ELECTRICAL

REPRODUCTION AUTOLITE BATTERIES

Autolite batteries are an excellent reproduction for your ???65-???72 Mustang. Case is original type with proper lettering. Case also includes original ???tabs??? for proper mounting on early batteries. Batteries include state-of-the-art ???guts??? for easy starting. Group 24 only currently available. Shipped dry (you will need to find a local source for Electrolite). L10.75??? W/Tab x W6.75??? x H9???.

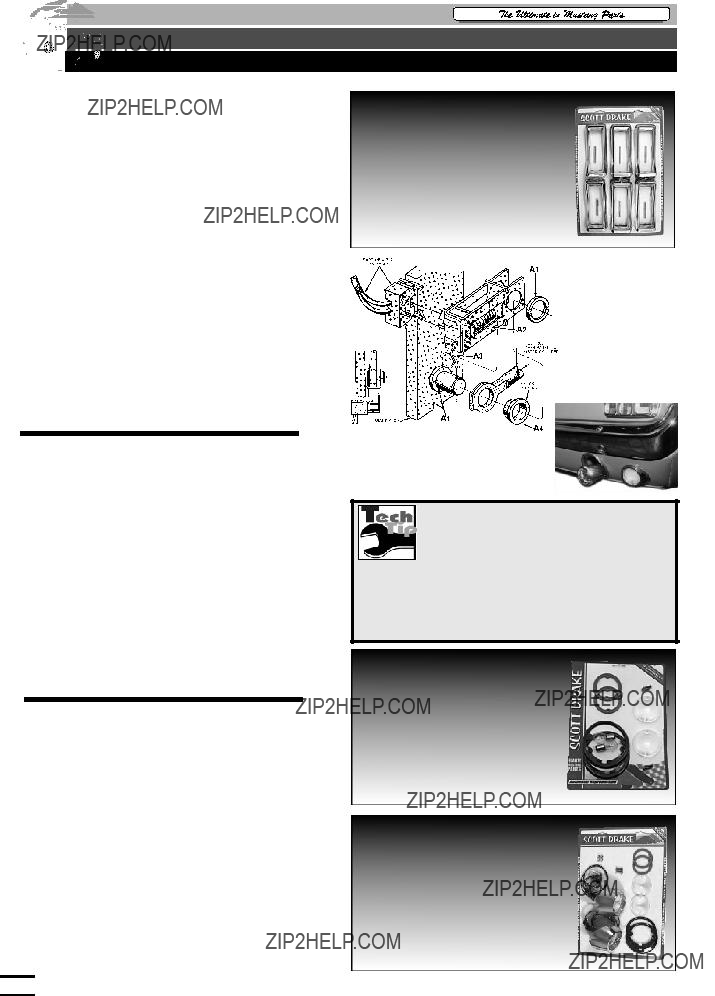
AUTOLITE BATTERY COVER

Give your car the original look, with the use of any 24F60 flat top maintenance free battery with the correct post location. Easy to install, just follow the instructions.

OPTIMA BATTERY

Optima is a sealed, zero-maintenance battery that last longer, recharges faster, more dependable than any battery on the market. It can???t even leak, so it can be shipped UPS ready to go! L9.94??? x W6.75??? x H7.81???

B1 65-73 .. 800S ..................... 800 Cold cranking amps . 139.95

BATTERY CABLE BRACKETS & GROMMETS

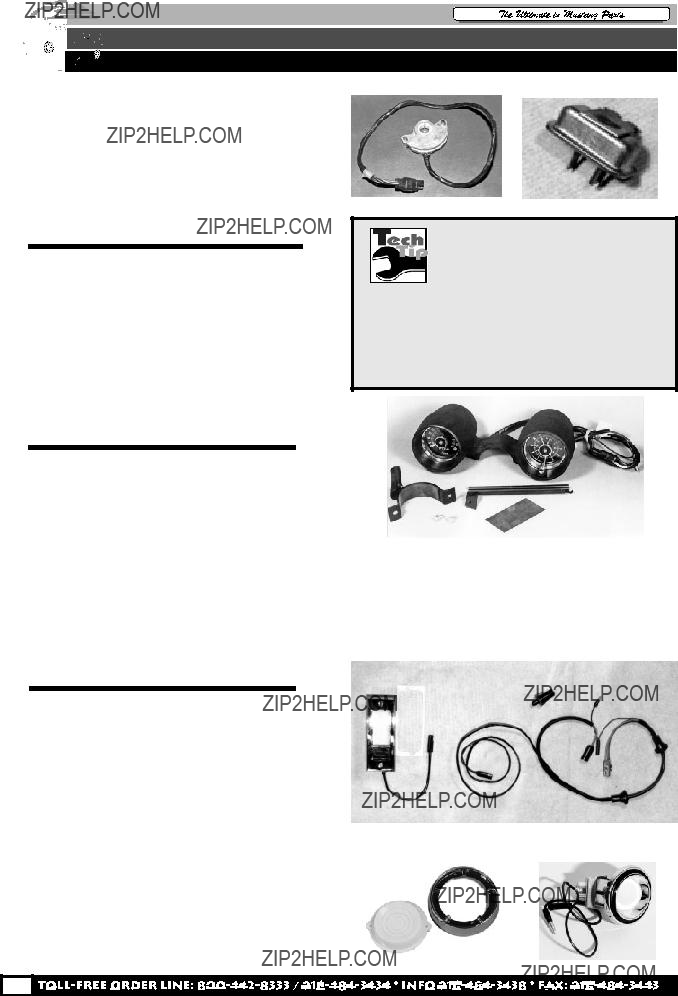
MOTORCRAFT BATTERY CABLES

These cables give you the 60???s look with 90???s Performance.

DIAMONDBACK SHIELDED BATTERY CABLES

Braided alloy shielding gives you the great ???Braided??? look and resists heat and abrasion. Heavy duty 4 gauge cable with Solid brass terminals - 3 times more conductive than lead.

YOUR MUSTANG???S ELECTRICAL SYSTEM

Like most cars, your Mustang???s electrical system consists of a ???primary??? and ???secondary??? system. The ???primary??? system is everything related to the engine???s starting and ignition system. The ???secondary???system consists of all wiring for headlights, tailights, and interior lights. Refer to the wiring diagram books that we sell. Also, pick up a (Repro) Shop Manual . After studying the schematics for some time, you???ll easily understand how everything works. We have grouped this section by specific areas (starting, charging, interior, headlights, tailights and wiring looms), to help you find what you may need.

Note: 12 volt negative ground means that your Mustang???s frame and metal body is the negative side of the electrical system. The wiring in your car carries the positive side to lights, etc.

D1

BATTERY HINTS

When replacing the battery, wear safety goggles, and make sure the ignition is in the ???off??? position. Keep flame and sparks away. When picking up the battery, avoid pressing on sides, as it may force

gas and/or acid from the top. Replace clean cable ends, before installing your new battery. Be sure cables are properly oriented

positive (+) and negative (-). On ???64-???73 Mustangs, the positive cable is mounted between the positive battery terminal and solenoid, and is usually shorter. The negative cable goes from the battery (neg) to the engine block (ground).

Note: Most ???dead??? batteries that fail to start on a cold morning, many times is actually because of dirty battery terminals and cable ends.

36

ELECTRICAL

H1

H3

H2

H4 G1

J1

1965-66 Battery Conversion. ???U??? Shape bracket. Single bolt instillation.

K1

L2

L4

HOW DO I KNOW MY IGNITION SWITCH IS BAD? If your ignition switch fails to engage the starter, it may be bad. After hundreds of starts, this switch can wear down by dirty or worn contacts. A bad switch can also cause the

solenoid and starter to ???stick on???, and also fail to engage the accessories contact.

BATTERY TRAY

65-66 BATTERY TRAY HOLD DOWN UPGRADE KIT

A must for 65-66 owners that are not using the original style (27F) battery. This allows you to securely bolt down a group 24 battery due to the missing tabs that are on the side of the battery. Use (H2) 67-70 Bracket & Bolt kit to complete the installation.

J1 C5ZZ-10732BR ...................Conversion bar ................. 14.95

BATTERY TRAY HOLD DOWN

TRUNK MOUNT BATTERY KIT

Provides better weight distribution and traction. All necessary hardware included.

K1 64-73 .. TMB-101 ...............All .................................. 69.95

IGNITION SWITCH

IGNITION RESISTOR WIRE

Used between Ignition and Coil to prevent point burn.

REMANUFACTURED STARTERS

Remanufactured, ask for current details on core.

37

ELECTRICAL

STARTER SOLENOID

Solenoids with the concours markings and color.

ELECTRONIC VOLTAGE REGULATOR

For state-of-the-art voltage for your early Mustang, this regulator will do the job. Bolt in replacement. A must w/ 120 amp alternators.

REMANUFACTURED GENERATOR

Remanufactured, ask for current details on core.

GENERATOR WIRE HARNESS

REMANUFACTURED ALTERNATOR

Remanufactured, ask for current details on core.

ALTERNATOR TROUBLESHOOTING

The alternator is the one part that tells you when it???s going bad. When the light on the dash (ALT) comes on, or flickers, it usually means that one

(or both) of the two diodes in the alternator has failed, and it???s time for a new or rebuilt one. If you???re unsure, a local shop can run an electrical test on the alternator, voltage regulator and battery. Sometimes a low engine idle, and/or loose belt can make the ???ALT??? light flicker. When an alternator fails it usually takes the voltage regulator along with it. So it???s highly advisable to replace both. If you drive your Mustang a lot, we recommend a state-of-art Motorcraft Voltage Regulator No. GR-540-A (???65-???73). For ???67-70 Shelbys and ???68 California Specials, a higher amp alternator is recommended for those Cougar/T-Bird tailights. Use higher amp versions for air conditioning, too. Concours Restorers should rebuild their alternators with our kit instead of a rebuilt/exchange.

ALTERNATOR - HI-PO PULLEY

Bolt-on HP! Factory on all 65???-68??? Shelby High rpm pulley

ALTERNATOR - WIRING HARNESS (E5)

Alternator to Regulator. (1 of 3 under hood looms) Attaches to the back of alternator, plugs into main headlight harness and ground.

MUSTANG WIRING LOOMS AND HARNESSES

Rewiring your Mustang, using reproduced looms and harnesses should not seem as difficult as at first impression.

Your Mustang is basically made up of an under-dash harness with two attached ???looms.??? These looms include the firewall to headlamp and dash to taillight. From the firewall to headlamp loom is attached the alternator to voltage regulator loom. Courtesy lights (roof) come off the taillight loom. The under-dash harness includes many plugs for the headlight, turn signal and wiper switches. The cigar lighter, radio, courtesy lights, dash lights, tach, etc., also go through the under-dash harness. If you???re thoroughly confused by now, get a copy of the Wiring Diagrams Book.

If you are unsure about wiring your car, an auto electric shop can install your looms for you. Don???t attempt wiring, splicing, etc., unless you know what you???re doing, as an electrical fire can result from a ???mistake.???

ELECTRICAL

R1

S2

S1

T1

E1 - Heater Motor, ???65-66 Part of E2

E2 - Engine Gauge Feed

E3 - Hood turn signial wiring

E4 - Headlamp loom wiring harness

E5 - Alternator wiring loom

E6 - Headlamp wiring extension ???67-70

E7 - Firewall to solenoid N/A ???67-70

HOW DO I KNOW IF MY HEADLIGHT SWITCH IS BAD? If your headlights dim or flicker, or if your dash and/or taillights flicker, then the switch is bad. Circuit breakers are in the switch, and after much use, can

fail. Remember to depress button on side of switch to remove switch handle (pulls out).

ALTERNATOR - BRACKETS

WIRE LOOM MOUNTING KIT

Includes all straps, anchors and clips need to install loom.

ENGINE GAUGE FEED (E2)

From firewall to engine components. On 64-66 it also plugs into heater blower motor. (1 of 3 under hood wire looms)

FUSE - PARTS

HEADLAMP

Incandescents are an OE replacement, Halogens give you 50% brighter light with 25% longer range for better safety.

HEADLIGHT - DIMMER SWITCH AND CAP

39

ELECTRICAL

HEADLIGHT - SWITCH

HEADLIGHT - SWITCH BEZEL

DASH BEZEL AND KNOB KIT

Includes: Headlight switch knob and bezel, wiper knob and bezel, ignition bezel, and a cigarette lighter element and knob assembly.

HEADLIGHT - KNOB & SHAFT

HEADLIGHT LOOM WIRING HARNESS (E4)

Firewall to Headlamp/Regulator loom. (1 of 3 under hood looms) All 1969-???70 Must reuse old firewall connector. See prior page for loom kits.

HEADLIGHT WIRING EXTENSION (E6)

PARKING LAMP - HOUSING W/PIG TAIL

U1

U2

U3

PARKING LAMP

INSTALLATION KIT

Includes: Mounting pads, lenses, gaskets, bulbs and mounting hardware.

PARKING LAMP DELUXE KIT

Includes: Pair of parking lamp housings, mounting pads, lenses, gaskets, bulbs and mounting hardware.

PARKING LAMP - ASSEMBLY W/ LENS & PIG TAIL

ELECTRICAL

PARKING LAMP - BULB

SIDE MARKER - ASSEMBLY

TAIL LAMP BEZEL KIT

Includes: Bezels, lenses, gaskets and mounting hardware.

B1

A1

WHY WON???T MY TAILLIGHTS WORK?

Few things are as frustrating as taillights that won???t work. After years of use, old Mustang taillights can ???go dark.??? Several things can hinder

taillights, brake and signal lights. Two circuits go to every tail lights: brake/signal, and headlight/taillight. Both of these circuits go into one bulb (LH, RH each) with two filaments (No. 1157). A common ground wire or contact completes these circuits. The ground contact, usually the bulb socket against the reflector housing, (which is grounded to the car) can become corroded over the years and should be cleaned up or replaced.

A bad headlight switch can prevent the taillight circuit to work. If only one side works (taillight or signal or brake), then the turn signal switch is usually at fault. Check the brake light switch is well. Taillights that work, but are dim, are usually due to a bad ground and/or taillight lenses that have darkened with age. Remember to do a complete restoration of the entire system to obtain optimum results. A voltmeter to measure amperage can be handy, too.

TAIL LIGHT - WIRE LOOM (A1)

Plugs into main under dash harness and turn signal harness and runs to tail lights, license plate light, back up lights, gas tank sending unit, and panel lamps on FB.

TAIL LIGHT - HOUSING

TAIL LIGHT - HOUSING TO BODY GASKET

41

ELECTRICAL

TAIL LIGHT - TAIL LIGHT TO HOUSING GASKET

TAIL LIGHT - DOOR

TAIL LIGHT - LENS

TAIL LIGHT - LENS GASKET

TAIL LIGHT - BULB

65-73 .. BP1157 .................Bulb .............................. pr.1.98

BRAKE LIGHT SWITCH

SW-24 Mounts on Master Cylinder - Others mount at Brake Pedal

BRAKE SWITCH HARDWARE

TAIL LAMP BEZEL KIT

Includes: Six bezels, pads and mounting hardware.

HOW DO I KNOW MY BRAKE (STOP) LIGHT SWITCH IS

BAD?

If it isn???t a bad turn signal switch, the brake light switch, mounted on the brake pedal (except ???64-1/2),

can either produce a dim, delayed or no brake signal, when bad. A good switch will produce brake lights at the slightest touch of the brakes. Replacement is relatively easy, if you???re good at lying on your back under the dash!

BRAKE WARNING LIGHT SWITCH

BACK UP LIGHT - HOUSING W/PIG TAIL

BACK UP LIGHT - HOUSING GASKET

BACK UP - LENS

BACK UP INSTALLATION KIT

Includes: Mounting pads, lenses, gaskets, bulbs and mounting hardware.

BACK UP LAMP DELUXE KIT

Includes: Back up housing, pads, lenses, gaskets, bulbs, and installation hardware.

42

ELECTRICAL

BACK UP - LIGHT LENS GASKET

BACK UP - LIGHT SWITCH

LICENSE PLATE LAMP PARTS

TURN SIGNAL - LEVER

TURN SIGNAL - CAM REPAIR KIT

Instead of replacing your whole turn signal switch for a broken or faulty cam, use this kit. (Repo. & Not for tilt wheel.)

TURN SIGNAL - FLASHER

TURN SIGNAL - SWITCH

EMERGENCY - SIGNAL FLASHER

65-73 ... SF-552-B.......................................................... 6.95

EMERGENCY - SIGNAL FLASHER SWITCH

D1

F1

HOW DO I KNOW MY TURN SIGNAL SWITCH IS BAD? If you???ve eliminated the possibility of turn signal & brake light bulb, pig tail, battery, or alternator etc., failure, then it probably is a bad switch. All four turn

signals, the brake lights, license plate light, horn, as well as the emergency flasher (after ???67), go through this switch. Four separate signals go through this switch, two front, two rear. You will need to pull the steering wheel to replace this switch, and re- wire the connector to the under dash harness. (See Shop Manual). Do not over torque steering wheel after replacement, as it can break the plastic cam.

43

ELECTRICAL

NEUTRAL (SAFETY) & BACK-UP SWITCH

NEUTRAL SAFETY SWITCH WIRE LOOM

65-66 ... C5-7A248 ...................................................... 19.95

UNDER DASH WIRING HARNESS

Main under dash harness. All new parts with fuse block and clips, lamp sockets and all molded plugs. ???67???s tach loom sold seperately.

DASH INSTRUMENT REGULATOR

DOOR JAMB SWITCH

DOOR COURTESY LAMP & SPEAKER LOOM (DOOR)

DOOR COURTESY LAMP (DOOR)

DOME LIGHT - BEZEL

DOME LIGHT - LENS & BULB

QUARTER TRIM LAMP

HOW DO I KNOW THE NEUTRAL SAFETY SWITCH

IS OUT?

This switch, mounted on the side of the automatic transmission, is intended to prevent your starting

in drive or reverse. If you turn the key and nothing happens - no starter movement - then with the brake on, shift into neutral and try. If it starts, the switch is out of adjustment, if not, chances are it???s this switch (if the battery and starter and solenoid are o.k.). This switch can be replaced without removing the transmission.

RALLY-PAC

To add the ???Grand Turismo??? look, Ford added two gauges to the steering column, Tachometer and a Clock. Our reproduction includes an electronic Tach. and quartz clock. Authentic wrinkle finish. (1966 Type only, similar to ???65 GT & Pony interior cars.

L1

ELECTRICAL

KEY TO LINE LISTING:

Bold Print = Reproduction / OEM-Style Replacement Parts

Standard Print = Current Original Ford Replacement Parts

CONSOLE - PARTS & LAMP

Assembly includes: Die cast lamp, lens and pigtail.

S1 S2 S3

Q1

1965-66 STANDARD STEERING WHEEL

1965-67 WOODGRAIN STEERING WHEEL

GLOVE COMPARTMENT LAMP

CIGAR LIGHTER PARTS

HORN RING / CAP

HORN RING CONTACT KIT

Includes: Contact plate, spring plate, horn ring retainer pressure pad, and screws. (A1, A2, A7, A13, A17)

Deluxe steering wheel. Includes: Plastic insulators and screws.

45

ELECTRICAL

???DEALER OPTION??? GT FOG LAMP INSTALLATION KIT 1965-1967

Although included with the GT option, fog lamps were originally available from the dealer separately. Our kits include: Fog lamp housing, bars, wiring harness kit, switch, bulbs, instructions, under dash wiring, wires to solenoid, ground wires, firewall grommets, 10 amp breaker and wiring diagram. *1966 requires GT Horse and Corral. 1965-67 Grill brackets are recommended.

FOG LIGHT - HOUSING

FOG LIGHT - BULB

FOG LIGHT - BARS

FOG LIGHT - BAR GRILL MOUNTING BRACKETS

FOG LIGHT - SWITCH

FOG LIGHT - WIRING HARNESS UNDER DASH

FOG LIGHT TO FIREWALL FEED

FOG LIGHT - GROUND WIRE

E8 66 ....... 66-FG-GR .................................................... pr.6.95

FOG LIGHT - CIRCUIT BREAKER

FOG LIGHT - PIGTAIL

G5

G20

G2

G1

G7

???67 ???66

305522

RestorationG3

Guide

46