ADJUSTABLE SPONGE SANDER

MODEL G0565

INSTRUCTION MANUAL

COPYRIGHT ?? AUGUST, 2004 BY GRIZZLY INDUSTRIAL, INC.

WARNING: NO PORTION OF THIS MANUAL MAY BE REPRODUCED IN ANY SHAPE

OR FORM WITHOUT THE WRITTEN APPROVAL OF GRIZZLY INDUSTRIAL, INC.

#EW6331 PRINTED IN TAIWAN

WARNING

Some dust created by power sanding, sawing, grind- ing, drilling, and other construction activities contains chemicals known to the State of California to cause cancer, birth defects or other reproductive harm. Some examples of these chemicals are:

???Lead from lead-based paints.

???Crystalline silica from bricks, cement, and other masonry products.

???Arsenic and chromium from chemically treated lumber.

Your risk from these exposures varies, depending on how often you do this type of work. To reduce your exposure to these chemicals: work in a well ventilated area, and work with approved safety equipment, such as those dust masks that are specially designed to fil- ter out microscopic particles.

INTRODUCTION

Foreword

We are proud to offer the Model G0565 Adjustable Sponge Sander. This machine is part of a grow- ing Grizzly family of fine woodworking machinery. When used according to the guidelines set forth in this manual, you can expect years of trouble-free, enjoyable operation and proof of Grizzly???s com- mitment to customer satisfaction.

We are pleased to provide this manual with the Model G0565. It was written to guide you through assembly, review safety considerations, and cover general operating procedures. It repre- sents our effort to produce the best documenta- tion possible.

The specifications, drawings, and photographs illustrated in this manual represent the Model G0565 as supplied when the manual was pre- pared. However, owing to Grizzly???s policy of con- tinuous improvement, changes may be made at any time with no obligation on the part of Grizzly. For your convenience, we always keep current Grizzly manuals available on our website at www. grizzly.com. Any updates to your machine will be reflected in these manuals as soon as they are complete. Visit our site often to check for the lat- est updates to this manual!

Contact Info

If you have any comments regarding this manual, please write to us at the address below:

Grizzly Industrial, Inc.

C/O Technical Documentation

P.O. Box 2069

Bellingham, WA 98227-2069

We stand behind our machines. If you have any service questions or parts requests, please call or write us at the location listed below.

Grizzly Industrial, Inc.

1203 Lycoming Mall Circle

Muncy, PA 17756

Phone: (570) 546-9663

Fax: (800) 438-5901 E-Mail: techsupport@grizzly.com Web Site: http://www.grizzly.com

MACHINE DATA

SHEET

Customer Service #: (570) 546-9663 ??? To Order Call: (800) 523-4777 ??? Fax #: (800) 438-5901

MODEL G0565 SPONGE SANDER

Features:

...................................................................... Performs Two Simultaneous Operations

.............................................. Heavy-Duty Cabinet Stand With Storage Compartment

.................................................. Handwheel and Lever Adjustments For Belt Tension

.......................................................... Infinite Horizontal and Vertical Belt Adjustment

................................................................................... Two 4" Dust Collection Shrouds

Specifications, while deemed accurate, are not guaranteed. 1/2004

Identification

B

A

C

G

H

SECTION 1: SAFETY

For Your Own Safety, Read Instruction Manual Before Operating this Machine

The purpose of safety symbols is to attract your attention to possible hazardous conditions. This manual uses a series of symbols and signal words which are intended to convey the level of importance of the safety messages. The progression of symbols is described below. Remember that safety messages by themselves do not eliminate danger and are not a substitute for proper accident prevention measures.

Safety Instructions for Machinery

1.READ THROUGH THE ENTIRE MANUAL

BEFORE STARTING MACHINERY.

Machinery presents serious injury hazards to untrained users.

2.MAKE SURE ALL GUARDS ARE IN

THEIR CORRECT PLACE AND

WORK CORRECTLY BEFORE USING

MACHINERY. NEVER OPERATE

MACHINE WITHOUT GUARDS.

3.ALWAYS USE ANSI APPROVED

SAFETY GLASSES WHEN OPERATING MACHINERY. Everyday eyeglasses only have impact resistant lenses, they are NOT safety glasses.

4.ALWAYS WEAR AN ANSI APPROVED

RESPIRATOR WHEN OPERATING

MACHINERY THAT PRODUCES DUST.

Wood dust is a carcinogen and can cause cancer and severe respiratory illnesses.

5.ALWAYS USE HEARING PROTECTION

WHEN OPERATING MACHINERY.

Machinery noise can cause permanent hearing damage.

6.WEAR PROPER APPAREL. DO NOT wear loose clothing, gloves, neckties, rings, or jewelry which may get caught in moving parts. Wear protective hair covering to con- tain long hair and wear non-slip footwear.

Safety Instructions for Machinery

7.NEVER OPERATE MACHINERY WHEN

TIRED, OR UNDER THE INFLUENCE OF DRUGS OR ALCOHOL. Be mentally alert at all times when running machinery.

8.ONLY ALLOW TRAINED AND PROP-

ERLY SUPERVISED PERSONNEL TO OPERATE MACHINERY. Make sure operation instructions are safe and clearly understood.

9.KEEP CHILDREN AND VISITORS AWAY.

Keep all children and visitors a safe dis- tance from the work area.

10.MAKE WORKSHOP CHILD PROOF. Use padlocks, master switches, and remove start switch keys.

11.NEVER LEAVE WHEN MACHINE IS RUNNING. Turn power OFF and allow all moving parts to come to a complete stop before leaving machine unattended.

12.DO NOT USE IN DANGEROUS ENVIRONMENTS. DO NOT use machin- ery in damp, wet locations, or where any flammable or noxious fumes may exist.

13.KEEP WORK AREA CLEAN AND WELL LIT. Clutter and dark shadows may cause accidents.

14.USE A GROUNDED EXTENSION CORD

RATED FOR THE MACHINE AMPERAGE.

Undersized cords overheat and reduce voltage. Replace extension cords if they become damaged. DO NOT use extension cords for 220V machinery.

15.ALWAYS DISCONNECT FROM POWER

SOURCE BEFORE SERVICING MACHINERY. Make sure switch is in OFF position before reconnecting.

16.MAINTAIN MACHINERY WITH CARE.

Keep blades sharp and clean for best and safest performance. Follow instructions for lubricating and changing accessories.

17.REMOVE ADJUSTING KEYS AND WRENCHES. Make a habit of checking for keys and adjusting wrenches before turn- ing machinery ON .

18.CHECK FOR DAMAGED PARTS BEFORE USING MACHINERY. Check for binding and alignment of parts, broken parts, part mounting, loose bolts, and any other conditions that may affect machine operation. Repair or replace damaged parts.

19.USE RECOMMENDED ACCESSORIES.

Refer to the instruction manual for recom- mended accessories. The use of improper accessories may cause risk of injury.

20.DO NOT FORCE MACHINERY. Work at the speed for which the machine or acces- sory was designed.

21.SECURE WORKPIECE. Use clamps or a vise to hold the workpiece when practi- cal. A secured workpiece protects your hands and frees both hands to operate the machine.

22.DO NOT OVERREACH. Keep proper foot- ing and balance at all times.

23.MANY MACHINES WILL EJECT THE

WORKPIECETOWARDTHEOPERATOR.

Know and avoid conditions that cause the workpiece to be ejected.

24.ALWAYS LOCK MOBILE BASES

BEFORE OPERATING MACHINERY.

Additional Safety Instructions for Sanders

1.POWER DISCONNECT. Do all inspec- tions, adjustments, and maintenance with the machine unplugged. Wait for all moving parts to come to a complete stop.

2.INSPECTIONS AND MAINTENANCE.

Check the machine for worn or damaged parts before each use. Replace worn parts and clean your machine regularly.

3.SANDING BELTS. DO NOT operate the sander if the sanding belt is damaged or badly worn. Pieces of sandpaper could be ejected from the sander, causing injury.

4.DUST COLLECTION. Never operate the sander without an adequate dust collection system in place and running.

5.TEST RUN. Turn the machine ON, check the tracking, feel for unusual vibrations, and listen for abnormal noises, before working on a workpiece.

6.HAND PLACEMENT. DO NOT place hands near, or in contact with, sanding belt during operation.

Using this machine pro- duces sawdust which may cause allergic reac- tions or respiratory problems. Always wear a respirator when oper- ating Model G0565.

7.SANDING DIRECTION. NEVER sand tapered or pointed stock with the point fac- ing the feed direction.

8.EXCESSIVE FORCE. DO NOT attempt to sand faster by applying extra pressure. Doing so greatly increases the chance of personal injury, mechanical damage, or damage to your workpiece.

9.SANDING TECHNIQUE. DO NOT jam the workpiece against the sanding belt. Firmly grasp the workpiece in both hands and ease it against the sanding belt with light pressure.

10.SANDING FRAGILE WORKPIECES.

DO NOT sand a workpiece if you doubt its stability or integrity. Inspect all materi- als carefully for loose knots, cracks, and foreign objects like nails and staples.

11.GOOD HABITS. Develop good habits in your shop and safety will become second- nature to you. Habits ??? good and bad ??? are hard to break.

No list of safety guidelines can be complete. Every shop environment is different. Always consider safety first, as it applies to your individual working conditions. Use this and other machinery with caution and respect. Failure to do so could result in serious per- sonal injury, damage to equipment, or poor work results.

SECTION 2: CIRCUIT REQUIREMENTS

220V Single-Phase

Serious personal injury could occur if you connect the machine to the power source before you have completed the set up pro- cess. DO NOT connect the machine to the power source until instructed to do so.

Amperage Draw

The 1 HP motor on the Model G0565 will draw the following amps:

Circuit Breaker Requirements

Install your machine on a dedicated circuit to reduce the possibility of tripping the circuit break- er. If the circuit breaker frequently trips, have the circuit inspected by a qualified electrician. Never use a larger circuit breaker than stated below, or you will increase the risk of fire.

Plug Type

We recommend using a NEMA 6-15 plug and receptacle to connect your machine to power.

Figure 2. NEMA 6-15 plug and receptacle.

-8-

Grounding

In the event of an electrical short, grounding reduces the risk of electric shock. This tool is equipped with a power cord that has a grounding wire, which must be properly connected to the grounding prong on the plug; likewise, the outlet must be properly installed and grounded. All elec- trical connections must be made in accordance with local codes and ordinances.

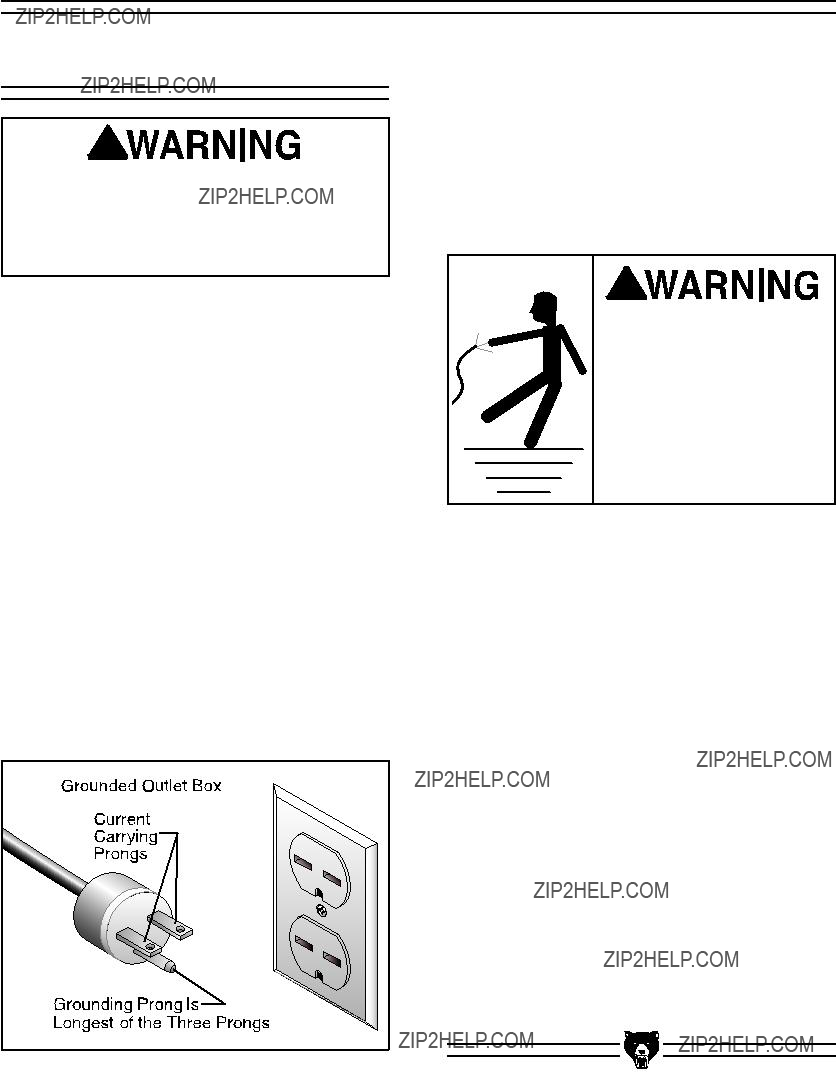
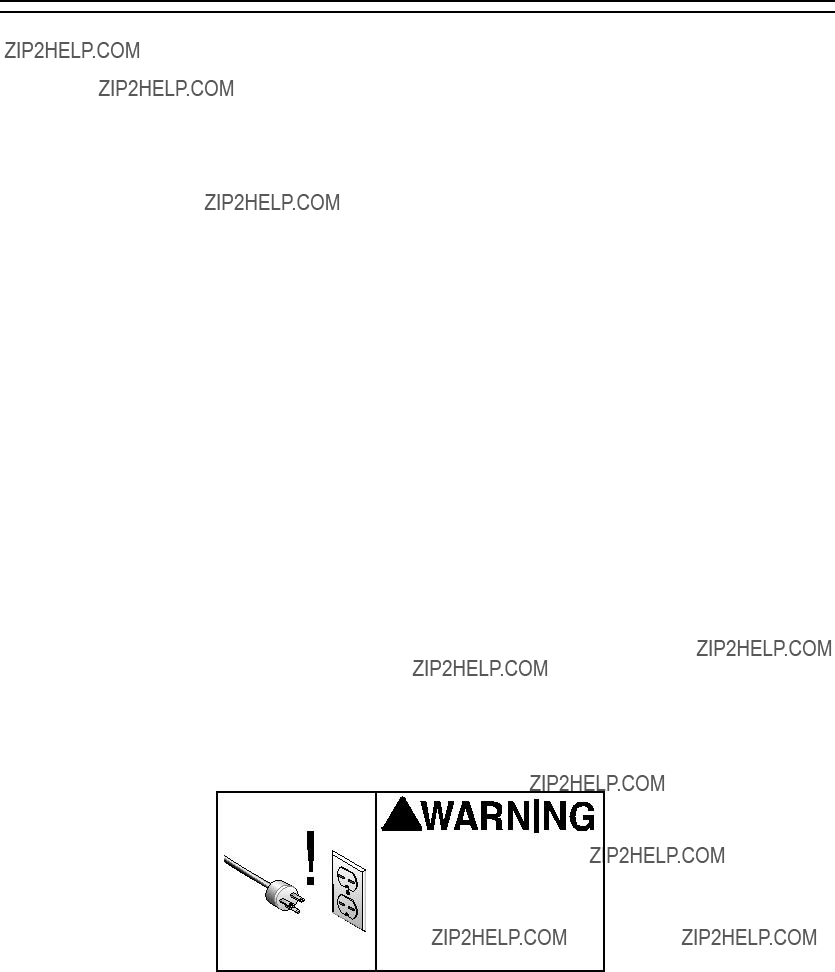
Electrocution or fire could result if this machine is not grounded correctly or if your electrical con- figuration does not com- ply with local and state codes. Ensure compliance by checking with a quali- fied electrician!

Your Shop Circuit Capacity

Always check to see if the wires in your circuit are capable of handling the amperage draw from your machine, as well as any other machines that could be operating on the same circuit. If you are unsure, consult a qualified electrician.

Extension Cords

We do not recommend the use of extension cords on 220V equipment. Instead, arrange the place- ment of your equipment and the installed wiring to eliminate the need for extension cords.

If you find it absolutely necessary to use an extension cord at 220V with your machine:

???Make sure the cord is rated for Standard Service (grade S) or better.

???The extension cord must also contain a ground wire and plug prong.

???Use at least a 16 gauge cord and make sure the cord is less than 50 feet long.

G0565 Adjustable Sponge Sander

SECTION 3: SET UP

About this Section

The purpose of this section is to guide you through the required steps to get your machine out of its crate and into operating condition.

This machine presents serious injury hazards to untrained users. Read through this entire manu- al to become familiar with the controls and opera- tions before starting the machine!

Wear safety glasses dur- ing the entire set up pro- cess!

The Model G0565 weighs 167lbs.(Shippingweight). DO NOT over-exert your- self while unpacking or moving your machine??? get assistance.

Items Needed For

Set Up

The following items are needed to complete the set up process, but are not included with your machine:

Unpacking

The Model G0565 was carefully packed when it left our warehouse. If you discover the machine is damaged after you have signed for delivery, please immediately call Customer Service at (570) 546-9663 for advice.

Save the containers and all packing materials for possible inspection by the carrier or its agent.

Otherwise, filing a freight claim can be difficult.

When you are completely satisfied with the con- dition of your shipment, you should inventory the contents.

Inventory

The Model G0565 Sponge Sander comes almost entirely assembled. The remaining parts can be found in a bag inside the cabinet. After removing the parts from the bag, you should have the fol- lowing items:

Figure 3. Parts inventory.

In the event that any nonproprietary parts are missing (e.g. a nut or a washer), we would be glad to replace them, or for the sake of expedi- ency, replacements can be obtained at your local hardware store.

Site Considerations

Floor Load

The Model G0565 weighs 167 lbs. and has a base footprint of 221???2" W x 19" D. Most commer- cial floors are suitable for your machine. Some residential floors may require additional reinforce- ment to support both the machine and operator.

Working Clearances

Consider existing and anticipated needs, size of material to be processed through each machine, and space for auxiliary stands, work tables or other machinery when establishing a location for your sponge sander. See Figure 4 for the mini- mum working clearances of the Model G0565.

?????????

?????????

Figure 4. Working clearances.

Unsupervised children and visitors inside your shop could cause serious per- sonal injury to themselves. Lock all entrances to the shop when you are away and DO NOT allow unsupervised children or visitors in your shop at any time!

Clean Up

The unpainted surfaces are coated with thin layer of grease to protect them from corrosion during shipment. Wipe off this protective coating with a clean dry rag and apply a solvent cleaner or citrus-based degreaser such as Grizzly???s G7895 Degreaser to remove any residue. To clean thor- oughly, some parts may need to be removed. For optimum performance from your machine, make sure you clean all moving parts that are coated. Avoid chlorine-based solvents as they may damage painted surfaces should they come in contact. Always follow the manufacturer???s instructions when using any type of cleaning product.

Rubber Feet

1.Place one side of the sponge sander on a block???such as a 2X4.

2.Slide the rubber feet through the holes in the flange of the cabinet and secure with a lock washer, flat washer, and a hex nut.

3.Lower the sander onto the feet and place the other side of the sponge sander on a block.

4.Place the remaining feet through the flange holes. Secure with hex nuts and washers.

1.Slide the hose clamps onto the dust hoses.

2.Slide the hoses onto the dust hoods and tighten the hose clamps.

3.Attach the hoses to a dust collector.

Test Run

Before starting the machine:

1.Read this manual and make sure you under- stand Section 1: Safety on page 5.

2.Review Section 3: Circuit Requirements on page 8, and make any necessary changes.

3.Install a NEMA 6-15 220V plug. DO NOT plug the sander into the power source at this time.

4.Make sure all tools and foreign objects have been removed from the machine.

Starting the machine:

1.Wear safety glasses at all times when running the sander!

2.Remove the sanding belts as described on

page 13.

3.Plug the sander into the power source.

4.Push the START button shown in Figure 5.

???If any problems, unusual noises, or vibra- tions occur, immediately press the STOP button. Turn to Troubleshooting on page 25 and correct the problem before oper- ating the machine further.

???If you cannot easily locate the source of the problem, unusual noise or vibration by yourself, please contact our service department at (570) 546-9663.

Power

Switch

Figure 5. Power switch.

5.If the sander seems to be running correctly, let it run for a short time to ensure that the moving parts are working properly. If any problem develops, correct it before attempt- ing to use the machine.

SECTION 4: OPERATIONS

Operation Safety

Damage to your eyes, lungs, and ears could result from using this machine without proper protective gear. Always wear safety glasses, a respirator, and hearing protection when operating this machine.

Loose hair and cloth-

ing could get caught in

machinery and cause seri-

ous personal injury. Keep

loose clothing and long hair away from moving machinery.

NOTICE

If you have never used this type of machine or equipment before, WE STRONGLY REC- OMMEND that you read books, trade maga- zines, or get formal training before begin- ning any projects. Regardless of the con- tent in this section, Grizzly Industrial will not be held liable for accidents caused by lack of training.

Sanding Belts

There are many types of sanding belts to choose from. We recommend Aluminum Oxide for gen- eral workshop environments. Below is a chart that groups abrasives into different classes, and shows which grits fall into each-class.

The general rule of thumb is to sand a workpiece with progressively higher grit numbers, with no one grit increase of more than 100.

To replace the sanding belts:

1.Unplug the sander from the power source!

2.Loosen the lock lever shown in Figure 6 and rotate the handwheel to remove the tension on the belt.

Figure 6. Sanding belt controls.

Rotate the sanding belts by hand.
???If the belt remains centered in the drum, go to step 7.
???If the belt pushes against one edge of the sanding drum, adjust the tracking.

3.Remove the belt and place a new belt on the sanding drums.

4.Center the sanding belt on the aluminium drum and the sponge drum.

5.Tension the belt by rotating the handwheel, then lock the belt in place. Note???The sponge drum will expand when at full RPM, so ten- sion the belt just tight enough that the alumi- num drum rotates when the belt is turned by hand.

Belt Tracking

Tracking is the process of adjusting the belts so they remain centered on the drums. Always adjust the tracking after replacing a sanding belt. Neglecting to adjust tracking will damage sand- ing belts and they will need to be replaced before they are worn out.

To adjust the sanding belt tracking:

1. Disconnect the machine from power!

2.

4.Move the tracking knob clockwise to move the sanding belt inwards or counter-clock- wise to move the belt outwards.

5.Tighten the lock handle.

6.Rotate the sanding belts by hand.

???If the belt remains centered in the drum, go to step 7.

???If the belt pushes against one edge of the sanding drum, return to step 3.

7.Connect the sander to power, then turn the sander ON and immediately turn it OFF. ???If the belt remains centered in the drum,

continue to the next step.

???If the belt is not tracking correctly, return to step 3 and make fine adjustments until the sanding belt tracks in the center of the drum.

8.Turn the sander ON and allow it to run for several minutes without use.

???If the belt is not tracking correctly, return to step 3 and make fine adjustments until the sanding belt tracks in the center of the drum.

???If the belt remains centered in the drum, the sander is ready for use.

3. Loosen the lock handle shown in Figure 7.

Figure 7. Tracking adjustments.

The sanding belt rotates 360?? to best meet the needs of your sanding operation.

To adjust the sanding belt tilt:

1.Disconnect the machine from the power source!

2.Loosen the belt tilt lock lever (see Figure 8.)

Belt Tilt

Lock Lever

Figure 8. Belt tilt lock lever.

3.Rotate the sanding belt to the desired angle.

4.Tighten the belt tilt lock lever.

The dust hoods easily tilt to funnel the maximum amount of dust into the dust collection system.

1.Disconnect the machine from the power source!

2.Hold the exterior hex nut with a wrench and loosen the interior hex nut (see Figure 9).

Figure 9. Dust hood lock nuts.

3.Rotate the dust hood to the desired angle.

4.Hold the exterior hex nut with a wrench and tighten the interior hex nut.

The extra wide spindles of this sponge sander are designed for sanding large objects and con- toured shapes such as chair legs, guitar necks, or gun stocks.

To sand with the sponge sander:

1.Wear safety glasses, a dust mask and hearing protection at all times when oper- ating the sander.

2.Plug the machine into the power source, press the START button and wait for the sander to reach full speed.

3.Gently press the workpiece into the sponge sanding drum as shown in Figure 10. Move the workpiece across the entire surface of the sanding belt to achieve the best sanding results and ensure long belt life.

Figure 10. Sanding with the sponge sander.

The sponge sanding drums will need to be replaced as they wear out, or you may wish to replace the original drums with a different diam- eter or hardness.

1.Hold the open end wrench on the flats of the spindle, as shown in Figure 11, and use the arbor wrench to remove the nut on the end of the shaft.

Figure 11. Replacing the sanding drums.

2.Slide the sanding drum off of the spindle and slide the replacement drum on.

3.Thread the nut onto the spindle and tighten it with the open end and arbor wrenches.

SECTION 5: ACCESSORIES

Figure 12. G7895 Citrus Degreaser.

H2499???Small Half-Mask Respirator

H3631???Medium Half-Mask Respirator

H3632???Large Half-Mask Respirator

H3635???Disposable Cartridge Filter Pair P100

Wood dust is now considered a known carcino- gen and has been linked to nasal cancer and severe respiratory illnesses. If you work around dust everyday, a half-mask respirator can be a lifesaver. Also compatible with safety glasses!

Figure 14. Our most popular safety glasses.

H4978???Deluxe Earmuffs - 27dB

H4979???Deluxe Twin Cup Hearing Protector

H4977???Work-Tunes Radio Headset Earmuffs

Protect yourself with a comfortable pair of cush- ioned earmuffs. Especially important if you oper- ate machines for hours at a time.

H4978

H4979

H4977

Figure 13. Half-mask respirator and filters.

G0565 Adjustable Sponge Sander

Figure 15. Our most popular earmuffs.

-17-

PRO-STICK?? Abrasive Surface Cleaners

Extend the life of your sanding discs and sleeves! Choose the Pro-Stick?? with a handle for greater control or without a handle for more usable area.

Figure 16. PRO-STICK?? abrasive cleaners.

Figure 17. PRO-STICK?? cleaners with handles.

-18-

Serrated Hard Rubber Sanding Drums

If you are looking for crisp edges and a flat sur- face, these drums will do the job.

Figure 18. Serrated hard rubber sanding drums.

Sponge Sanding Drums

When your original drums wear out, replace them with the medium drums, or use the hard drums for a crisper edge.

Figure 19. Sponge sanding drums.

G0565 Adjustable Sponge Sander

SECTION 6: MAINTENANCE

Disconnect power to the machine when perform- ing any maintenance, assembly or adjust- ments. Failure to do this may result in serious personal injury.

Wear safety glasses dur- ing maintenance. Failure to comply may result in serious personal injury.

General

Regular periodic maintenance of your Model G0565 will ensure optimum performance. Inspect your machine each time you use it. Check for the following conditions and repair or replace when necessary:

1.Loose mounting bolts.

2.Worn switch.

3.Worn or damaged cords and plugs.

4.Damaged or worn sanding belt.

5.Other conditions that could hamper the safe operation of this machine.

Cleaning

Cleaning the Model G0565 is relatively easy. Vacuum up excess sawdust, and wipe off the remaining dust with a dry cloth. Keep bare metal surfaces rust-free with products like, G96?? Gun Treatment or Boeshield?? T-9.

G0565 Parts Breakdown

??????

??????

??????

????????????

??????

??????

??????

???

?????????????????????

????????????????????????????????????

??????????????????????????????????????????

??????????????????????????????????????????????????????????????????

???????????????????????????????????????

?????????????????????????????????????????????????????????

??????????????????????????????????????????

????????????????????????????????????????????????????????????????????????????????????????????????

??????????????????????????????????????????????????????????????????

?????????????????????????????????????????????????????????????????????

D a te

???????????????????????????????????????????????????????????????????????????????????????????????????????????????

????????????????????????????????????????????????????????????????????????????????????

?????????????????????????????????????????????????????????????????????

S e ria l N u m b e r

????????????????????????????????????????????????????????????

??????????????????????????????????????????????????????????????????????????????????????????????????????

???????????????????????? ????????? ????????????????????? ?????????????????? ??????????????????????????? ??????????????? ????????????????????? ????????? ????????????????????????

????????????????????????????????????????????????

????????????????????????????????????????????????????????????????????????????????????????????????????????????????????????????????????????????????????????????????????????

??????????????????????????????????????????????????????????????????????????????????????????????????????????????????????????????????????????????????????????????????????????????

?????????????????????????????????????????????????????????????????????????????????????????????????????????????????????????????????????????????

?????????????????????????????????????????????????????????????????????????????????????????????????????????????????????????????????

?????????????????????????????????????????????????????????????????????????????????????????????????????????????????????????????????

?????????????????????????????????????????????????????????????????????????????????????????????????????????????????????????????????????????????????????????????????????????????????????????????

?????????????????????????????????????????????????????????????????????????????????????????????????????????????????????????????????????????????

?????????????????????????????????????????????????????????????????????????????????????????????????????????????????????????????????????????????????????????????????????

????????????????????????????????????????????????

?????????????????????????????????????????????????????????????????????????????????????????????????????????????????????

????????????????????????????????????????????????????????????????????????????????????????????????????????????????????????????????????????????????????????????????????????????????????

?????????????????????????????????????????????????????????????????????????????????????????????????????????????????????????????????????????????????????????????????????????????????????????????

??????????????????????????????????????????????????????????????????????????????????????????

??????????????????????????????????????????????????????????????????????????????????????????????????????????????????????????????????????????????????????????????????????????????????????????

???????????????????????????????????????????????????????????????????????????

??????

?????? ??????

??????

???

??????

??????

???

???

???

???

???

?????????

?????????

?????????

?????????

?????????

?????????

?????????

?????????

?????????

?????????

?????????

?????????

?????????

??????????????????

?????????

?????????

?????????

?????????

?????????

?????????

????????? ?????????

?????????

?????????

?????????

?????????

?????????

?????????

?????????

?????????

?????????

?????????

?????????

????????? ?????????

?????????

?????????

?????????

?????????

?????????

?????????

?????????

?????????

????????? ?????????

?????????

?????????

?????????

?????????

?????????

?????????

?????????

?????????

?????????

?????????

?????????

?????????

?????????

?????????

?????????

?????????

????????? ?????????

?????????

?????????

?????????

?????????

?????????

?????????

G0565 Parts List

Troubleshooting

Disconnect power to the machine when perform- ing any troubleshooting. Failure to do this may result in serious person- al injury.

Warranty and Returns

Grizzly Industrial, Inc. warrants every product it sells for a period of 1 year to the original purchaser from the date of purchase. This warranty does not apply to defects due directly or indirectly to misuse, abuse, negligence, accidents, repairs or alterations or lack of maintenance. This is Grizzly???s sole written warranty and any and all warranties that may be implied by law, including any merchantability or fitness, for any par- ticular purpose, are hereby limited to the duration of this written warranty. We do not warrant or represent that the merchandise complies with the provisions of any law or acts unless the manufacturer so warrants. In no event shall Grizzly???s liability under this warranty exceed the purchase price paid for the product and any legal actions brought against Grizzly shall be tried in the State of Washington, County of Whatcom.

We shall in no event be liable for death, injuries to persons or property or for incidental, contingent, special, or consequential damages arising from the use of our products.

To take advantage of this warranty, contact us by mail or phone and give us all the details. We will then issue you a ???Return Number,?????? which must be clearly posted on the outside as well as the inside of the carton. We will not accept any item back without this number. Proof of purchase must accompany the merchandise.

The manufacturers reserve the right to change specifications at any time because they constantly strive to achieve better quality equipment. We make every effort to ensure that our products meet high quality and durability standards and we hope you never need to use this warranty.

Please feel free to write or call us if you have any questions about the machine or the manual.

Thank you again for your business and continued support. We hope to serve you again soon.

CUT ALONG DOTTED LINE

WARRANTY CARD

Name_____________________________________________________________________________________

Street_____________________________________________________________________________________

City____________________________________________________State________Zip ______________

Phone Number______________________E-Mail_______________________FAX____________________

MODEL: G0565 Adjustable Sponge Sander Serial #______________________ Order ______________

The following information is given on a voluntary basis. It will be used for marketing purposes to help us develop better products and services. Of course, all information is strictly confidential.

6.How long have you been a woodworker?

FOLD ALONG DOTTED LINE

Place

Stamp

Here

GRIZZLY INDUSTRIAL, INC.

P.O. BOX 2069

BELLINGHAM, WA 98227-2069

FOLD ALONG DOTTED LINE

Send a Grizzly Catalog to a friend:

Name_______________________________

Street_______________________________

City______________State______Zip______

TAPE ALONG EDGES--PLEASE DO NOT STAPLE

Buy Direct and Save with Grizzly?? ??? Trusted, Proven and a Great Value!

Visit Our Website Today And Discover Why

Grizzly?? Is The Industry Leader!

???SECURE ORDERING

???ORDERS SHIPPED WITHIN 24 HOURS

???E-MAIL RESPONSE WITHIN ONE HOUR

-OR-

Call Today For A FREE

Full Color Catalog