MODEL G0562Z/G0562ZP/
G1030Z2/G1030Z2P
DUST COLLECTOR
OWNER'S Manual
(For models manufactured since 11/11)
Copyright ?? DECEMBER, 2011 By Grizzly Industrial, Inc.
Warning: No portion of this manual may be reproduced in any shape
Or form without the written approval of Grizzly Industrial, inc.
#BL14619 printed IN TAIWAN
This manual provides critical safety instructions on the proper setup, operation, maintenance, and service of this machine/tool. Save this document, refer to it often, and use it to instruct other operators.
Failure to read, understand and follow the instructions in this manual may result in fire or serious personal injury???including amputation, electrocution, or death.
The owner of this machine/tool is solely responsible for its safe use. This responsibility includes but is not limited to proper installation in a safe environment, personnel training and usage authorization, proper inspection and maintenance, manual availability and compre- hension, application of safety devices, cutting/sanding/grinding tool integrity, and the usage of personal protective equipment.
The manufacturer will not be held liable for injury or property damage from negligence, improper training, machine modifications or misuse.
3OME DUST CREATEDTBY POWER SANDING� SAWING�PGRINDING� DRILLING� AND
OTHERHCONSTRUCTION ACTIVITIESTCONTAINS CHEMICALS KNOWN TOSTHEC3TATEA
OF #ALIFORNIAITO CAUSE CANCER� BIRTH DEFECTS ORCOTHERCREPRODUCTIVEV
HARM�R3OME EXAMPLESEOF THESE CHEMICALS ARE�
ss ,EAD FROM LEAD
BASED PAINTS�
ss #RYSTALLINEASILICA FROM BRICKS�ICEMENT AND OTHER MASONRY PRODUCTS� ss !RSENICEANDICHROMIUM FROMCCHEMICALLY
TREATED LUMBER�
9OUR RISK FROM THESE EXPOSURES VARIES� DEPENDING ONSHOWROFTEN YOU
DO THISTTYPE OF WORK�P4O REDUCE YOUR EXPOSURE4TO THESE CHEMICALS�
7ORK INKA WELL VENTILATEDLAREA�VANDNWORK WITHTAPPROVED SAFETY�EQUIP
MENT�NSUCH ASSTHOSEHDUST MASKS THATSARE SPECIALLY DESIGNED TO FILTERT
OUTUMICROSCOPICRPARTICLES�
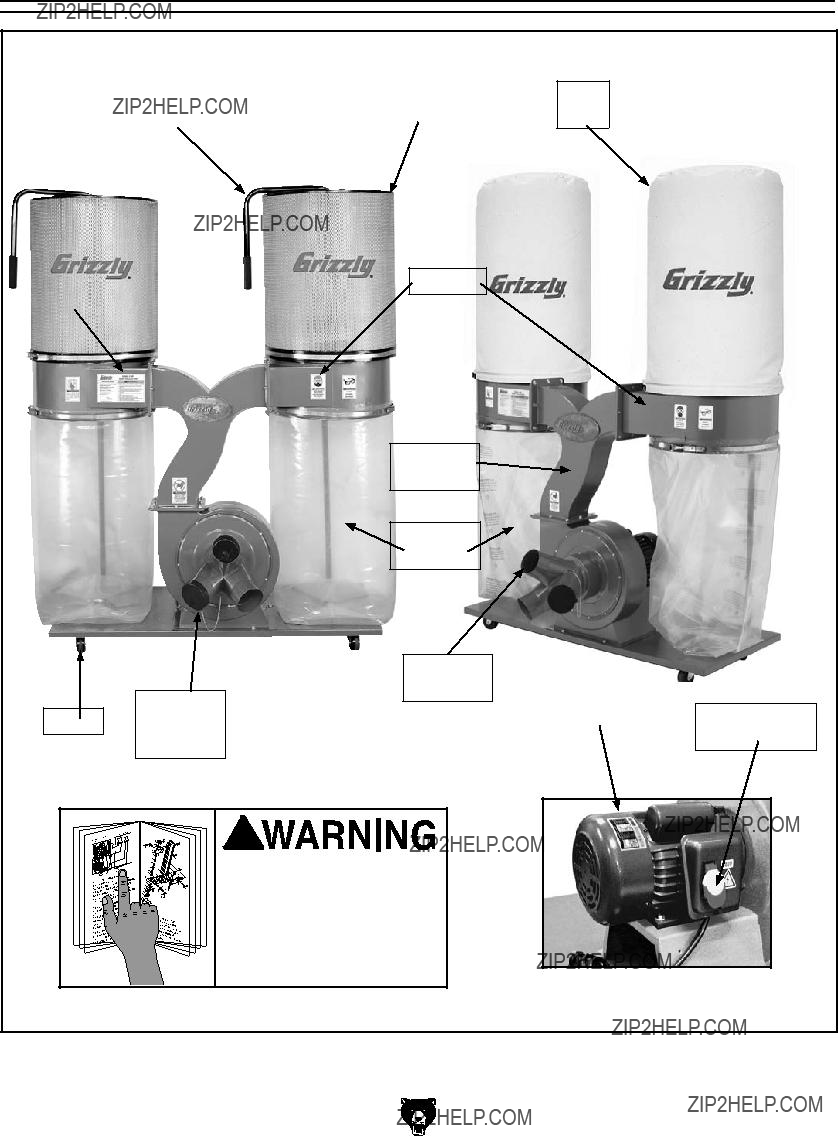
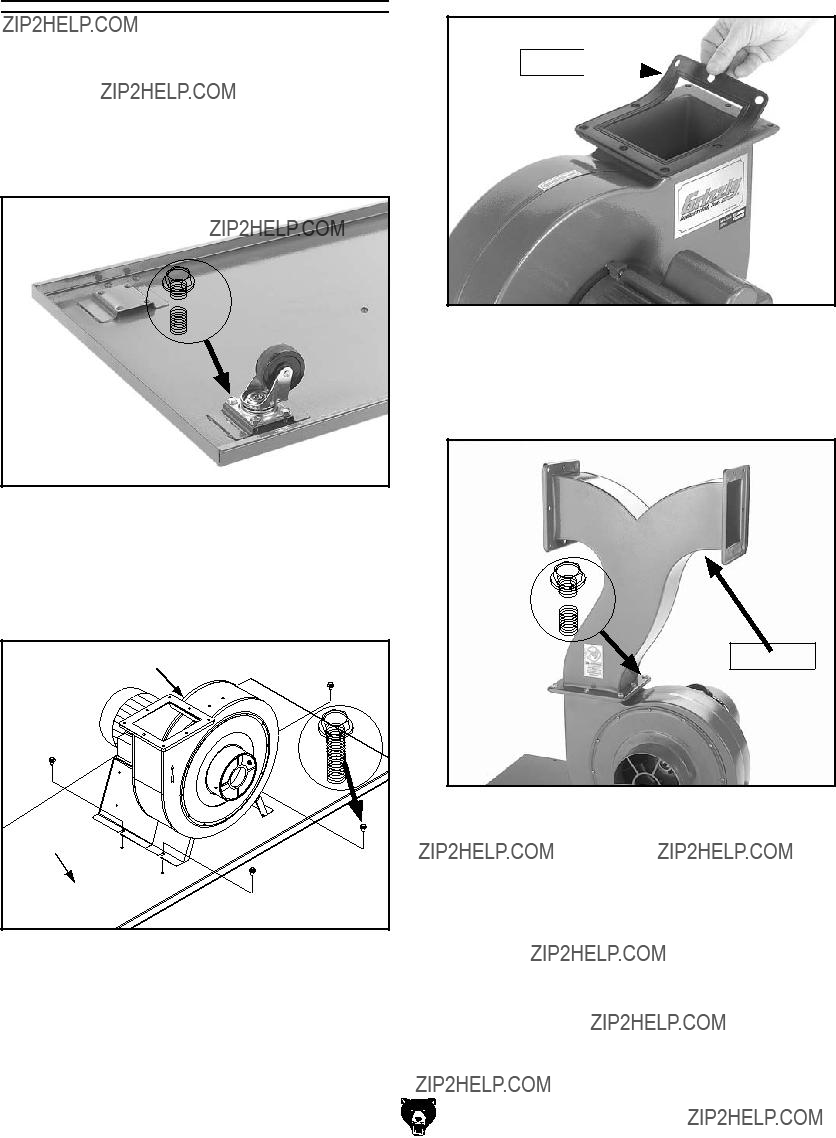
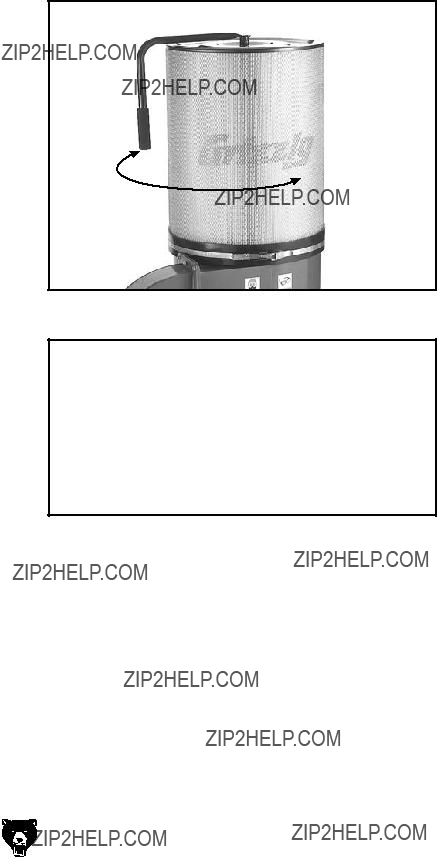
Collector
 Outlet
Connector
Collection
Connector
To reduce the risk of serious injury when using this machine, read and understand this entire manual before beginning any operations.
Paddle Switch
Figure 1. Rear view identification.
Figure 2. Model G0562Z/G1030Z2 identification.
MODEL G0562Z/G0562ZP, G1030Z2/1030Z2P
DUST COLLECTORS
SECTION 1: SAFETY
For Your Own Safety, Read Instruction Manual Before Operating this Machine
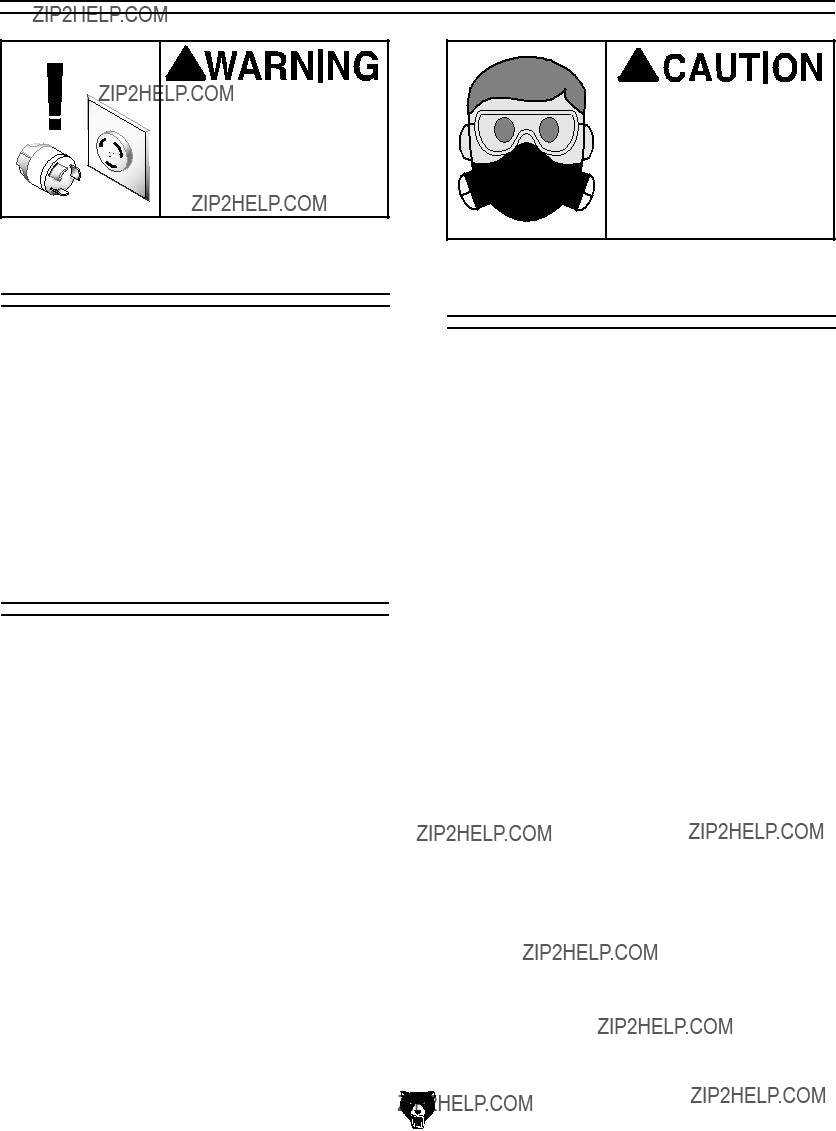
The purpose of safety symbols is to attract your attention to possible hazardous conditions. This manual uses a series of symbols and signal words intended to convey the level of impor- tance of the safety messages. The progression of symbols is described below. Remember that safety messages by themselves do not eliminate danger and are not a substitute for proper accident prevention measures.
Additional Safety for Dust Collectors
�
INTENDED USE.� I]^h� Yjhi� XdaaZXidg� ^h� dcan� ^ciZcYZY�[dg�XdaaZXi^c\�lddY�Yjhi�VcY�X]^eh�[gdb� lddYldg`^c\� bVX]^cZh#� 9D� CDI� jhZ� i]^h� Yjhi� XdaaZXidg� id� XdaaZXi� bZiVa!� Y^gi!� eZWWaZh!� YgnlVaa!� VhWZhidh!� aZVY� eV^ci!� h^a^XV!� a^fj^Yh!� VZgdhdah!� dg� Vcn�[aVbbVWaZ!�XdbWjhi^WaZ!�dg�]VoVgYdjh�bViZg^" Vah#
HAZARDOUS DUST. 9jhi� XgZViZY� l]^aZ� jh^c\� bVX]^cZgn� bVn� XVjhZ� XVcXZg!� W^gi]� YZ[ZXih!� dg� adc\"iZgb� gZhe^gVidgn� YVbV\Z#� 7Z� VlVgZ� d[� Yjhi� ]VoVgYh�VhhdX^ViZY�l^i]�ZVX]�ldg`e^ZXZ�bViZg^Va!� VcY�ValVnh�lZVg�V�C>DH="VeegdkZY�gZhe^gVidg�id� gZYjXZ�ndjg�g^h`#
DUST ALLERGIES.� 9jhi� [gdb� XZgiV^c� lddYh� bVn�XVjhZ�Vc�VaaZg\^X�gZVXi^dc�^c�eZdeaZ�VcY�Vc^" bVah#�BV`Z�hjgZ�ndj�`cdl�l]Vi�ineZ�d[�lddY�Yjhi� ndj�l^aa�WZ�ZmedhZY�id�^c�XVhZ�i]ZgZ�^h�V�edhh^W^a^in� d[�Vc�VaaZg\^X�gZVXi^dc#
WEAR RESPIRATOR.� ;^cZ� Yjhi� i]Vi� ^h� idd� hbVaa�id�WZ�XVj\]i�^c�i]Z�[^aiZg�l^aa�WZ�Wadlc�^cid� i]Z� VbW^Zci� V^g� Yjg^c\� deZgVi^dc#� 6alVnh� lZVg� V� C>DH=�VeegdkZY�gZhe^gVidg�Yjg^c\�deZgVi^dc�VcY� [dg�V�h]dgi�i^bZ�V[iZg�id�gZYjXZ�ndjg�g^h`�d[�eZgbV" cZci�gZhe^gVidgn�YVbV\Z#
EMPTYING DUST.�L]Zc�Zbein^c\�Yjhi�[gdb�i]Z� XdaaZXi^dc�XdciV^cZg!�lZVg�V�gZhe^gVidg�VcY�hV[Zin� \aVhhZh#� :bein� Yjhi� VlVn� [gdb� ^\c^i^dc� hdjgXZh� VcY�^cid�Vc�VeegdkZY�XdciV^cZg#
DISCONNECTING POWER SUPPLY.� Ijgc� i]Z� hl^iX]� OFF!� Y^hXdccZXi� i]Z� Yjhi� XdaaZXidg� [gdb� i]Z�edlZg�hjeean!�VcY�Vaadl�i]Z�^beZaaZg�id�XdbZ� id� V� XdbeaZiZ� hide� WZ[dgZ� aZVk^c\� i]Z� bVX]^cZ� jcViiZcYZY�dg�Yd^c\�Vcn�hZgk^XZ!�XaZVc^c\!�bV^c" iZcVcXZ!�dg�VY_jhibZcih#
REGULAR CLEANING.� GZ\jaVgan� X]ZX`$Zbein� i]Z� XdaaZXi^dc� WV\h� dg� Ygjb� id� Vkd^Y� i]Z� Wj^aYje� d[�[^cZ�Yjhi�i]Vi�XVc�^cXgZVhZ�i]Z�g^h`�d[�[^gZ#�BV`Z� hjgZ�id�gZ\jaVgan�XaZVc�i]Z�hjggdjcY^c\�VgZV�l]ZgZ� i]Z�bVX]^cZ�^h�deZgViZY ZmXZhh^kZ�Yjhi�Wj^aYje� dc� dkZg]ZVY� a^\]ih!� ]ZViZgh!� ZaZXig^XVa� eVcZah!� dg� di]Zg�]ZVi�hdjgXZh�l^aa�^cXgZVhZ�i]Z�g^h`�d[�[^gZ#
SUSPENDED DUST PARTICLES AND IGNITION SOURCES.�9D�CDI�deZgViZ�i]Z�Yjhi�XdaaZXidg�^c� VgZVh�lZgZ�Zmeadh^dc�g^h`h�VgZ�]^\]#�6gZVh�d[�]^\]� g^h`�^cXajYZ!�Wji�VgZ�cdi�a^b^iZY�id!�VgZVh�cZVg�e^adi� a^\]ih!�deZc�[aVbZh!�dg�di]Zg�^\c^i^dc�hdjgXZh#
FIRE SUPPRESSION.�Dcan�deZgViZ�i]Z�Yjhi�Xda" aZXidg�^c�adXVi^dch�i]Vi�XdciV^c�V�[^gZ�hjeegZhh^dc� hnhiZb�dg�]VkZ�V�[^gZ�Zmi^c\j^h]Zg�cZVgWn#
IMPELLER HAZARDS.� 9D� CDI� eaVXZ� ndjg� ]VcYh�dg�iddah�cZVg�i]Z�deZc�^caZi�Yjg^c\�deZgVi^dc� [dg�Vcn�gZVhdc#�I]Z�edlZg[ja�hjXi^dc�XdjaY�ZVh^an� XVjhZ�VXX^YZciVa�XdciVXi�l^i]�i]Z�^beZaaZg�l]^X]� l^aa� XVjhZ� hZg^djh� eZghdcVa� ^c_jgn� dg� YVbV\Z� id� i]Z�bVX]^cZ#�6alVnh�`ZZe�hbVaa�Vc^bVah�VcY�X]^a" YgZc�VlVn�[gdb�deZc�Yjhi�XdaaZXi^dc�^caZih#
AVOIDING SPARKS.� 9D� CDI� Vaadl� hiZZa� dg� gdX`h� id� hig^`Z� i]Z� ^beZaaZg i]^h� bVn� egdYjXZ� heVg`h#� HeVg`h� XVc� hbdaYZg� ^c� lddY� Yjhi� [dg� V� adc\�i^bZ�WZ[dgZ�V�[^gZ�^h�YZiZXiZY#�>[�ndj�VXX^YZc" iVaan�Xji�^cid�lddY�XdciV^c^c\�igVbe�bZiVa��cV^ah!� hiVeaZh!� he^`Zh!� ZiX#�!� ^bbZY^ViZan� ijgc� OFF� i]Z� Yjhi�XdaaZXidg!�Y^hXdccZXi�^i�[gdb�edlZg!�VcY�lV^i� [dg� i]Z� ^beZaaZg� id� hide i]Zc� Zbein� i]Z� XdaaZX" i^dc� XdciV^cZg� ^cid� Vc� VeegdkZY� V^gi^\]i� bZiVa� XdciV^cZg#
OPERATING LOCATION.� Id� gZYjXZ� gZhe^gV" idgn� ZmedhjgZ� id� [^cZ� Yjhi!� adXViZ� eZgbVcZcian� ^chiVaaZY� Yjhi� XdaaZXidgh� VlVn� [gdb� i]Z� ldg`^c\� VgZV!�dg�^c�Vcdi]Zg�gddb�i]Vi�^h�Zfj^eeZY�l^i]�V� hbd`Z�YZiZXidg#�9D�CDI�deZgViZ�i]Z�Yjhi�XdaaZX" idg� ^c� gV^cn� dg� lZi� adXVi^dch ZmedhjgZ� id� lViZg� bVn�XgZViZ�Vc�h]dX`�]VoVgY�dg�YZXgZVhZ�i]Z�a^[Z� d[�i]Z�bVX]^cZ#
STATIC ELECTRICITY.�EaVhi^X�Yjhi�a^cZh�\ZcZg" ViZ�]^\]�Vbdjcih�d[�hiVi^X�ZaZXig^X^in�Vh�Yjhi�X]^eh� eVhh�i]gdj\]�i]Zb#�6ai]dj\]�gVgZ!�heVg`h�XVjhZY� Wn� hiVi^X� ZaZXig^X^in� XVc� XVjhZ� Zmeadh^dch� dg� [^gZ#� Id� gZYjXZ� i]^h� g^h`!� bV`Z� hjgZ� Vaa� Yjhi� a^cZh� VgZ� i]dgdj\]an�\gdjcYZY�Wn�jh^c\�V�\gdjcY^c\�l^gZ#

Weight Load
GZ[Zg�id�i]Z�Machine Data Sheet�[dg�i]Z�lZ^\]i� d[�ndjg�bVX]^cZ#�BV`Z�hjgZ�i]Vi�i]Z�hjg[VXZ�jedc� l]^X]�i]Z�bVX]^cZ�^h�eaVXZY�l^aa�WZVg�i]Z�lZ^\]i� d[�i]Z�bVX]^cZ!�VYY^i^dcVa�Zfj^ebZci�i]Vi�bVn�WZ� ^chiVaaZY�dc�i]Z�bVX]^cZ!�VcY�i]Z�]ZVk^Zhi�ldg`" e^ZXZ�i]Vi�l^aa�WZ�jhZY#�6YY^i^dcVaan!�Xdch^YZg�i]Z� lZ^\]i� d[� i]Z� deZgVidg� VcY� Vcn� YncVb^X� adVY^c\� i]Vi�bVn�dXXjg�l]Zc�deZgVi^c\�i]Z�bVX]^cZ#
Space Allocation
8dch^YZg� i]Z� aVg\Zhi� h^oZ� d[� ldg`e^ZXZ� i]Vi� l^aa� WZ� egdXZhhZY� i]gdj\]� i]^h� bVX]^cZ� VcY� egdk^YZ� Zcdj\]�heVXZ�VgdjcY�i]Z�bVX]^cZ�[dg�VYZfjViZ� deZgVidg� bViZg^Va� ]VcYa^c\� dg� i]Z� ^chiVaaVi^dc� d[� Vjm^a^Vgn�Zfj^ebZci#�L^i]�eZgbVcZci�^chiVaaVi^dch!� aZVkZ�Zcdj\]�heVXZ�VgdjcY�i]Z�bVX]^cZ�id�deZc� dg�gZbdkZ�Yddgh$XdkZgh�Vh�gZfj^gZY�Wn�i]Z�bV^c" iZcVcXZ� VcY� hZgk^XZ� YZhXg^WZY� ^c� i]^h� bVcjVa#�
See below for required space allocation.
Children or untrained people may be seriously injured by this machine. Only install in an access restricted location.
Physical Environment
I]Z� e]nh^XVa� Zck^gdcbZci� l]ZgZ� i]Z� bVX]^cZ� ^h deZgViZY�^h�^bedgiVci�[dg�hV[Z�deZgVi^dc�VcY�adc" \Zk^in� d[� bVX]^cZ� XdbedcZcih#� ;dg� WZhi� gZhjaih! deZgViZ�i]^h�bVX]^cZ�^c�V�Ygn�Zck^gdcbZci�i]Vi�^h [gZZ� [gdb� ZmXZhh^kZ� bd^hijgZ!� ]VoVgYdjh� X]Zb^" XVah!� V^gWdgcZ� VWgVh^kZh!� dg� ZmigZbZ� XdcY^i^dch# :migZbZ�XdcY^i^dch�[dg�i]^h�ineZ�d[�bVX]^cZgn�VgZ \ZcZgVaan� i]dhZ� l]ZgZ� i]Z� VbW^Zci� iZbeZgVijgZ gVc\Z� ZmXZZYh� )&????&%)??;0� i]Z� gZaVi^kZ� ]jb^Y^in gVc\Z�ZmXZZYh�'%??.*���cdc"XdcYZch^c\�0�dg�i]Z Zck^gdcbZci� ^h� hjW_ZXi� id� k^WgVi^dc!� h]dX`h!� dg Wjbeh#
Electrical Installation
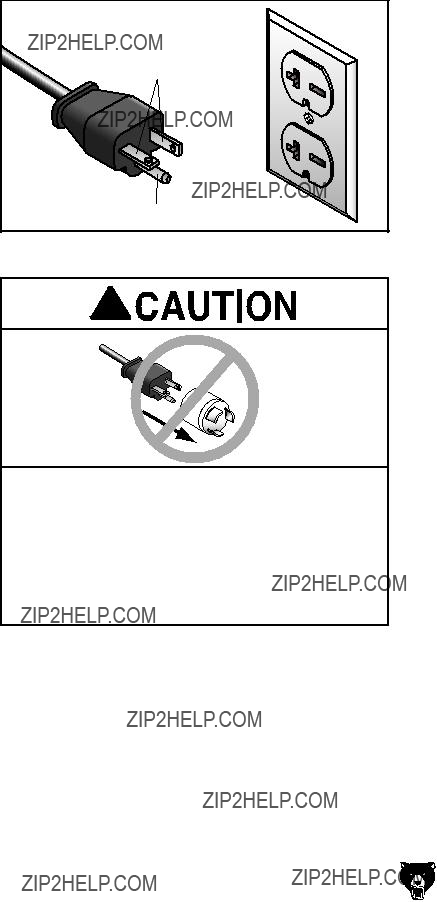
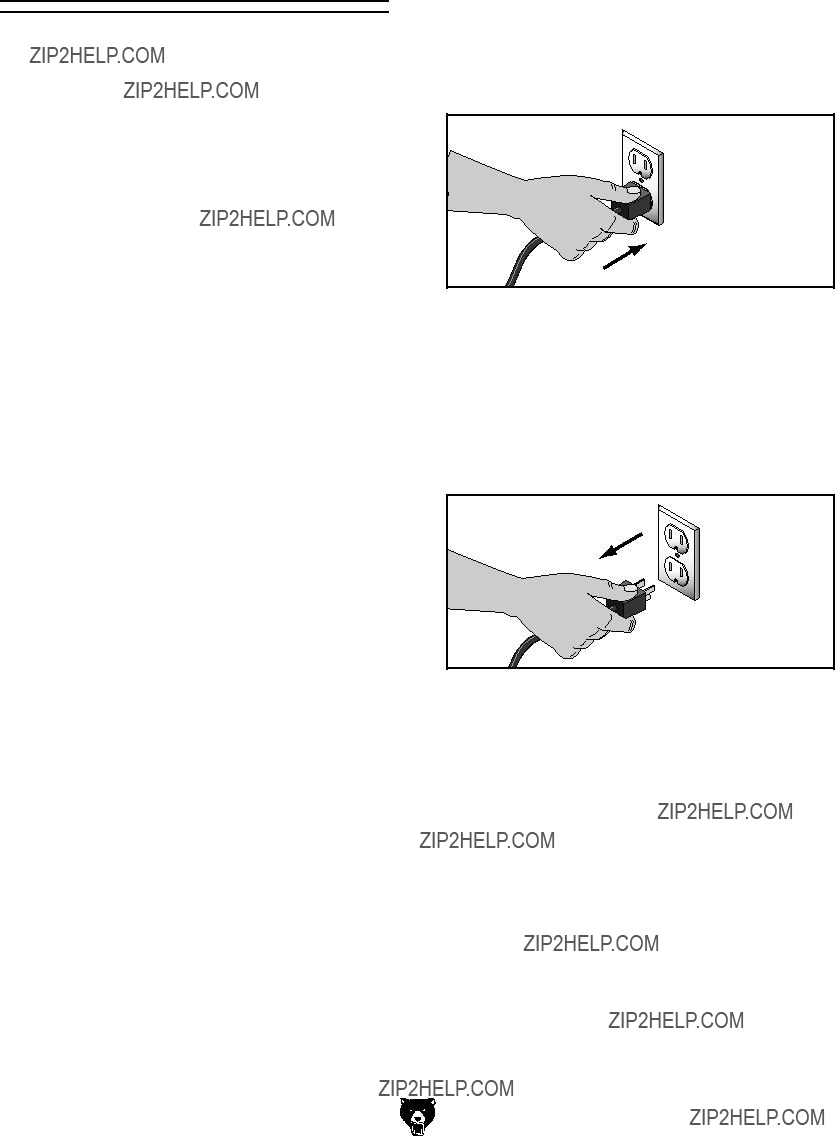
EaVXZ�i]^h�bVX]^cZ�cZVg�Vc�Zm^hi^c\�edlZg�hdjgXZ# BV`Z� hjgZ� Vaa� edlZg� XdgYh� VgZ� egdiZXiZY� [gdb igV[[^X!� bViZg^Va� ]VcYa^c\!� bd^hijgZ!� X]Zb^XVah! dg� di]Zg� ]VoVgYh#� BV`Z� hjgZ� id� aZVkZ� VXXZhh� id V� bZVch� d[� Y^hXdccZXi^c\� i]Z� edlZg� hdjgXZ� dg Zc\V\^c\�V�adX`dji$iV\dji�YZk^XZ!�^[�gZfj^gZY#
Lighting
A^\]i^c\� VgdjcY� i]Z� bVX]^cZ� bjhi� WZ� VYZfjViZ Zcdj\]�i]Vi�deZgVi^dch�XVc�WZ�eZg[dgbZY�hV[Zan# H]VYdlh!�\aVgZ!�dg�higdWZ�Z[[ZXih�i]Vi�bVn�Y^higVXi dg�^beZYZ�i]Z�deZgVidg�bjhi�WZ�Za^b^cViZY#
491???2"
28"
Figure 8. Minimum working clearances.
accessories
SECTION 6: ACCESSORIES
Some aftermarket accessories can be installed on this machine that could cause it to function improperly, increasing the risk of serious personal injury. To minimize this risk, only install accessories recommended for this machine by Grizzly.
NOTICE
Refer to the newest copy of the Grizzly Catalog for other accessories available for this machine.
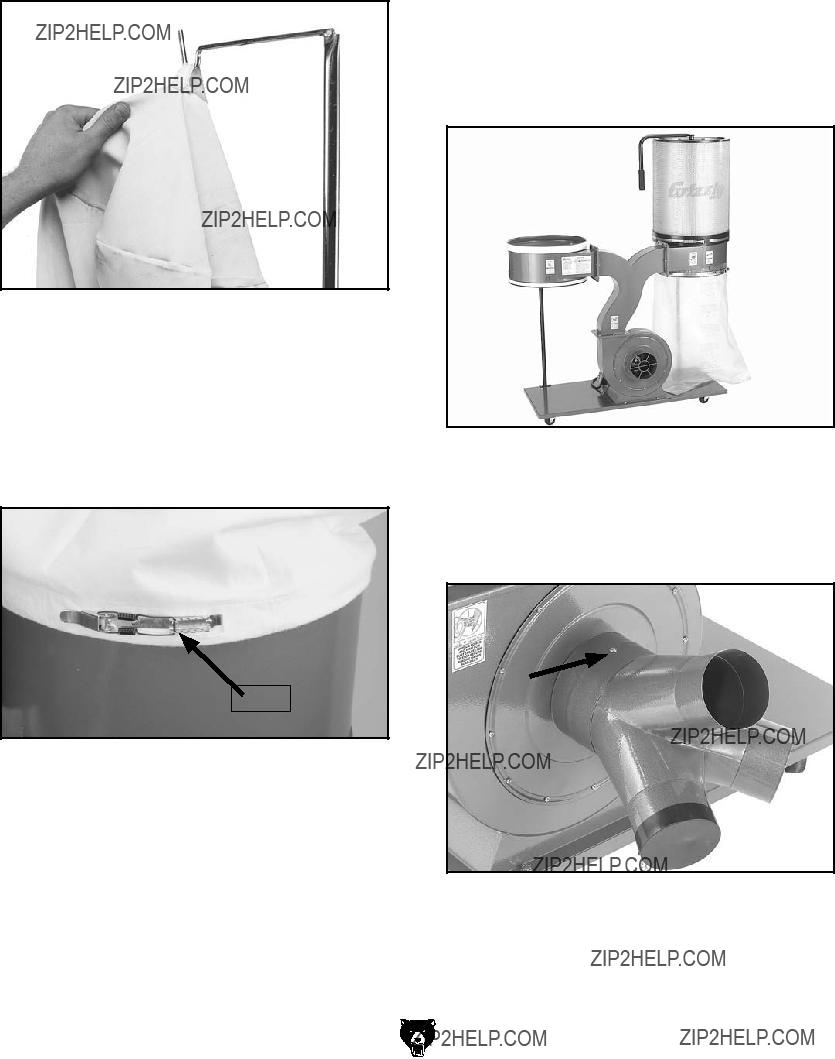
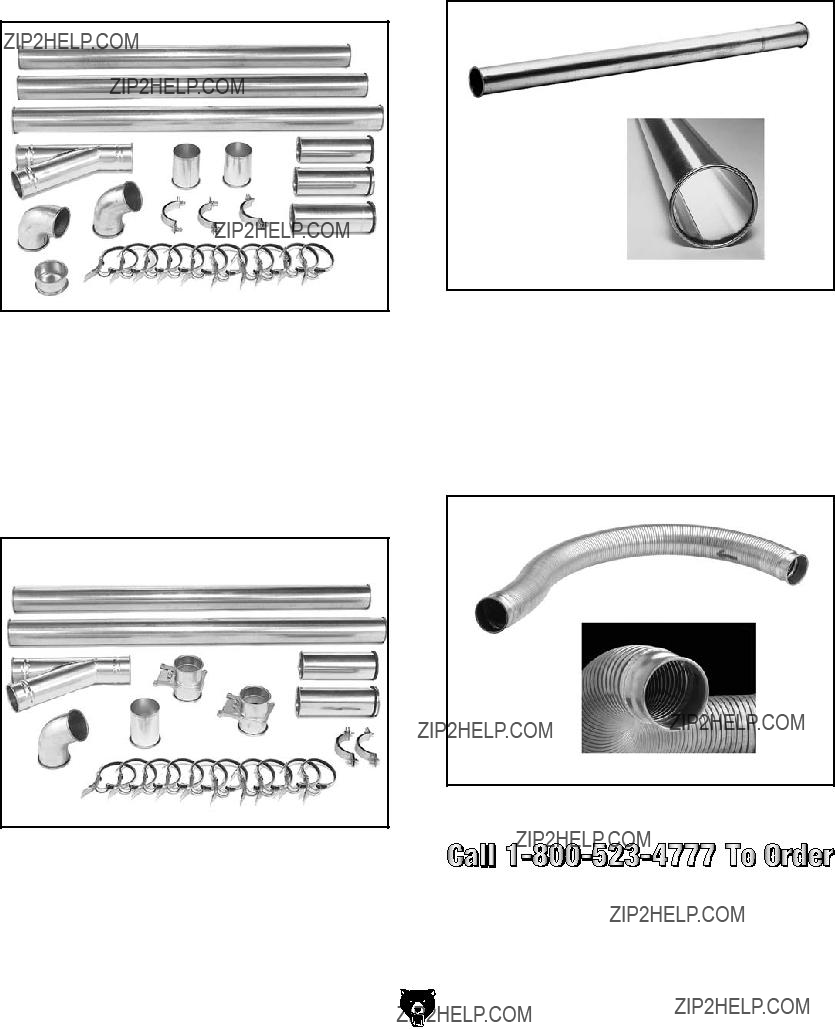
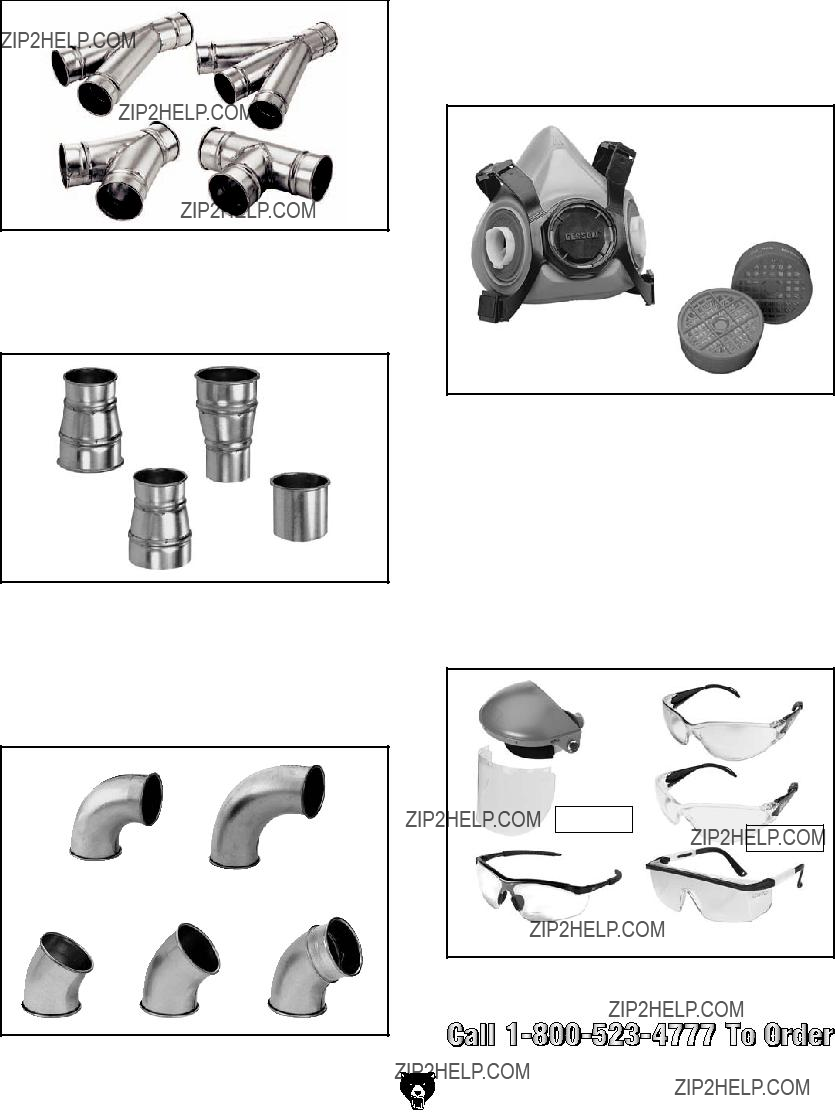
T20543??? Plastic Bottom Bag
This 41" x 31" Flat (19.75" Diameter) Plastic Bottom Bag is for the G0525, G0548/Z/ ZP, G0562/Z/ZP, G1029/Z2/Z2P, G1030Z/Z2/ Z2P, and G1028Z/Z2 Dust Collectors.
H5783???Extra 1 Micron Canister
Replacement canister for Grizzly G0548Z/ G0548ZP, G0562Z/G0562ZP, G1028Z/Z2, G1029Z/Z2/Z2P, and G1030Z/Z2/Z2P Dust Collectors.
G1536???Black Flexible Hose 4" x 10'
G2974???Wire Hose Clamp 4"
G1843???Plastic Blast Gate 4"
G4679???Anti-Static Grounding Kit
We've hand picked a selection of commonly used dust collection components for machines with 4" dust ports.
Figure 47. 4" dust collection accessories.
G9956???Remote Controlled Heavy-Duty Double Air Filter
G0572???Hanging Air Filter with Remote
These Hanging Air Filters have convenient remote controls and feature a three speed motor, auto- matic shutoff timer and hang easily from the work- shop ceiling.
Figure 48. G0572 Dust Filter.
Figure 46. Replacement canister.
SECTION 8: SERVICE
Review the troubleshooting and procedures in this section if a problem develops with your machine. If you need replacement parts or additional help with a procedure, call our Technical Support at (570) 546-9663.
Note: Please gather the serial number and manufacture date of your machine before calling.
To reduce the risk of serious personal injury or damage to the machine, any repairs not covered in this manual should only be performed by or with the assistance of qualified service personnel.
Troubleshooting
Motor & Electrical
I]ZhZ�eV\Zh�VgZ�XjggZci�Vi�i]Z�i^bZ�d[�eg^ci^c\#�=dlZkZg!�^c�i]Z�he^g^i�d[�^begdkZbZci!�lZ�bVn�bV`Z�X]Vc\"
Zh�id�i]Z�ZaZXig^XVa�hnhiZbh�d[�[jijgZ�bVX]^cZh#�8dbeVgZ�i]Z�bVcj[VXijgZ�YViZ�d[�ndjg�bVX]^cZ�id�i]Z�dcZ hiViZY�^c�i]^h�bVcjVa!�VcY�hijYn�i]^h�hZXi^dc�XVgZ[jaan#
>[�i]ZgZ�VgZ�Y^[[ZgZcXZh�WZilZZc�ndjg�bVX]^cZ�VcY�l]Vi�^h�h]dlc�^c�i]^h�hZXi^dc!�XVaa�IZX]c^XVa�Hjeedgi�Vi �*,%��*)+".++(�[dg�Vhh^hiVcXZ�7:;DG:�bV`^c\�Vcn�X]Vc\Zh�id�i]Z�l^g^c\�dc�ndjg�bVX]^cZ#�6c�jeYViZY l^g^c\� Y^V\gVb� bVn� WZ� VkV^aVWaZ#� Note:� Please gather the serial number and manufacture date of your machine before calling. This information can be found on the main machine label.
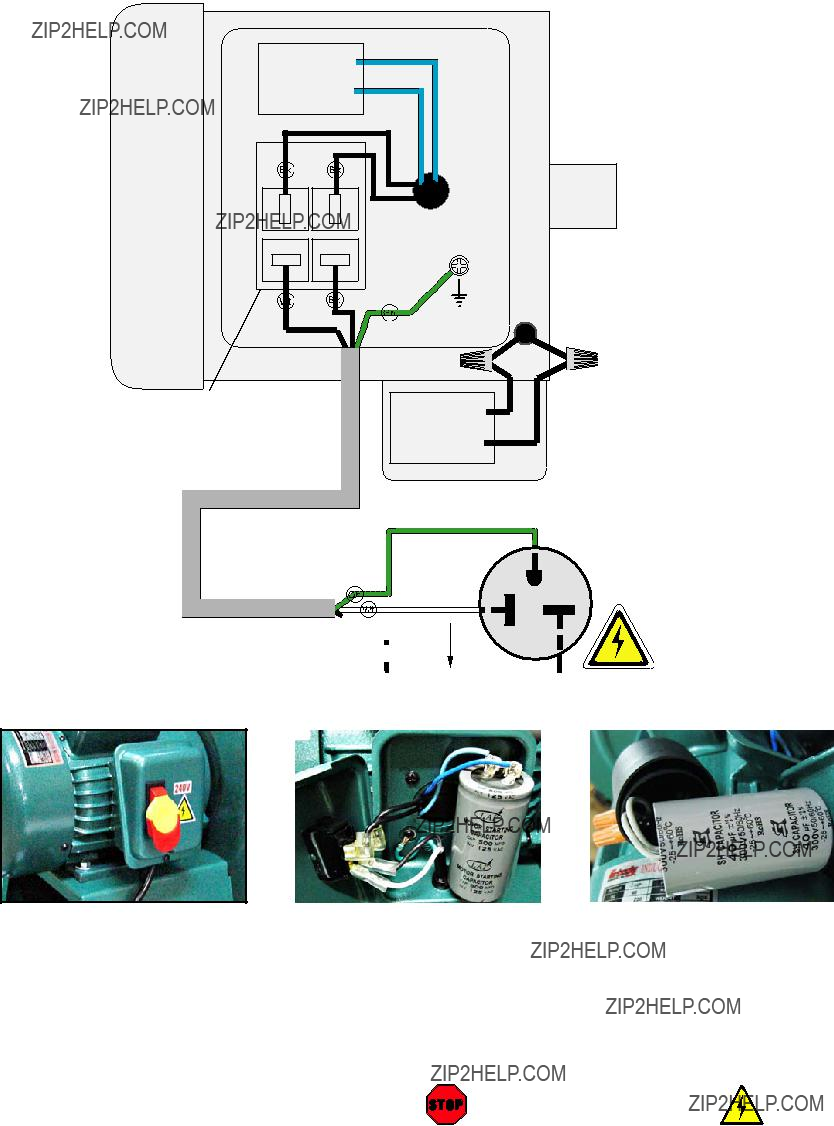
Wiring Safety Instructions
MODIFICATIONS.� BdY^[n^c\� i]Z� l^g^c\� WZndcY� l]Vi�^h�h]dlc�^c�i]Z�Y^V\gVb�bVn�aZVY�id�jcegZ" Y^XiVWaZ� gZhjaih!� ^cXajY^c\� hZg^djh� ^c_jgn� dg� [^gZ#� I]^h�^cXajYZh�i]Z�^chiVaaVi^dc�d[�jcVeegdkZY�V[iZg" bVg`Zi�eVgih#
WIRE CONNECTIONS.� 6aa� XdccZXi^dch� bjhi� WZ� i^\]i� id� egZkZci� l^gZh� [gdb� addhZc^c\� Yjg^c\� bVX]^cZ� deZgVi^dc#� 9djWaZ"X]ZX`� Vaa� l^gZh� Y^h" XdccZXiZY�dg�XdccZXiZY�Yjg^c\�Vcn�l^g^c\�iVh`�id� ZchjgZ�i^\]i�XdccZXi^dch#
CIRCUIT REQUIREMENTS. Ndj� BJHI� [daadl� i]Z� gZfj^gZbZcih� Vi� i]Z� WZ\^cc^c\� d[� i]^h� bVc" jVa l]Zc� XdccZXi^c\� ndjg� bVX]^cZ� id� V� edlZg� hdjgXZ#
MOTOR WIRING. I]Z� bdidg� l^g^c\� h]dlc� ^c� i]ZhZ� Y^V\gVbh� ^h� XjggZci� Vi� i]Z� i^bZ� d[� eg^ci^c\� Wji�bVn�cdi�bViX]�ndjg�bVX]^cZ#�>[�ndj�[^cY�i]^h� id�WZ�i]Z�XVhZ!�jhZ�i]Z�l^g^c\�Y^V\gVb�^ch^YZ�i]Z� bdidg�_jcXi^dc�Wdm#
CAPACITORS/INVERTERS.� HdbZ� XVeVX^idgh� VcY�edlZg�^ckZgiZgh�hidgZ�Vc�ZaZXig^XVa�X]Vg\Z�[dg� je� id� &%� b^cjiZh� V[iZg� WZ^c\� Y^hXdccZXiZY� [gdb� i]Z� edlZg� hdjgXZ#� Id� gZYjXZ� i]Z� g^h`� d[� WZ^c\� h]dX`ZY!�lV^i�Vi�aZVhi�i]^h�adc\�WZ[dgZ�ldg`^c\�dc� XVeVX^idgh#
EXPERIENCING DIFFICULTIES. >[�ndj�VgZ�ZmeZ" g^ZcX^c\�Y^[[^Xjai^Zh�jcYZghiVcY^c\�i]Z�^c[dgbVi^dc� ^cXajYZY� ^c� i]^h� hZXi^dc!� XdciVXi� djg� IZX]c^XVa� Hjeedgi�Vi��*,%��*)+".++(#
The photos and diagrams included in this section are best viewed in color. You can view these pages in color at www.grizzly.com.
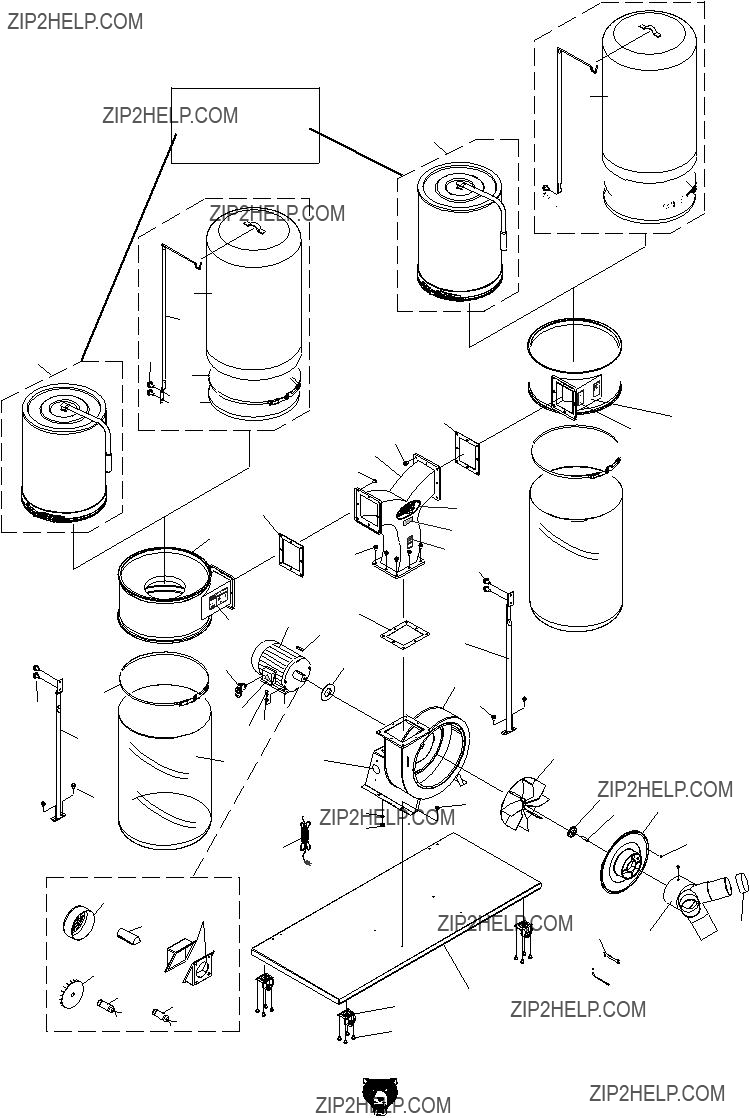
SECTION 10: PARTS
G0562Z/G1030Z2 Main Breakdown
See H5783 Parts
Breakdown
on Page 39  '*
'*


 '
'
G0562Z/G1030Z2 Main Parts List
H5783 Canister Filter Assembly
'&
''
'(
) +

 &.
&.
,
H5783 breakdown
5PH5783005 THRUST BEARING 12 X 14 X 6
6PH5783006 BEARING PLATE
19PH5783019 SPONGE GASKET 10 X 15MM
20PH5783020 HANDLE SLEEVE
22PH5783022 QUICK RELEASE CLAMP
23PH5783023 FOAM STRIP 20MM X 156CM
24PH5783024 FOAM STRIP 42MM X 156CM
G0562ZP/G1030Z2P Main Breakdown
See H5783 Parts
Breakdown
on Page 39'*
+ *
)
 ((
((
(&
G0562ZP/G1030Z2P Main Parts List
Safety labels warn about machine hazards and ways to prevent injury. The owner of this machine MUST maintain the original location and readability of the labels on the machine. If any label is removed or becomes unreadable, REPLACE that label before using the machine again. Contact Grizzly at (800) 523-4777 or www.grizzly.com to order new labels.
;DA9�6ADC<�9DII:9�A>C:
EaVXZ
HiVbe
=ZgZ
'2)::,99).$5342)!,��).#� 0�/��"/88���� "%,,).'(!-� 7! �����
����
;DA9�6ADC<�9DII:9�A>C:
HZcY�V�<g^ooan�8ViVad\�id�V�[g^ZcY/
CVbZTTTTTTTTTTTTTTTTTTTTTTTTTTTTTTT HigZZiTTTTTTTTTTTTTTTTTTTTTTTTTTTTTTT 8^inTTTTTTTTTTTTTTHiViZTTTTTTO^eTTTTTT
I6E:�6ADC<�:9<:H""EA:6H:�9D�CDI�HI6EA:
WARRANTY AND RETURNS
7!22!.499!.$$2%452.3
<g^ooan�>cYjhig^Va!�>cX#�lVggVcih�ZkZgn�egdYjXi�^i�hZaah�[dg�V�eZg^dY�d[���YEAR�id�i]Z�dg^\^cVa�ejgX]VhZg�[gdb� i]Z�YViZ�d[�ejgX]VhZ#�I]^h�lVggVcin�YdZh�cdi�Veean�id�YZ[ZXih�YjZ�Y^gZXian�dg�^cY^gZXian�id�b^hjhZ!�VWjhZ!� cZ\a^\ZcXZ!�VXX^YZcih!�gZeV^gh�dg�VaiZgVi^dch�dg�aVX`�d[�bV^ciZcVcXZ#�I]^h�^h�<g^ooan??h�hdaZ�lg^iiZc�lVggVcin� VcY�Vcn�VcY�Vaa�lVggVci^Zh�i]Vi�bVn�WZ�^bea^ZY�Wn�aVl!�^cXajY^c\�Vcn�bZgX]VciVW^a^in�dg�[^icZhh!�[dg�Vcn�eVg" i^XjaVg�ejgedhZ!�VgZ�]ZgZWn�a^b^iZY�id�i]Z�YjgVi^dc�d[�i]^h�lg^iiZc�lVggVcin#�LZ�Yd�cdi�lVggVci�dg�gZegZhZci� i]Vi�i]Z�bZgX]VcY^hZ�Xdbea^Zh�l^i]�i]Z�egdk^h^dch�d[�Vcn�aVl�dg�VXih�jcaZhh�i]Z�bVcj[VXijgZg�hd�lVggVcih#� >c�cd�ZkZci�h]Vaa�<g^ooan??h�a^VW^a^in�jcYZg�i]^h�lVggVcin�ZmXZZY�i]Z�ejgX]VhZ�eg^XZ�eV^Y�[dg�i]Z�egdYjXi�VcY� Vcn�aZ\Va�VXi^dch�Wgdj\]i�V\V^chi�<g^ooan�h]Vaa�WZ�ig^ZY�^c�i]Z�HiViZ�d[�LVh]^c\idc!�8djcin�d[�L]ViXdb#
LZ�h]Vaa�^c�cd�ZkZci�WZ�a^VWaZ�[dg�YZVi]!�^c_jg^Zh�id�eZghdch�dg�egdeZgin�dg�[dg�^cX^YZciVa!�Xdci^c\Zci!�heZX^Va!� dg�XdchZfjZci^Va�YVbV\Zh�Vg^h^c\�[gdb�i]Z�jhZ�d[�djg�egdYjXih#
Id�iV`Z�VYkVciV\Z�d[�i]^h�lVggVcin!�XdciVXi�jh�Wn�bV^a�dg�e]dcZ�VcY�\^kZ�jh�Vaa�i]Z�YZiV^ah#�LZ�l^aa�i]Zc� ^hhjZ�ndj�V�??GZijgc�CjbWZg!????�l]^X]�bjhi�WZ�XaZVgan�edhiZY�dc�i]Z�djih^YZ�Vh�lZaa�Vh�i]Z�^ch^YZ�d[�i]Z� XVgidc#� LZ� l^aa� cdi� VXXZei� Vcn� ^iZb� WVX`� l^i]dji� i]^h� cjbWZg#� Egdd[� d[� ejgX]VhZ� bjhi� VXXdbeVcn� i]Z� bZgX]VcY^hZ#�
I]Z�bVcj[VXijgZgh�gZhZgkZ�i]Z�g^\]i�id�X]Vc\Z�heZX^[^XVi^dch�Vi�Vcn�i^bZ�WZXVjhZ�i]Zn�XdchiVcian�hig^kZ�id�
VX]^ZkZ�WZiiZg�fjVa^in�Zfj^ebZci#�LZ�bV`Z�ZkZgn�Z[[dgi�id�ZchjgZ�i]Vi�djg�egdYjXih�bZZi�]^\]�fjVa^in�VcY�
YjgVW^a^in�hiVcYVgYh�VcY�lZ�]deZ�ndj�cZkZg�cZZY�id�jhZ�i]^h�lVggVcin#
EaZVhZ�[ZZa�[gZZ�id�lg^iZ�dg�XVaa�jh�^[�ndj�]VkZ�Vcn�fjZhi^dch�VWdji�i]Z�bVX]^cZ�dg�i]Z�bVcjVa#�
I]Vc`�ndj�V\V^c�[dg�ndjg�Wjh^cZhh�VcY�Xdci^cjZY�hjeedgi#�LZ�]deZ�id�hZgkZ�ndj�V\V^c�hddc#
Buy Direct and Save with Grizzly?? ??? Trusted, Proven and a Great Value!
~Since 1983~
Visit Our Website Today For
Current Specials!
ORDER
24 HOURS A DAY!
1-800-523-4777


 x 16
x 16
 x 8
x 8

 x 4
x 4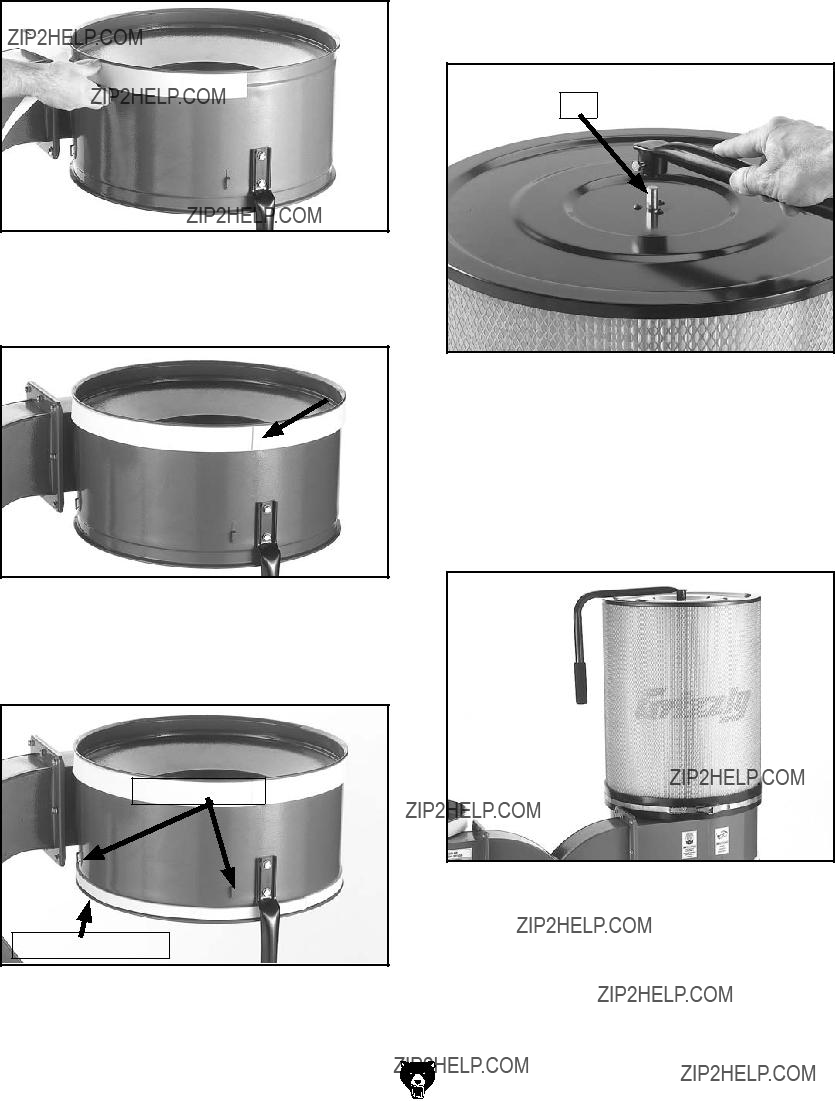


 220
220 
 VAC
VAC
 ')
') ('
('


 (*
(* 


 ''
''


 (,
(,
 ('
(' '%
'% ((
((
 ',
',


 &-
&-
 ')
')
 ('
('


 (*
(*


 ''
''


 (,
(,
 ('
(' '%
'%


 WARRANTY CARD