OWNER???S GUIDE

READ AND SAVE THESE INSTRUCTIONS

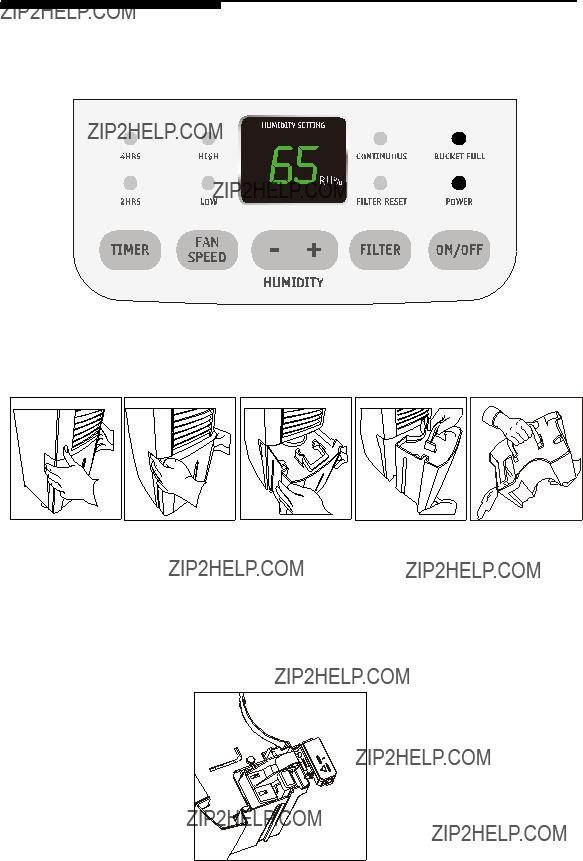
Record Model No. and Serial No. of this dehumidifier in space provided below. These numbers are printed on the nameplate located behind the bucket.

M odel No. ___________________________________________________

Serial No. ____________________________________________________

IM PO RTA NT: Keep a copy of your bill of sale. The date on the bill establishes the warranty period should service be required. If service is performed, it is in your best interest to obtain and keep all receipts.

Register Your Product

The self-addressed PRODUC T REGISTRATION C ARD should be filled in completely, signed, and returned to the Frigidaire C ompany.

Contents

2W arranty

3Important Saf ety Instructions
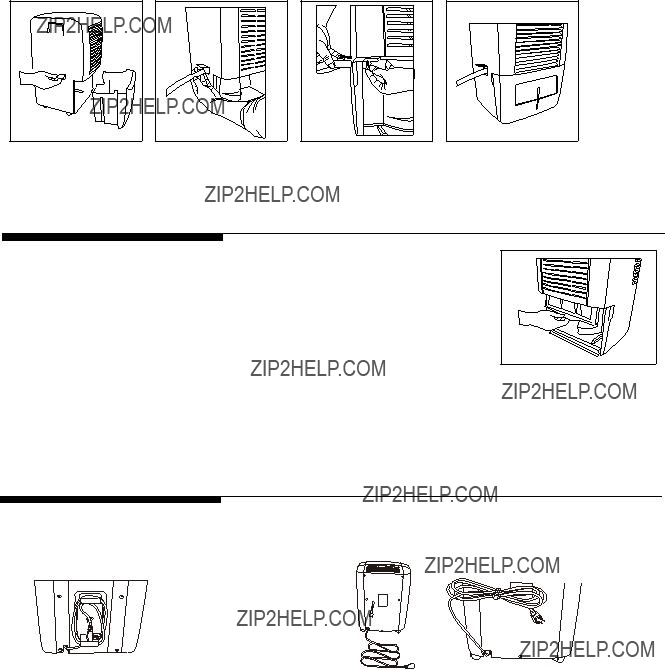
3Location

3How It W ork s

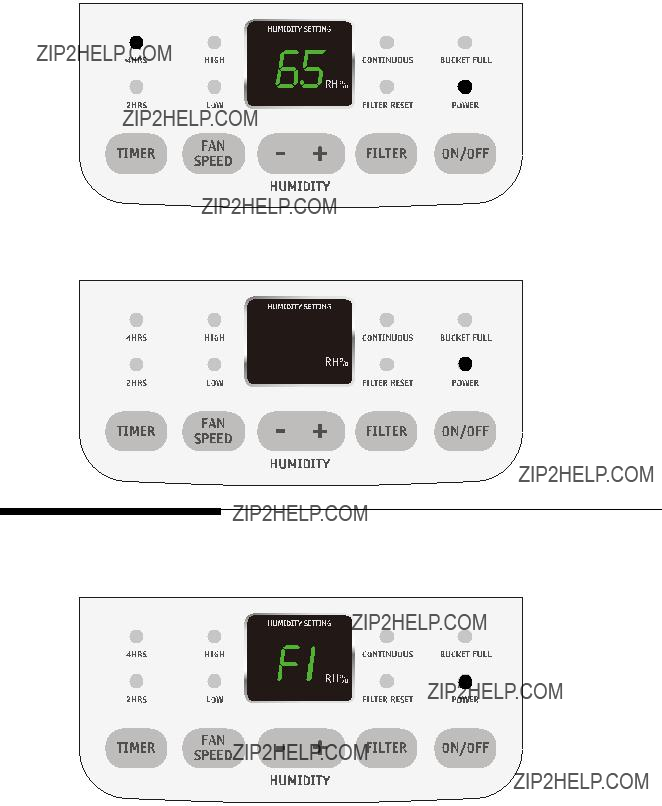
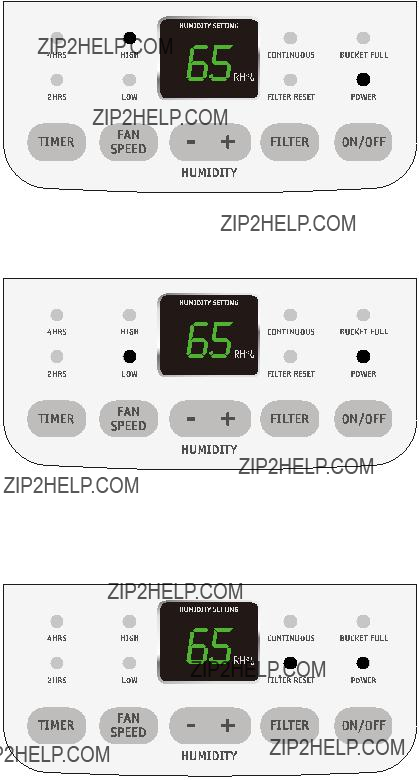
4O peration & Features

6F a u l t C o d e s

8Care and Cleaning

8Storage

9A void Service Checklist

Operate dehumidifier only as instructed in this Owner???s Guide. These instructions are not meant to cover every possible condition and situation that may occur. Common sense and caution must be used when installing, operating, and maintaining any appliance.

DEHUMIDIFIER

P/N 66166042

DEHUMIDIFIER WARRANTY

Your product is protected by this warranty

Your appliance is warranted by Electrolux. Electrolux has authorized Frigidaire Consumer Services and their authorized servicers to perform service under this war- ranty. Electrolux authorizes no one else to change or add to any of these obligations under this warranty. Any obligations for service and parts under this war- ranty must be performed by Frigidaire Consumer Services or an authorized Frigidaire servicer.

*NORMAL

RESPONSIBILITIES

OF THE CONSUMER

EXCLUSIONS

This warranty applies only to products in ordinary household use, and the consumer is responsible for the items listed below.

1. Proper use of the appliance in accordance with instructions provided with the product.

2.Proper installation by an authorized servicer in accordance with instructions provided with the appliance and in accordance with all local plumbing, electrical and/or gas codes.

3.Proper connection to a grounded power supply of sufficient voltage, replacement of blown fuses, repair of loose connections or defects in house wiring.

4.Expenses for making the appliance accessible for servicing, such as removal of trim, cupboards, shelves, etc., which are not a part of the appliance when it was shipped from the factory.

5.Damages to finish after installation.

6.Damage to unit after remove from packaging carton.

This warranty does not cover the following:

1.CONSEQUENTIAL OR INCIDENTAL DAMAGES SUCH AS PROPERTY DAMAGE AND INCIDENTAL EXPENSES RESULTING FROM

ANY BREACH OF THIS WRITTEN OR ANY IMPLIED WARRANTY.

Note: Some states do not allow the exclusion or limitation of incidental or consequential damages, so this limitation or exclusion may not apply to you.

2.Service calls which do not involve malfunction or defects in workmanship or material, or for appliances not in ordinary household use. The consumer shall pay for such service calls.

3.Damages caused by services performed by persons other than authorized Frigidaire servicers; use of parts other than Frigidaire

Genuine Renewal Parts; obtained from persons other than such servicers; or external causes such as abuse, misuse, inadequate power supply or acts of God.

4.Products with original serial numbers that have been removed or altered and cannot be readily determined.

IF YOU NEED SERVICE Keep your bill of sale, delivery slip, or some other appropriate payment record. The date on the bill establishes the warranty period should service be required. If service is performed, it is in your best interest to obtain and keep all receipts. This written warranty gives you specific legal rights. You may also have other rights that vary from state to state. Service under this warranty must be obtained by following these steps, in order:

1.Contact Frigidaire Consumer Services or an authorized Frigidaire servicer.

2.If there is a question as to where to obtain service, contact our Consumer Relations Department at:

Product features or specifications as described or illustrated are subject to change without notice. All warranties are made by Electrolux. This warranty applies only in the 50 states of the U.S.A., Puerto Rico and Canada.

FOR SERVICE CALL 1-800-444-4944.

2

Important Safety

Instructions

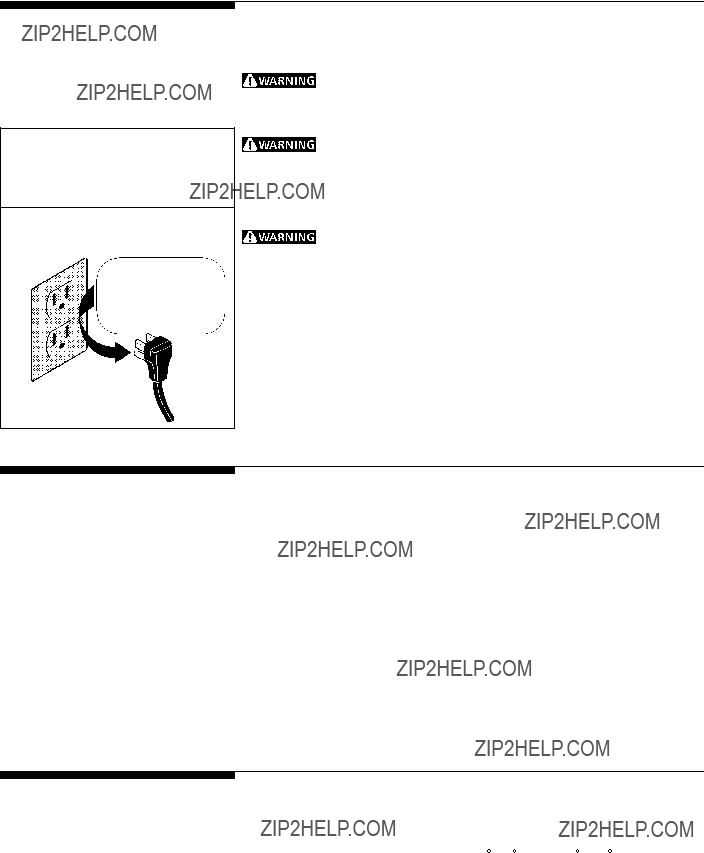
Avoid fire hazard or electric shock. Do not use an extension cord or an adaptor plug. Do not remove grounding prong from power cord.
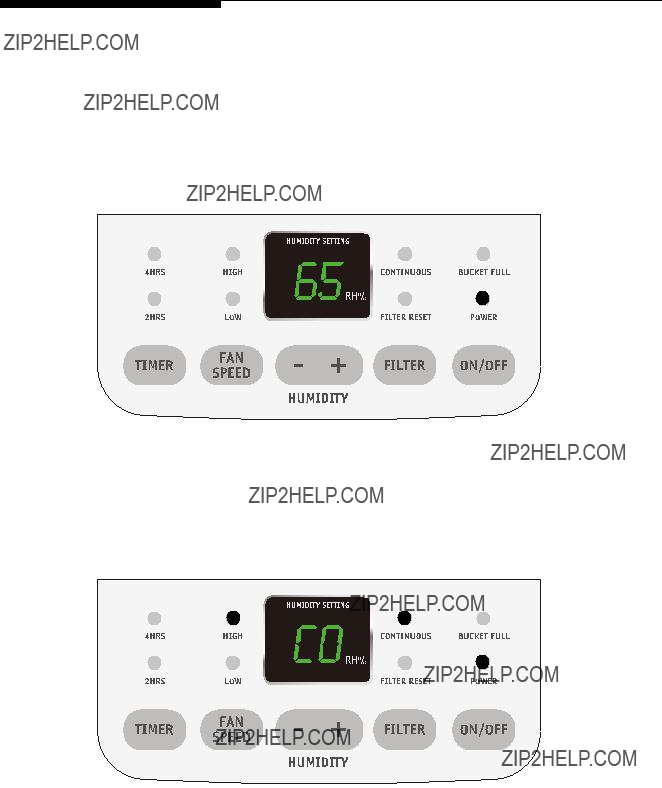
Grounding type w all receptacle

Do not, under

any circumstances, cut, remove,

or bypass the grounding prong from this plug.

Pow er supply cord w ith 3-prong grounding plug

Read all instructions bef ore using this dehumidif ier. To reduce the risk of fire, electric shock, or injury to persons when using your dehumidifier, follow basic precautions, including the following:

For Your Saf ety

Do not store or use gasoline or other flammable vapors and liquids in the vicinity of this or any other appliance. Read product labels for flammability and other warnings.

Child Saf ety Precautions

???Destroy the carton, plastic bags, and any packing materials immediately after the dehumidifier is unpacked. C hildren should never use these items for play.

???Do not leave children unattended in an area where the appliance is operating.

???Do not allow them to sit or stand on the appliance.

Electrical Inf ormation

???For your safety and protection, this dehumidifier is equipped with a three-prong grounding plug on the power cord. Do not, under any circumstances, cut or remove the round ground prong f rom the plug.

???Your dehumidifier must be plugged directly into a properly grounded and polarized three-prong receptacle. If the wall receptacle you intend to use will not accept a three-prong plug, or if you are not sure the outlet is adequately grounded or protected by a time delay fuse or circuit breaker, have a qualified electrician install the proper outlet according to the National Electrical C ode and applicable local codes and ordinances. Do not use an extension cord or an adapter plug.

???Never unplug the dehumidifier by pulling on the power cord. Always grip the plug firmly and pull straight out from the receptacle.

???Do not pinch, bend, or knot the power cord.

How It Works

W hen the unit is started, the fan begins to pull moisture-laden air across the dehumidifying coils. The coils condense or draw moisture from the air, and air flows through the side louvers into the room as dry, warm air. Moisture removed from air is collected in a bucket on the front of the dehumidifier.

The unit is designed to operate between 41 F (5 C ), and 96 F (35 C ).

If the unit is switched off and needs to be switched on again, wait three minutes before doing so.

Make sure the tank is fitted correctly otherwise unit will not turn on.

3

OPERATION & FEATURES

Allow the unit to reach room temperature before operating.

To begin operating the dehumidifier, follow these steps:

1. Plug the power cord into a properly grounded 115 volt AC outlet. Note the POWER indicators will illuminate.

2. To turn the unit on press the ON/OFF button. The unit will run in the factory setting of CONTINUOUS and high fan speed.After a few seconds the unit will display the actual room's relative humidity. This will be the case after each and every change of setting.It is recommended you leave the unit running in the CONTINUOUS setting for the first three or four days until the sweating and dampness odors have stopped.

4

3. After a few days when the Relative Humidity has declined, press the HUMIDITY + or - buttons to choose a value between 35% to 80%, so the room is kept at a

comfortable concentration.Pressing the + or - buttons will change the humidity selection in 5% increments.If at any time you want to return to the CONTINUOUS Mode, pressing the HUMIDITY - button will lower the Relative Humidity through the 5% increments until the Continuous indicator is lit and the display reads CO.

4. You can also use the FAN button to change the fan speed to HIGH()

or LOW( ). The indicator light will show the setting you have selected. A higher fan speed will result in quicker moisture removal.

5. The FILTER RESET light will illuminate after 250 hours of operation. At this time refer to the Care and Cleaning section to remove and clean the filter. Once the filter has been cleaned , to extinguish the light simply press the FILTER button.

5

6. The TIMER function enables you to either start or stop the unit in the choice of 2 or 4 hours.If the unit is running then selecting TIMER at 2 hours will turn the unit

off after 2 hours.If the unit is off pressing the TIMER button and selecting say 4 hours, the unit will turn on after 4 hours and remain working in the selected mode.The POWER indicator must be lit to make sure power is being supplied to the unit.

7. To shut the unit down, press the ON/OFF button. Note: the power indicator will still be lit when the unit is turned off. Only removing the plug will extinguish these lights.

FAULT CODES

If the display reads "F1" or "F2", a sensor has failed. Contact your Authorized Frigidaire Service Center.

6

REMOVING COLLECTED WATER

1.Emptying the Bucket:

a.When the bucket is full the unit will shut down and the BUCKET FULL indicator light will illuminate.

b.Do not move the unit at this point otherwise water may spill on the floor.

c.Press sides of bucket gently to unclip the bucket from the unit.

d.Remove the bucket as shown in the photographs below and empty the bucket.

e.Replace the empty bucket back into the unit and once seated correctly the unit will start up again.

f. You should hear a click when the bucket is in the correct position.

,IWKHEXFNHWIXOOOLJKWGRHVQRWH[WLQJXLVKFKHFNWKDWWKHIORDWLVFRUUHFWO\VQDSSHG

LQSODFHDVLQGLFDWHGE\WKHdiagram

7

2.Continuous Drainage:

a.For constant drainage operation, you will need a garden hose and a drain nearby to discharge the water into.

b.Remove the bucket from the unit and set aside.

c.Lift up the side flap located on the left side of the unit as looking from the front. (fig.1)

d.Insert the female threaded end of the hose through the opening. (fig.2)

e.Screw the garden hose onto the threaded portion of the tray underneath the bucket opening. (fig.3)

f.Make sure the hose is secure so there are not leaks.

g.Direct the hose toward the drain making sure that there are no kinks that will stop the water flowing.

h.Place the end of the hose into the drain.

i.Place the bucket back in the unit and make sure that it is located correctly. (fig.4)

j.Select the desired humidity setting and fan speed on the unit for continuous draining to start.

Note: If the unit stops operating check that the bucket full light is illuminated. If it is remove the bucket and empty the contents and then check the seal between the hose and the drip tray. If there is a small leak then replace the hose gasket and re-tighten the hose.

CARE AND CLEANING

1.Filter

a. Remove the filter every two weeks based on normal operating conditions.

E 7RUHPRYHWKHILOWHUUHPRYH%XFNHWWKHQ pull filter downwards.

c.Wash the filter with clean water then dry.

d.Re-install the filter, replace Bucket.

2.Cabinet

a.Dust cabinet with an oil-free cloth, or using a damp cloth.

b.Vacuum grill using brush attachment.

3.Water Bucket

a. Clean bucket with warm water and detergent.

STORAGE

When unit is not in use unplug and use the cord wrap shown for your model type.

1.2.

8

Avoid Service Checklist

O CCURRENCE

Before calling for service, review this list. It may save you time and expense. This list includes common occurrences that are not the result of defective workman- ship or materials in this appliance.

SO LUTIO N

If These Solutions Fail, Call 1-800-444-4944 For Frigidaire Service.

9