G2579

Instructions

TELESCOPE & PROJECTOR

Please keep this instruction sheet for future reference, as it contains important information.

Requires four ???C??? (LR14) alkaline batteries for operation (not included).

Requires one KPR113 Krypton light bulb (included).

Tool required for battery installation and light bulb replacement: Phillips screwdriver (not included).

Battery Installation

Battery

Compartment

Battery Safety Information

1.5V x 4 ???C??? (LR14)

Shown Actual Size

???Locate the battery compartment door on the top of the toy.

???Loosen the screw in the battery compartment door with a Phillips screwdriver. Lift the bat- tery compartment.

???Insert four ???C??? (LR14) alka- line batteries.

Hint: We recommend the use of alkaline batteries for longer battery life.

???Replace the battery compart- ment door and tighten the screw with a Phillips screwdriver. Do not over-tighten.

Batteries may leak fluids that can cause a chemical burn injury or ruin your toy. To avoid battery leakage:

???Do not mix old and new batteries or batteries of different types: alkaline, standard (carbon-zinc) or rechargeable (nickel-cadmium).

???Insert batteries as indicated inside the battery compartment.

???Remove batteries during long periods of non-use. Always remove exhausted batteries from the toy. Dispose of batteries safely. Do not dispose of batteries in a fire. The batteries may explode or leak.

???Never short-circuit the battery terminals.

???Use only batteries of the same or equivalent type, as recommended.

???Do not charge non-rechargeable batteries.

???Remove rechargeable batteries from the toy before charging.

???If removable, rechargeable batteries are used, they are only to be charged under adult supervision.

2

Assembly

Hole

Threaded Bar

Plastic Screw

Tripod

???Place the projector/telescope upside-down on a flat surface.

???Position the tripod with the rib side facing down.

???Insert the tripod into the center slot on the projector/telescope.

???Align the holes in the projector/telescope with the hole in the tripod.

???Push the threaded bar through the holes in the projector/telescope and the tripod.

???Place the plastic screw on the end of the threaded bar and tighten. Do not over-tighten.

3

Using the Telescope

WARNING

Never point the telescope at or near the sun. Viewing the sun can cause instant, permanent eye damage.

Cushioned Eyepiece

Telescope

Focus Knob

Tripod

Angle Adjustment Knob

Helpful Hints: This product has been designed for use with children. We do, however, recommend that you help them set up the product for telescope or projector use and teach them how

to use it. Remove ViewMaster?? reel from the projector before using the telescope.

???Unfold the tripod into the open position.

???Stand the telescope on its legs on a hard, flat surface.

???Point the telescope at the desired object.

???Tighten the angle adjustment knob. Do not over-tighten.

???Look through the eyepiece.

???Turn the telescope focus knob to get a sharper image.

4

Telescope Tips

STOP

Actual Image

STOP

Image Viewed

Through Telescope

???This telescope has a magnification power of 17.5X. This means that objects seen through the telescope look 17.5 times larger than with the eyes alone.

???This telescope is a refracting telescope. When you look at an object with this telescope, the object will appear backwards. For example, if you look at a STOP sign, you will see the word backwards (refer to the picture above).

???It???s easier to find objects when you move the telescope up and down because up is still up, and down is still down. They are not reversed.

???Practice moving the telescope slowly from side to side until you can easily focus on an object.

Looking through your Telescope

There are many exciting things to discover with your telescope. Remember, never look at the sun or any other bright light with your telescope, because that can cause permanent, instant eye damage. The best time to use your telescope is when the sun is behind you.

???Point your telescope at the top of a tall tree. Can you see the leaves? Does the bark look smooth or rough? Can you find a bird???s nest? Is there a squirrel in the tree, or a bird on a branch?

???Point your telescope at a tall building or the rooftop of a house.

Can you see if the building is made of stones, bricks, wood or metal? Is there a chimney? What color are the bricks?

???Point your telescope at a garden. Can you focus on one flower? Do you see any birds, animals or insects? What else can you find in the garden? You may be able to watch birds perched on wires, pulling worms from the grass, or splashing in a birdfeeder. How many different birds can you see?

5

Using the Projector

Slot

Reel Storage

Compartment

Advance

Lever

Projector

Focus Knob

On/Off Switch

Tripod

On/Off Switch

You can use the projector to send bright, clear images from any View-Master?? reel onto walls, ceilings or just about anywhere.

???Unfold the tripod into the open position.

???Stand the projector on its legs on a hard, flat surface.

???Point the projector at the desired viewing area.

???Tighten the angle adjustment knob. Do not over-tighten.

???To turn the projector on: Slide the on/off switch forward.

???To turn the projector off: Slide the on/off switch backward.

???To insert the reel:

Fit the reel into the slot with the printed side to the rear and push all the way down.

???To remove the reel:

Pull the reel straight up.

Helpful Hint: Remove the reel before using the telescope.

Reel

Slot

6

Advance

Lever

Helpful Hint: Since you cannot rewind to a favorite picture, continue to press the advance lever to find a desired picture.

Projector Tips

???For the steadiest picture show, place the projector on a hard, flat surface.

???Make sure the play area is completely dark for maximum picture clarity.

???To turn the projector into a telescope, simply remove the reel and turn the projector off.

7

Storage

Reels

Reel Storage

Compartment

??? Store ViewMaster?? reels in the reel storage compartment.

???Loosen the angle adjustment knob.

???Fold the tripod legs up.

???Tighten the angle adjustment knob to lock tripod legs in place. Do not over-tighten.

???Carry this product using the convenient carrying handle.

Carrying

Handle

Tripod

8

Light Bulb (Glass Bulb) Replacement

IMPORTANT! Should the light bulb become non-functional, you are advised to remove or replace it. This should be carried out away from the child???s play area.

1

Screw

Reel Storage

Compartment

???Loosen the screw on the light bulb holder with a Phillips screwdriver. (The screw will remain in the light bulb holder.)

2

???Using a Phillips screw- driver, turn the keyhole clockwise.

Note: Make sure the tab aligns with the notch.

???Loosen the screw on the light bulb compartment door with a Phillips screw- driver.

???Lift the light bulb compart- ment door to open.

Light Bulb

Light Bulb

Holder

???Pull the light bulb holder straight up to remove.

???Pull to remove the light bulb from the light bulb holder.

???Discard the light bulb properly. Beware of cracked or broken glass.

???Insert a new KPR113 Krypton bulb.

???Replace the light bulb holder in the light bulb compartment. Tighten the screw with a Phillips screw- driver. Do not over-tighten.

Light Bulb

Compartment Light Bulb

Holder

Light Bulb

Screw

9

3

??? Close the light bulb compart- Keyhole ment door and tighten the

screw with a Phillips screw- driver. Do not over-tighten.

???Using a Phillips screwdriver, turn the keyhole counter-

clockwise.

???Turn the projector on without a reel in place.

???Using a Phillips screwdriver, turn the keyhole clockwise and counter-clockwise to adjust the bulb brightness.

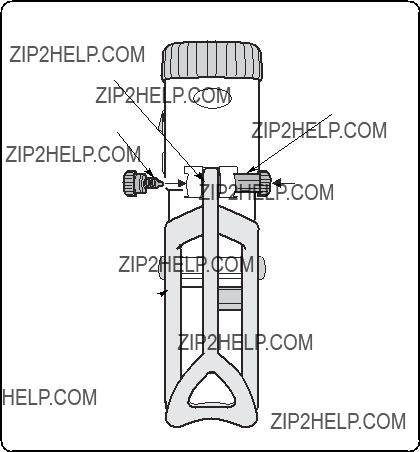
Helpful Hint: Point the projector at a white wall or surface to help determine bulb brightness. Continue turning the keyhole until you have the brightest light with minimum dark spots.

Care

???Wipe the outside of this toy with a clean cloth dampened with a mild soap and water solution. Do not immerse this toy.

???Clean the lenses with soft, damp tissue or damp cotton cloth. Do not rub or wipe the lenses with a dry cloth because that will cause scratches.

???Keep the lenses clean and dry. Do not touch them with your fingers because that will eventually damage the lenses.

Consumer Information

Question? We???d like to hear from you! Call Fisher-Price?? Consumer Relations, toll-free at 1-800-432-KIDS (5437),

8 AM - 6 PM EST Monday through Friday. Hearing-impaired consumers using TTY/TDD equipment, please call 1-800-382-7470. Or, write to: Fisher-Price Consumer Affairs, 636 Girard Avenue, East Aurora,

New York 14052, U.S.A.

For countries outside the United States:

CANADA Questions? 1-800-567-7724. Mattel Canada Inc., 6155 Freemont Blvd., Mississauga, Ontario L5R 3W2.

GREAT BRITAIN Mattel UK Ltd, Vanwall Business Park, Maidenhead SL6 4UB. Helpline: 01628 500302.

AUSTRALIA Mattel Australia Pty. Ltd., 658 Church Street, Locked Bag #870, Richmond, Victoria 3121 Australia. Consumer Advisory Service 1300 135 312.

NEW ZEALAND 16-18 William Pickering Drive, Albany 1331, Auckland.

ASIA Mattel East Asia Ltd, Room 1106, South Tower, World Finance Centre, Harbour City, Tsimshatsui, HK, China.

??Disney/Pixar.

Visit the Incredibles website at www.incredibles.com

Fisher-Price, Inc., a subsidiary of Mattel, Inc., East Aurora, NY 14052 U.S.A. ??2004 Mattel, Inc. All Rights Reserved. View-Master and View-Master logo are U.S. trademarks of Mattel, Inc.

www.view-master.com