ELECTRICAL HAZARD
 WARNING
???Battery can fall out and injure a child if vehicle tips over. Always use battery clamp.
???PREVENT FIRE
-Do not bypass a Power Wheels?? fuse. It is a safety device.
-Use only a Power Wheels?? 25 Amp fuse.
-Never modify the electrical system. Alterations could cause a fire resulting in serious injury and could also ruin the electrical system.
-Use of the wrong type battery or charger could cause a fire or explosion resulting in serious injury.
-Use of Power Wheels?? components in products other than Power Wheels?? vehicles could cause overheating, fire or explosion.
???The battery must be handled by adults only. The battery is heavy and contains sulfuric acid (electrolyte). Dropping the battery could result in serious injury.
???Never allow children to charge the battery. Battery charging must be done by adults only. A child could be injured by the electricity involved in charging the battery.
???Never lift or carry the battery by the wires or connector. This can damage the battery and possibly cause a fire resulting in serious injury. Lift and carry the battery by the case only.
???Read the safety instructions on the battery.
???Examine the battery, charger and their connectors for excessive wear or damage each time you charge the battery. If damage or excessive wear is detected, do not use the charger or the battery until you have replaced the worn or damaged part.
???HOT motors. Handle carefully.
RIDING HAZARD
 WARNING
???Prevent Injuries and Deaths
???Direct Adult Supervision Required
???Keep Children Within Safe Riding Areas.
These areas must be:
-away from swimming pools and other bodies of water to prevent drownings
-generally level to prevent tipovers
-away from steps, driveways, cars, roads and alleys.
CAUTION
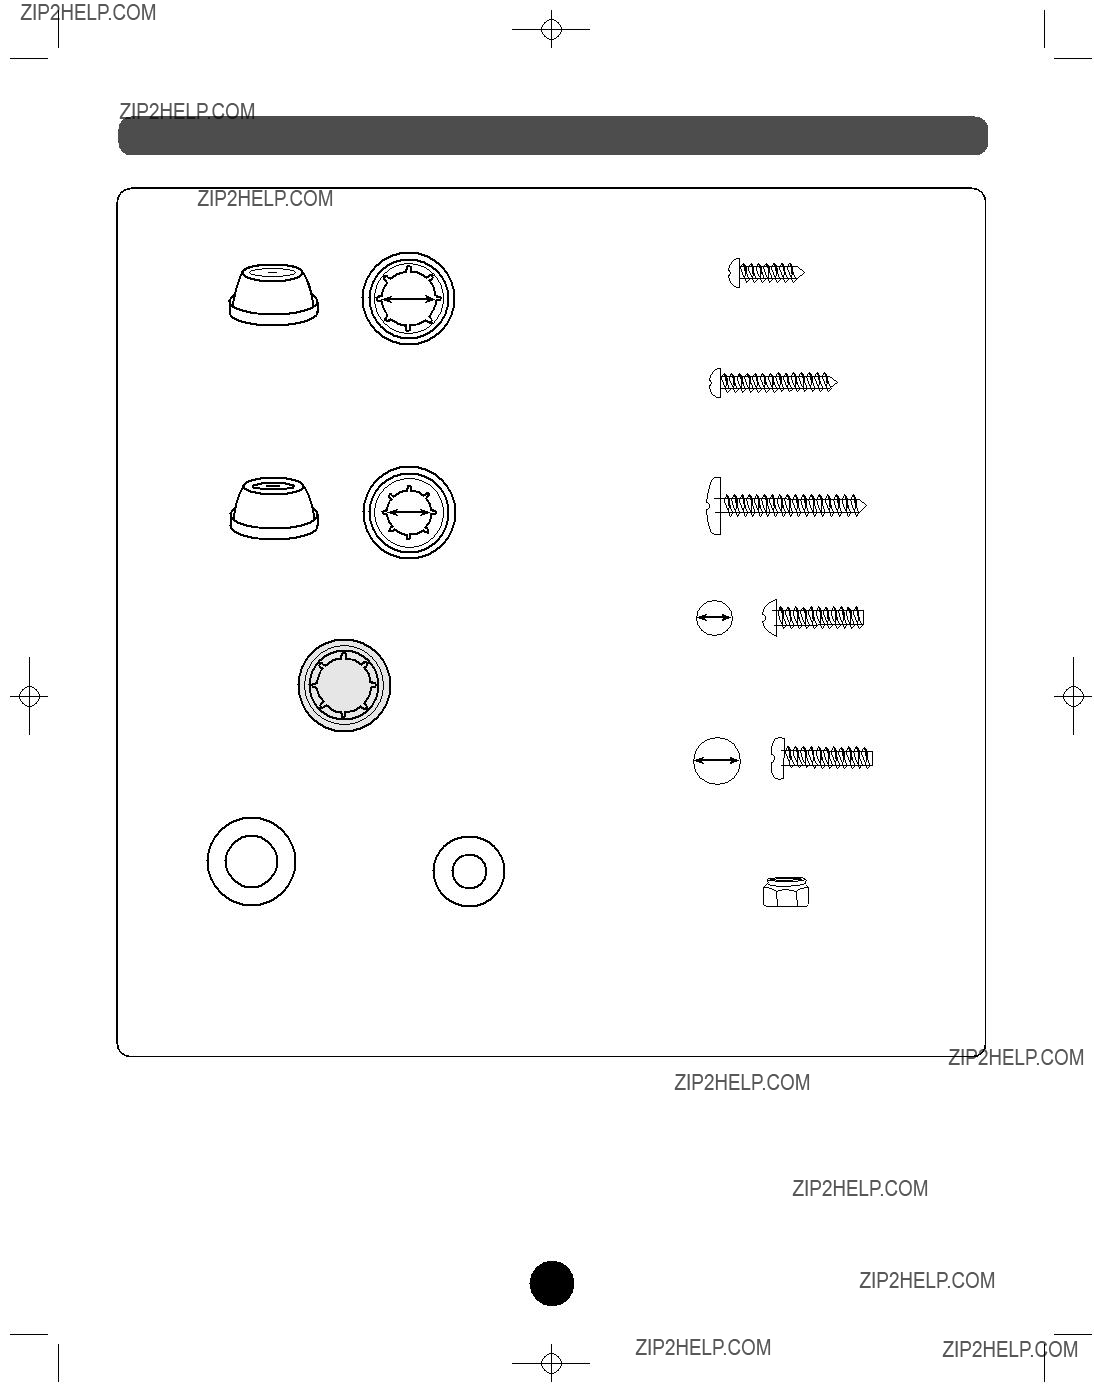
???In the unassembled state, this package contains small parts. Adult assembly is required.
???Use the charger in dry locations only.


 22
22
 WARNING
 CAUTION
 position.


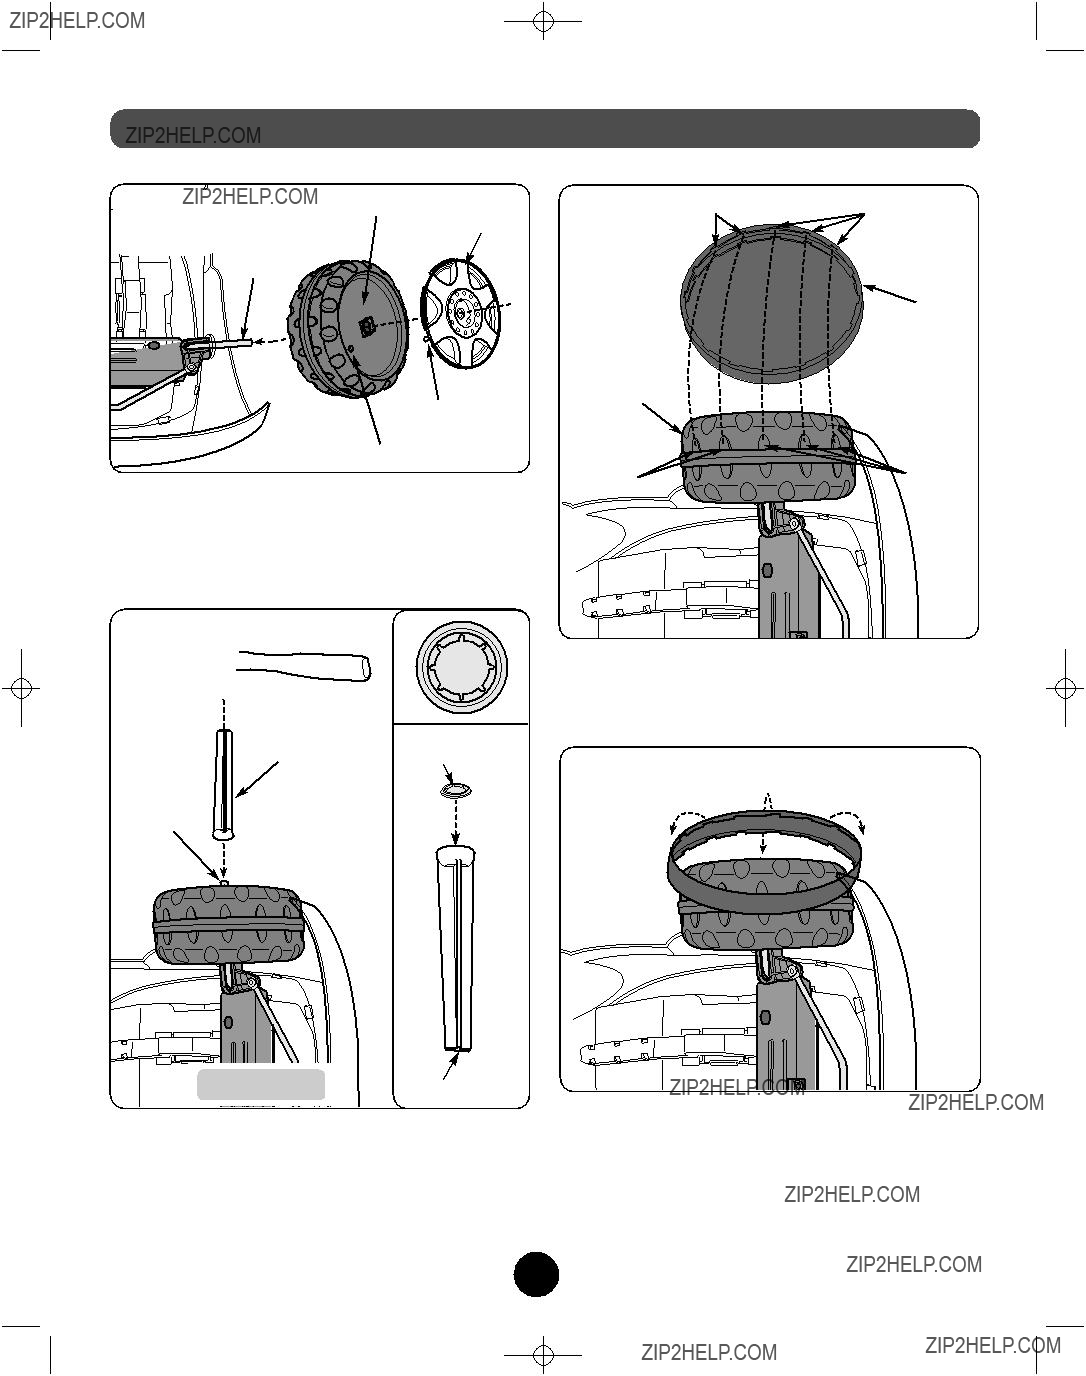
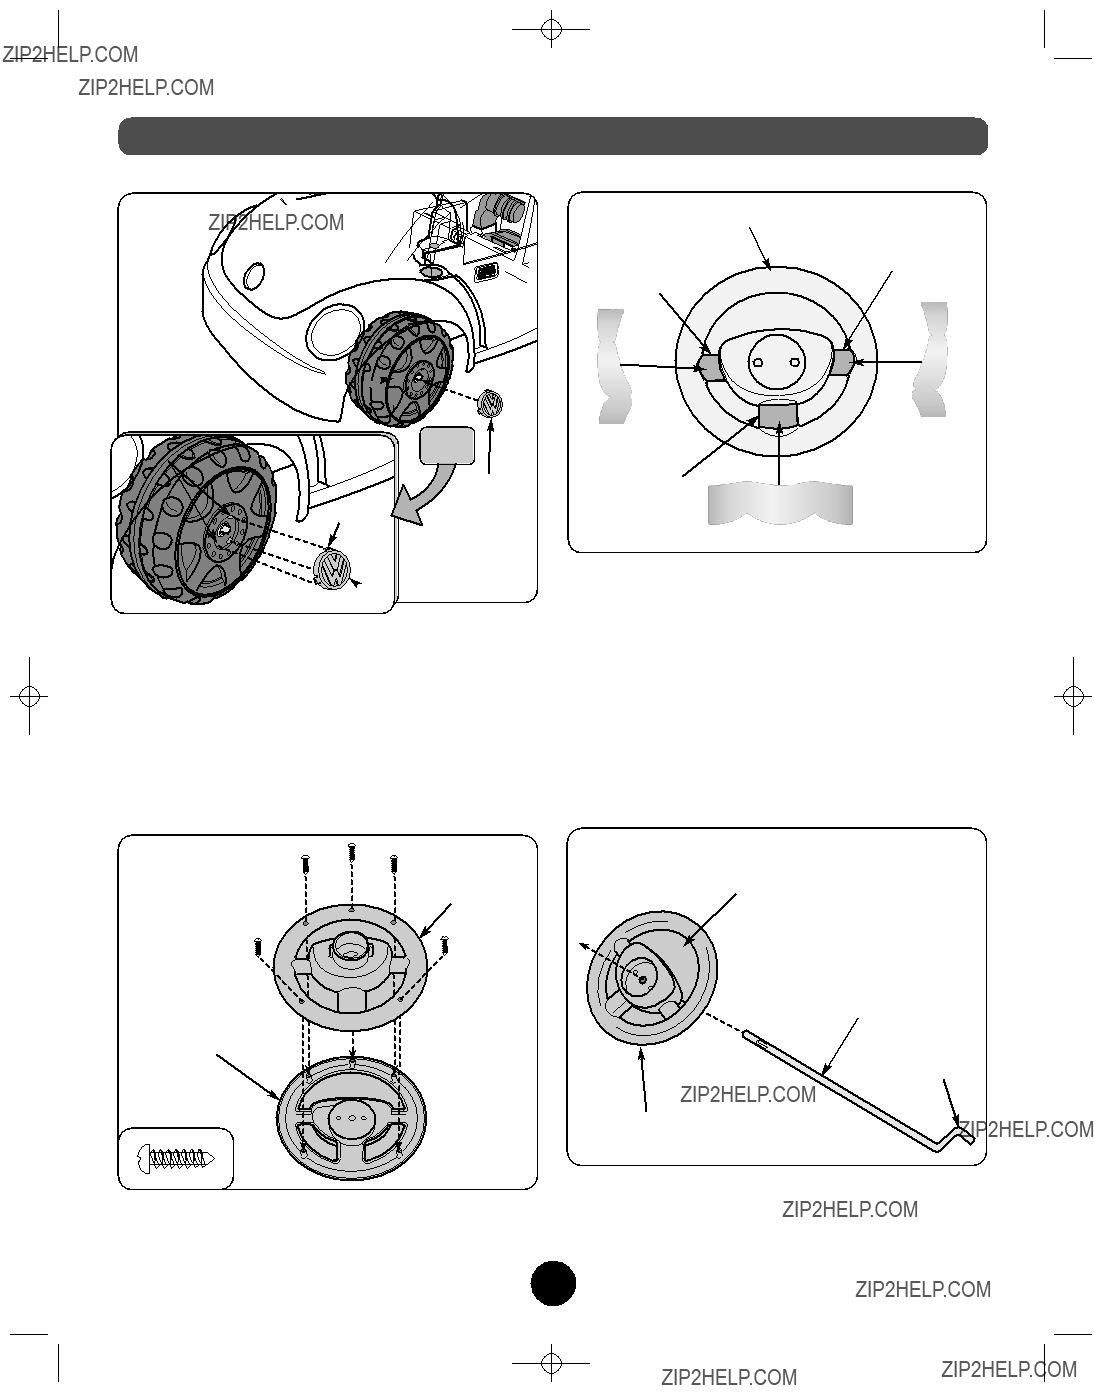
 Hubcap
 Rear Axle
 Teeth
Teeth


 Door
Door


 Hole
Hole Axle
Axle Linkage
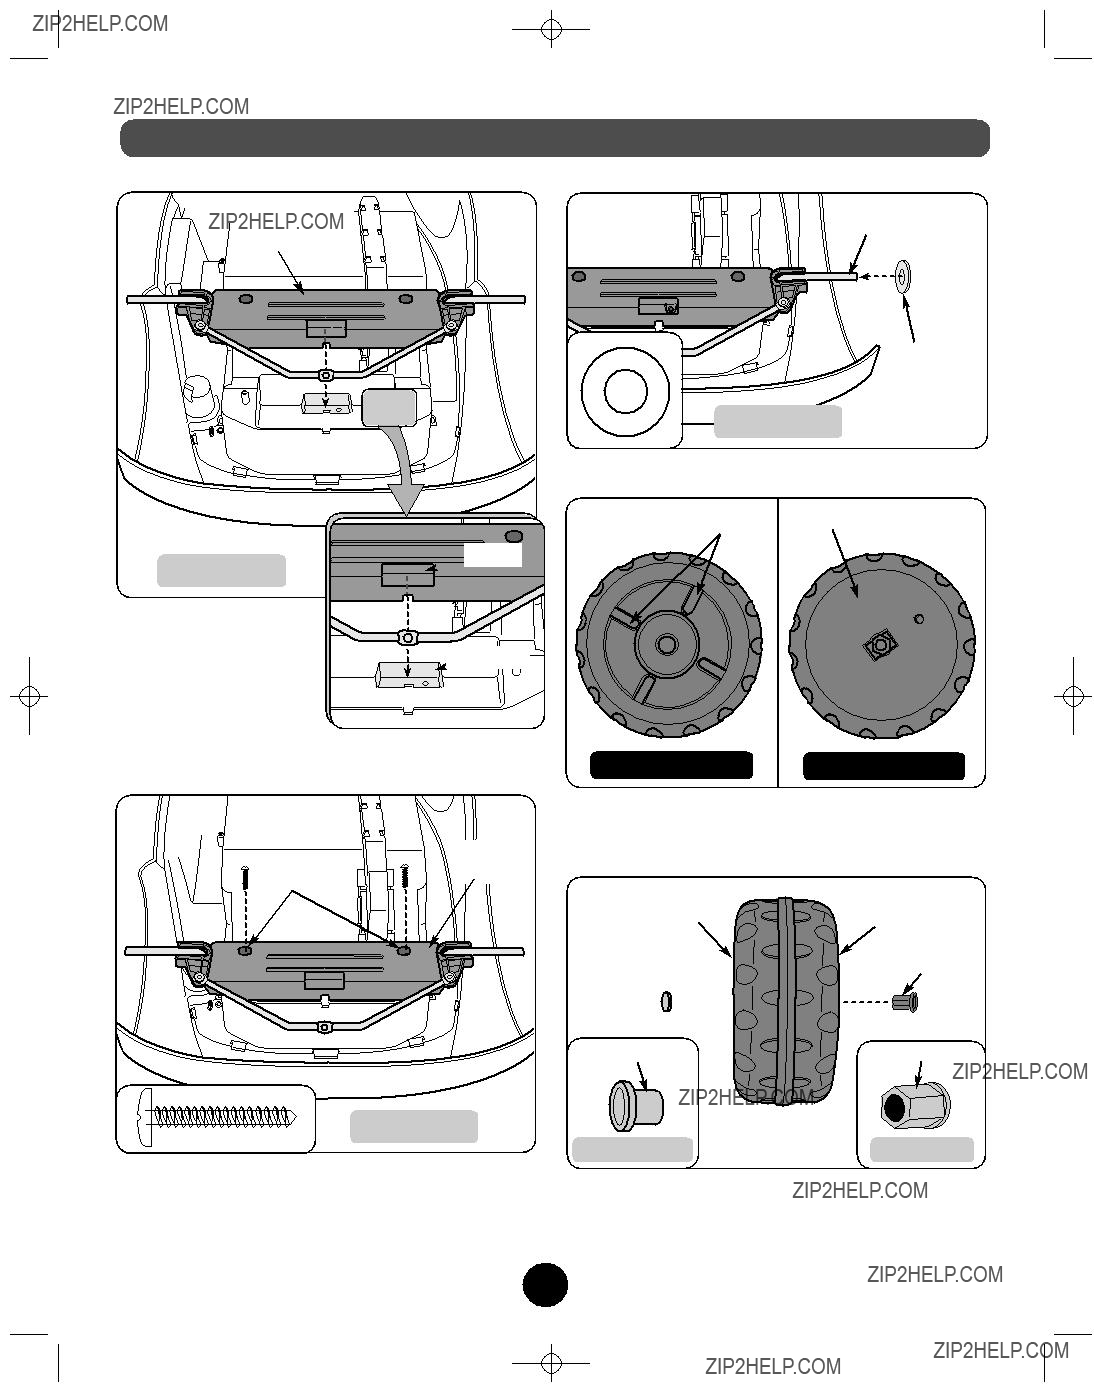


 Notch
Notch Notch
Notch


 View
View
 position.


 27
27
 position.
 See
See
 position.
 WARNING


 Over 400


 Authorized Service


 If you are missing parts or need assistance, please call us