dB ??? decibel ??? A unit used to express relative difference in power or intensity, usually between two acoustic or electric signals, equal to ten times the common logarithm of the ratio of the two levels.
Diagonal Screen ??? A method of measuring the size of a screen or a projected image. It measures from one corner to the opposite corner. A 9 ft high, 12 ft wide, screen has a diagonal of 15 ft. This document assumes that the diagonal dimensions are for the traditional 4:3 ratio of a computer image as per the example above.
DHCP ??? Dynamic Host Configuration Protocol ??? A network protocol that enables a server to automatically assign a TCP/IP address to a device.
DLP?? ??? Digital Light Processing??? ??? Reflective display technology developed by Texas Instruments, using small manipulated mirrors. Light passing through a color filter is sent to the DLP mirrors which arrange the RGB colors into a picture projected onto screen, also known as DMD.
DMD ??? Digital Micro-Mirror Device ??? Each DMD consists of thousands of tilting, microscopic aluminum alloy mirrors mounted on a hidden yoke.
DNS ??? Domain Name System ??? An internet service that translates domain names into IP addresses.
Focal Length ??? The distance from the surface of a lens to its focal point.
Frequency ??? It is the rate of repetition in cycles per seconds of electrical signals. Measured in Hz (Hertz).
HDCP ??? High-Bandwidth Digital-Content Protection ??? A specification developed by Intel??? Corporation to protect digital entertainment across digital interface, such as DVI and HDMI.
HDMI ??? High-Definition Multimedia Interface ??? HDMI carries both uncompressed high definition video along with digital audio and device control data in a single connector.
Hz (Hertz) ??? Unit of frequency.
Keystone Correction ??? Device that will correct an image of the distortion (usually a wide-top narrow-bottom effect) of a projected image caused by improper projector to screen angle.
Maximum Distance ??? The distance from a screen the projector can be to cast an image that is usable (bright enough) in a fully darkened room.
Maximum Image Size ??? The largest image a projector can throw in a darkened room. This is usually limited by focal range of the optics.
Minimum Distance ??? The closest position that a projector can focus an image onto a screen.


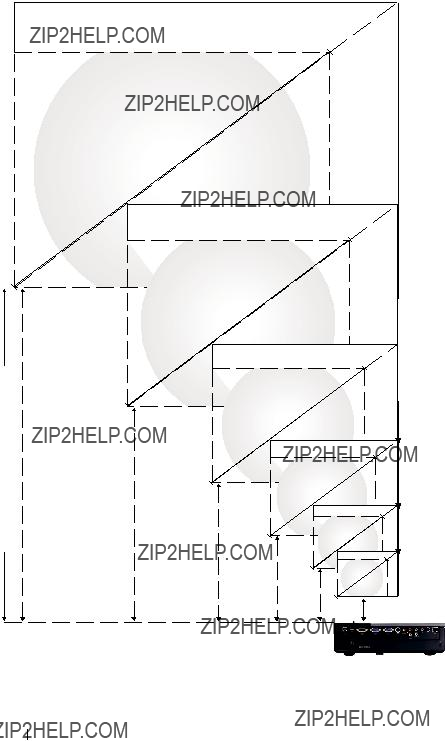
 307"(779.78cm)
 277"(703.58cm)
 215"(546.10cm)


 or
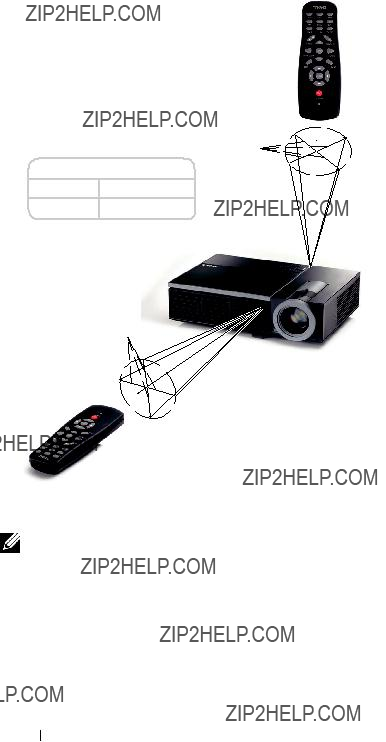
or  buttons on your projector???s control panel or remote control.
 button on your projector???s control panel or press the
  or
or  buttons on your projector???s control panel or remote control. The color changes to dark blue. When an item is selected, the color changes to dark blue.
 or
or  buttons on the control panel or remote control to adjust the settings.
 button on the control panel or press the
  button or press the Menu button directly on the control panel or press the
  button on remote control, there is no


 mark on remote now.
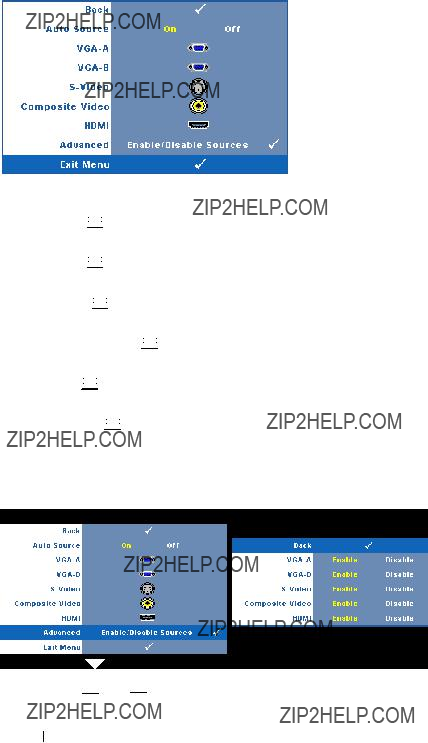
 on the control panel or press
  on the control panel or press
  on the control panel or press
  on the control panel or press
  on the control panel or press


 on the control panel or press
 and
and 


 to enable or disable


 and
and 


 to enable or disable


 and
and 


 to enable or disable


 and
and 


 to enable or disable Composite Video input.
  and
and  to enable or disable HDMI input.
 and
and 

 and
and  to adjust the display contrast.


 on the control panel or press
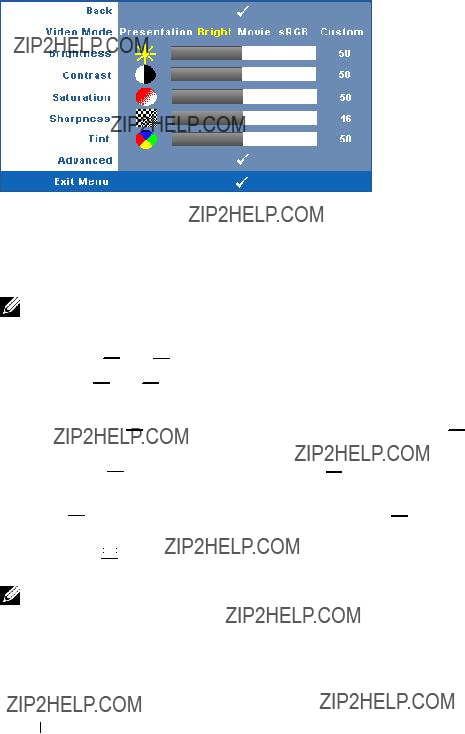


 and
and 


 and
and 


 to adjust the display contrast.
 to decrease the amount of color in the image and
  to increase the amount of color in the image.
 to decrease the sharpness and


 to increase the amount of green in the image and
  to increase the amount of red in the image (available for NTSC only).
 on the control panel or press
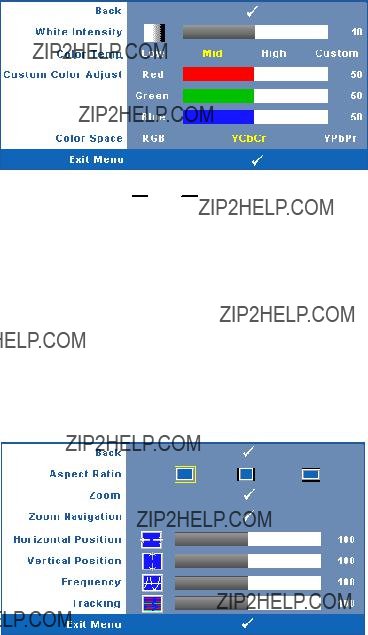
 and
and  to adjust the display white intensity.
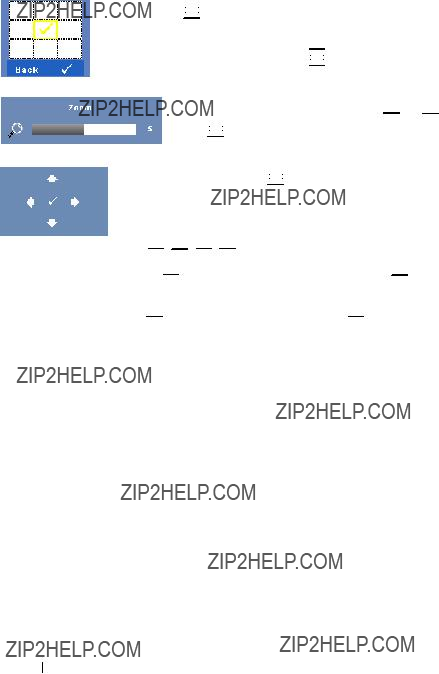
 Original ??? Select Original to maintain the aspect ratio of image projected according to input source.
 4:3 ??? The input source scales to fit the screen and projects a 4:3 image.
 Wide ??? The input source scales to fit the width of the screen to project a wide screen image.


 on the control panel or press


 on the control panel or press
  or
or 


 and press


 on the control panel or press
  on the control panel or press


 to navigate projection screen.


 to move the image to the left and
 to move the image to the right.
 to move the image down and
 to move the image up.
 Original ??? Select Original to maintain the aspect ratio of image projected according to input source.
 4:3 ??? The input source scales to fit the screen and projects a 4:3 image.
 Wide ??? The input source scales to fit the width of the screen to project a wide screen image.


 on the control panel or press


 on the control panel or press


 or
or  and press
  on the control panel or press
  on the control panel or press


 to navigate projection screen.
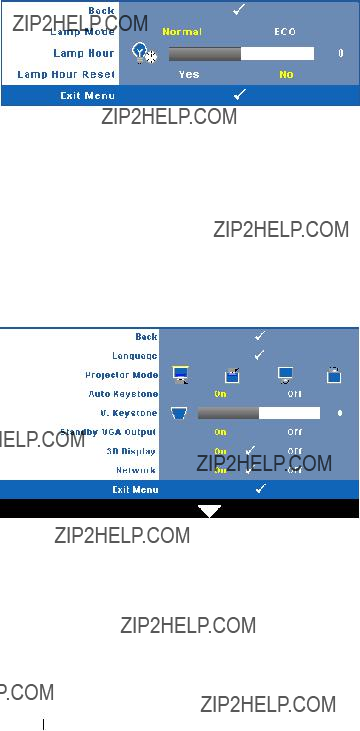


 on the control panel or press
  Front
Front  Front
Front  Rear
Rear 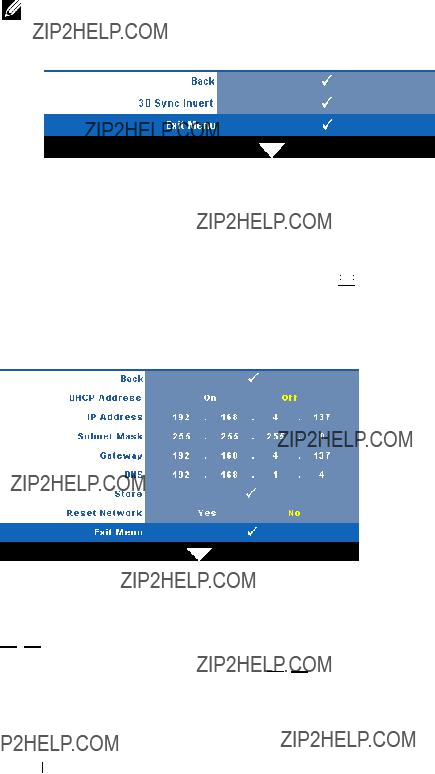


 on the control panel or press
 to select the number of IP Address, Subnet Mask, and Gateway. Key in Enter to confirm each number and then use


 to set the next item.
 on the control panel or press


 on the control panel or press


 on the control panel or press


 on the control panel or press

 on the control panel or press


 on the control panel or press
  to decrease the volume and
 to increase the volume.


 on the control panel or press


 on the control panel or press
 on the control panel or press
  on the control panel or press
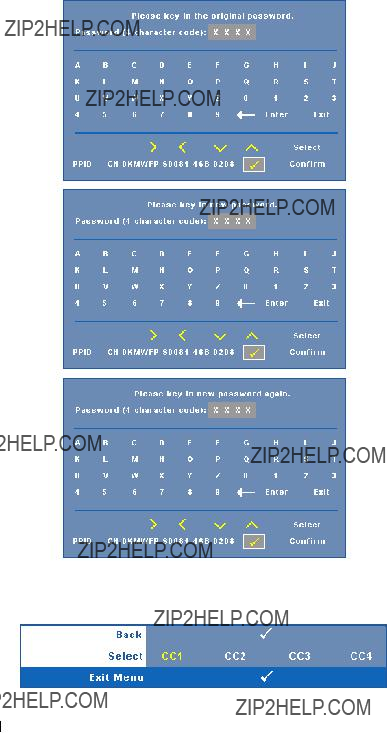


 and
and 


 buttons on the control panel simultaneously for 2 seconds. You can also invoke the test pattern 2


 and
and  buttons on the control panel simultaneously for 2 seconds.


 on the control panel or press


 Internet Options
  General
  Temporary Internet Files
  Settings


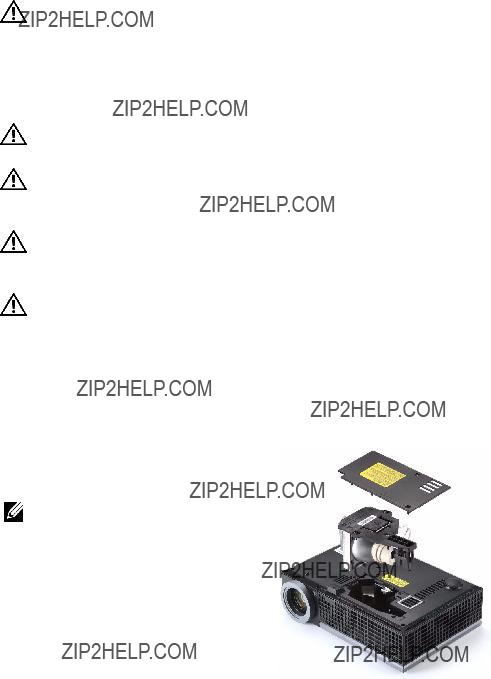

 LAMP(S) INSIDE THIS PRODUCT CONTAIN MERCURY AND MUST BE