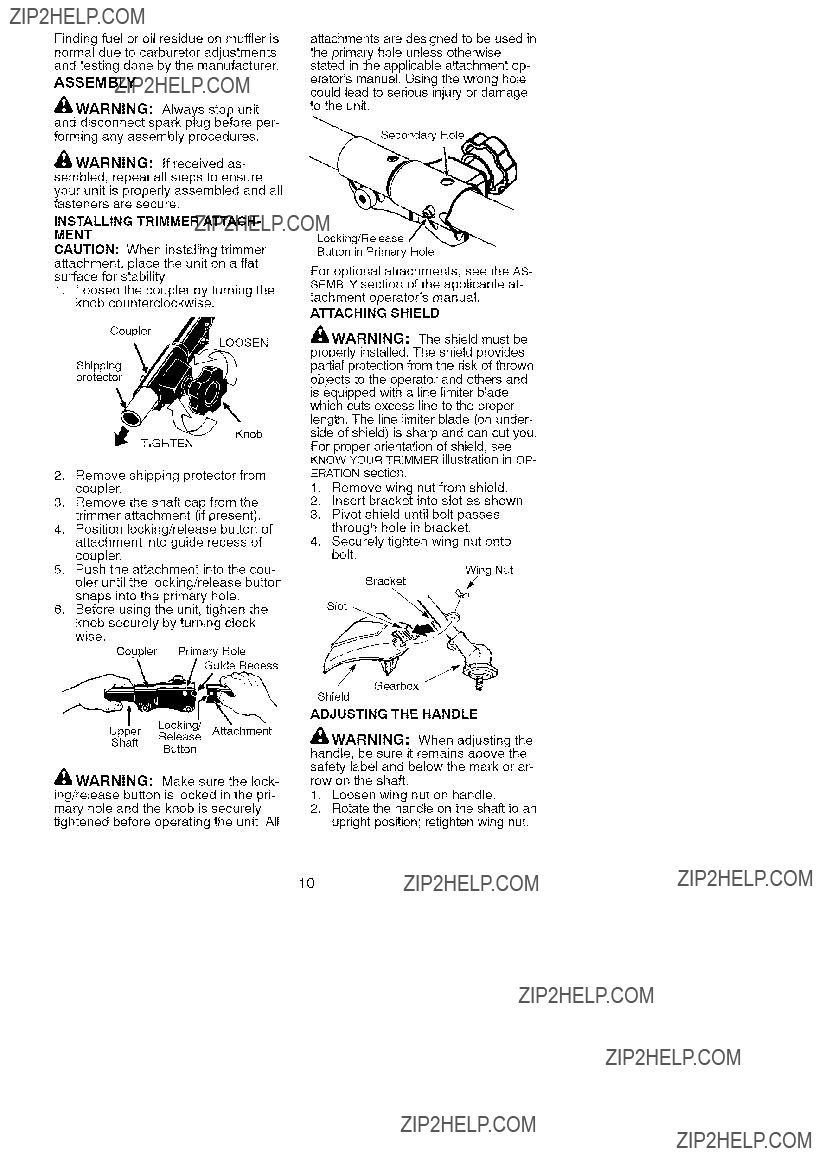
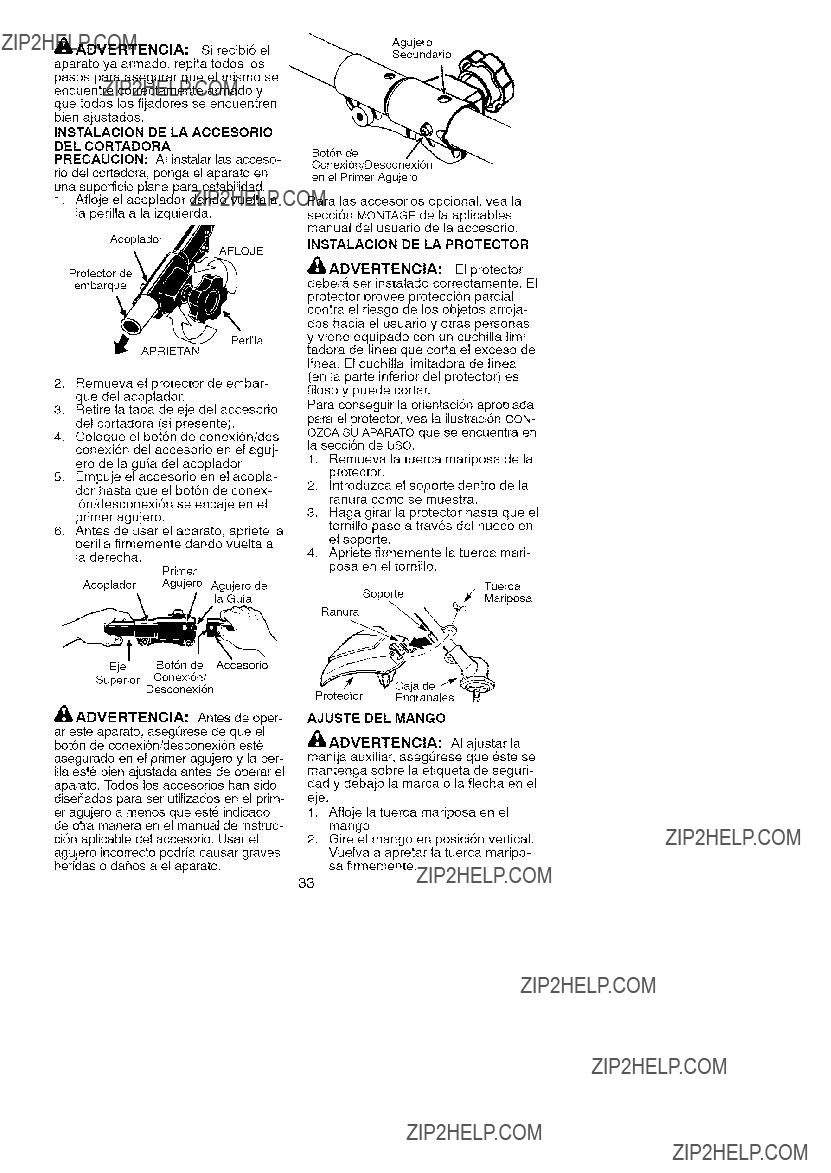
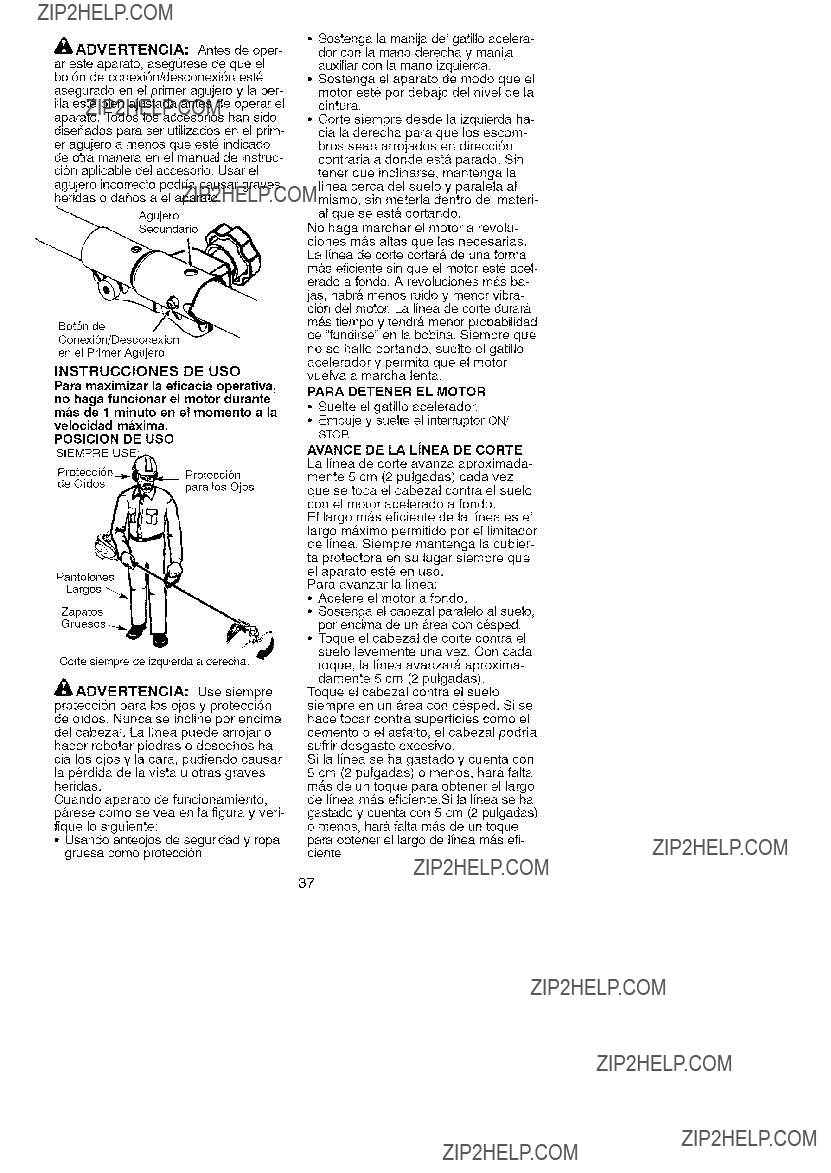
ar este aparato, asegOrese de que el bot6n de conexi6n/desconexi6n est6
asegurado en el primer agujero y la per- ilia este bien ajustada antes de operar el
aparato. Todos los accesorios han sido diseSados para ser utilizados en el prim-
er agujero a menos que est6 indicado de otra manera en el manual de instruc-
ci6n aplicable del accesorio. Usar el agujero incorrecto podria causar graves heridas o daSos a el aparato.
Agujero
Secundano
Bot6n de Conexi6n/Desconexi6n en el Primer Agujero
INSTRUOOIONES DE USO
Para maximizar la eficacia operativa,
no haga funcionar el motor durante mas de 1 minuto en el momento a la
velocidad maxima.
POSICION DE USO
SIEMPRE USE:_
Proteosidn__. Proteosidn
de oidos. Nunca se incline per encima del cabezal. La linea puede arrojar o hacer rebotar piedras o desechos ha- cia los ojos y la cara, pudiendo causar
la perdida de la vista u otras graves heridas.
Cuando aparato de funcionamiento, p_trese come se vea en la figura y veri- fique Io siguiente:
???Usando anteojos de seguridad y ropa gruesa como protecci6n.
???Sostenga la manija del gatillo acelera- dor con la mano derecha y manija auxiliar con la mano izquierda.
???Sostenga el aparato de modo que el motor est6 per debajo del nivel de la cintura.
???Carte siempre desde la izquierda ha- cia la derecha para que los escom- bros sean arrojados en direcci6n contraria a donde est,. parado. Sin
tener que inclinarse, mantenga la linea cerca del suelo y paralela al mismo, sin meterla dentro del materi- al que se est,. cortando.
No haga marchar el motor a revolu-
clones m_.s altas que las necesarias. La linea de carte cortara de una forma
m_.s eficiente sin que el motor est6 acel- erado a fondo. A revoluciones m_ts ba-
jas, habr_, menos ruido y menor vibra- ci6n del motor. La linea de corte durar_.
m_.s tiempo y tendr_, menor probabilidad de "fundirse" en la bobina. Siempre que no se halle cortando, suelte el gatillo
acelerador y permita que el motor vuelva a marcha lent&
PARA DETENER EL MOTOR
???Suelte el gatillo acelerador.
???Empuje y suelte el interruptor ON/
STOR
AVANCE DE LA LiNEA DE CORTE
La linea de corte avanza aproximada- mente 5 cm (2 pulgadas) cada vez
que se toca el cabezal contra el suelo con el motor acelerado a fondo.
El largo m_.s eficiente de la linea es el largo m_tximo permitido per el limitador de line& Siempre mantenga la cubier- ta protectora en su lugar siempre que
el aparato este en usa. Para avanzar la linea:
???Acelere el motor a fondo.
???Sostenga el cabezal paralelo al suelo, per encima de un _trea con c6sped.
???Toque el cabezal de corte contra el suelo levemente una vez. Con cada
toque, la linea avanzar_, aproxima-
damente 5 cm (2 pulgadas). Toque el cabezal contra el suelo
siempre en un _.rea con c6sped. Si se hace tocar contra superficies coma el cemento o el asfalto, el cabezal podria sufrir desgaste excesivo.
Si la linea se ha gastado y cuenta con 5 cm (2 pulgadas) o menos, hara falta
m_ts de un toque para obtener el largo de linea m_ts eficiente.Si la linea se ha
gastado y cuenta con 5 cm (2 pulgadas) o menos, har_t falta m_ts de un toque
para obtener el largo de linea mb.s eft- ciente.
37