SAFETY INSTRUCTIONS cont.
SAFETY RULES FOR ELECTRIC HEDGE TRIMMERS cont.
19.Disconnect from power source BEFORE passing the hedge trimmer to another person.
20.ALWAYS store the trimmer indoors when not in use. It should be stored in a dry place, high up or locked in a place that is out of the reach of children.
21.ALWAYS use only the accessories provided by or sold by Sears. Use of any other accessories may create a hazardous situation.
22.ALWAYS keep ventilation openings clear of debris.
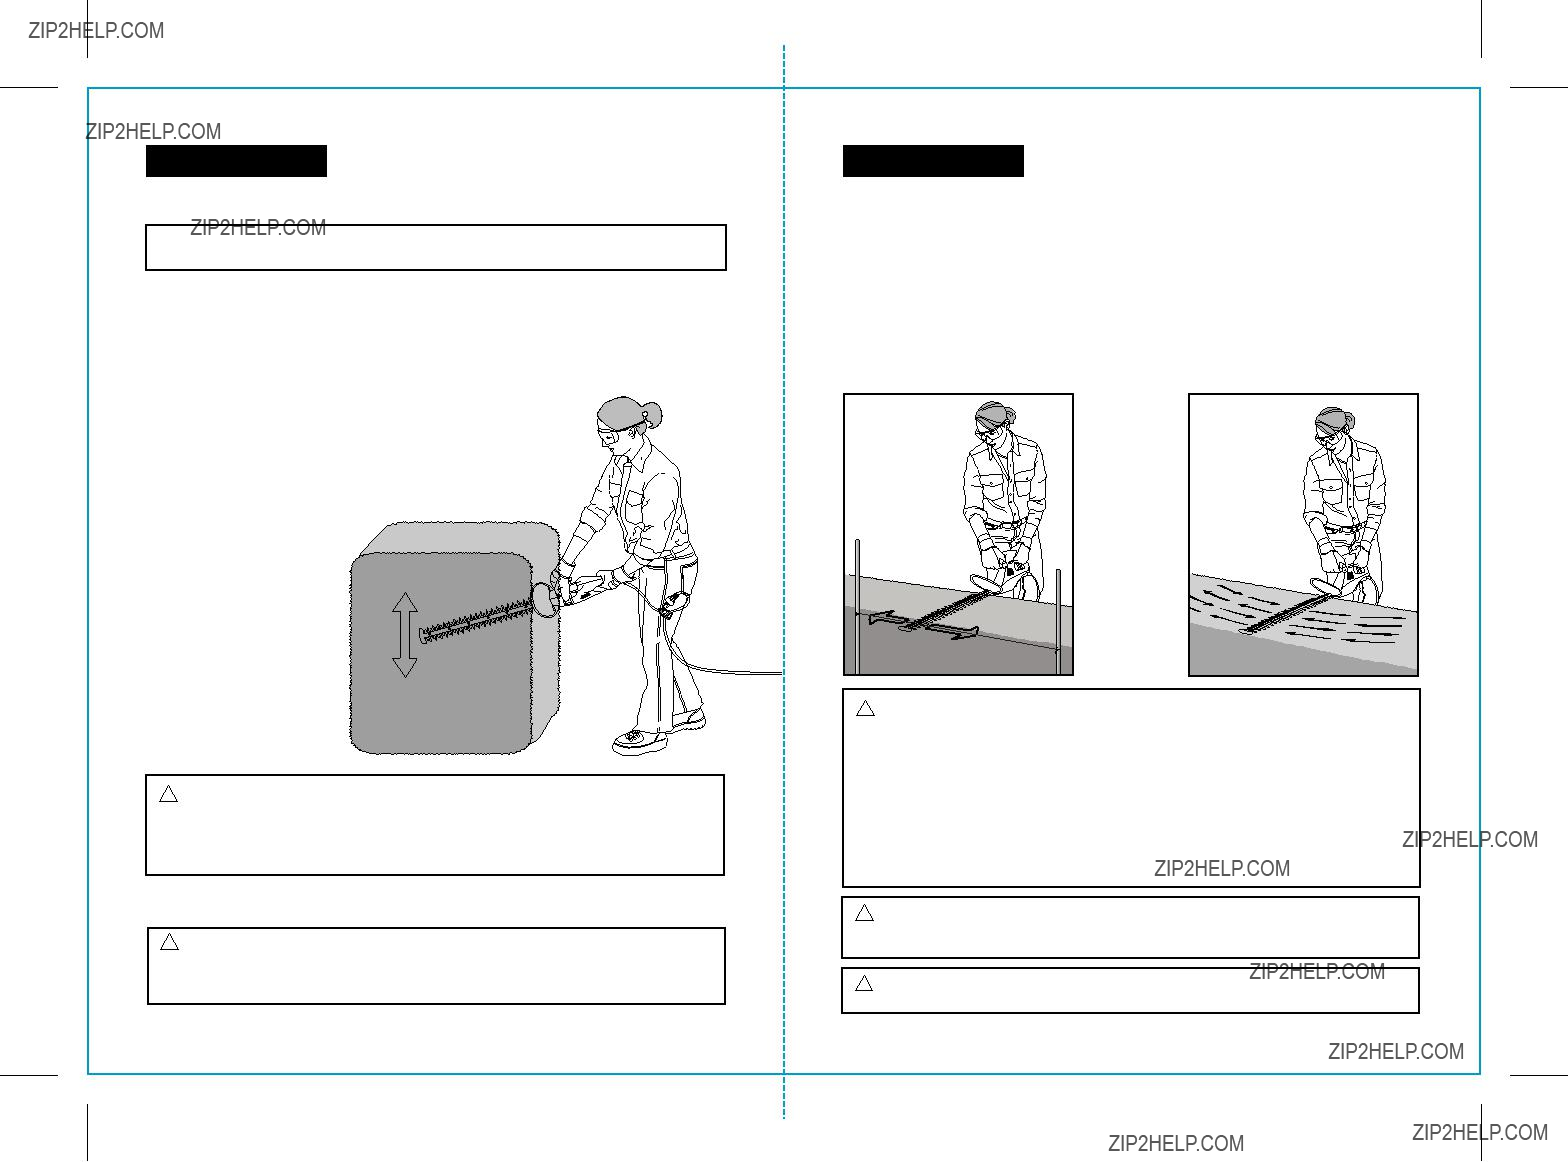
24.BEFORE using this hedge trimmer, clear the area to be cut. Remove all objects such as cords, lights, wire, or string, which can become entangled in the cutting blade.
25.If you hit an object with the hedge trimmer, CHECK to be sure trimmer is in safe operating condition BEFORE continuing to use.
! WARNING: Some dust particles created by lawn and garden tools contain chemicals known to cause cancer, birth defects or other reproductive harm. Some examples of these chemicals are:
???Compounds in fertilizers, herbicides, pesticides, and insecticides.
???Arsenic and chromium from chemically treated lumber.
Your risk from these exposures varies, depending upon how often you do this type of work. To reduce your exposure to these chemicals:
???Work in a well-ventilated area
???Work with approved safety equipment, such as those dust masks that are specially designed to filter out microscopic particles.
ADDITIONAL RULES FOR SAFE OPERATION
! WARNING: BE SURE to read and understand all instructions. Failure to follow all instructions listed below may result in electric shock, fire and/or serious personal injury.
1.Know your power tool. Read operator???s manual carefully. Learn the applications and limitations, as well as the specific potential hazards related to this tool. Following
this rule will reduce the risk of electric shock, fire or serious injury. Lend this operator???s manual to any user who borrows this hedge trimmer.
2.ALWAYS wear safety glasses or eye shields when using this tool. Everyday eyeglasses have only impact-resistant lenses; they are NOT safety glasses.
3.PROTECT your lungs. Wear a face mask or dust mask if the operation is dusty.
4.PROTECT your hearing. Wear appropriate personal hearing protection during use. Under some conditions noise from this product may contribute to hearing loss.
5.ALL VISITORS AND BYSTANDERS MUST wear the same safety equipment that the operator of the tool wears.
6.INSPECT the tool cords periodically and if damaged have them repaired at your nearest Sears Service Center. ALWAYS BE AWARE of the cord location.
10
SAFETY INSTRUCTIONS cont.
7.ALWAYS check the tool for damaged parts. Before further use of the tool, a guard or other part that is damaged should be carefully checked to determine if it will operate properly and perform its intended function. Check for misalignment or binding of moving parts, breakage of parts, and any other condition that may affect the tool???s operation.
A guard or other part that is damaged should be properly repaired or replaced at a Sears Service center.
8.Keep hands away from blades.
9.Keep both hands on handles; don???t overreach.
10.BLADES COAST after turn Off.
11.DO NOT use in wet conditions.
12.DO NOT use with damaged blade bar, cutting blades, guard, handles, power cord or extension cord. Have them repaired at your nearest Sears Service Center.
13.DO NOT store trimmer plugged into power supply.
14.SAVE THESE INSTRUCTIONS. Refer to them frequently and use them to instruct others who may use this tool. If someone borrows this tool, make sure they have these instructions also.
UNPACKING
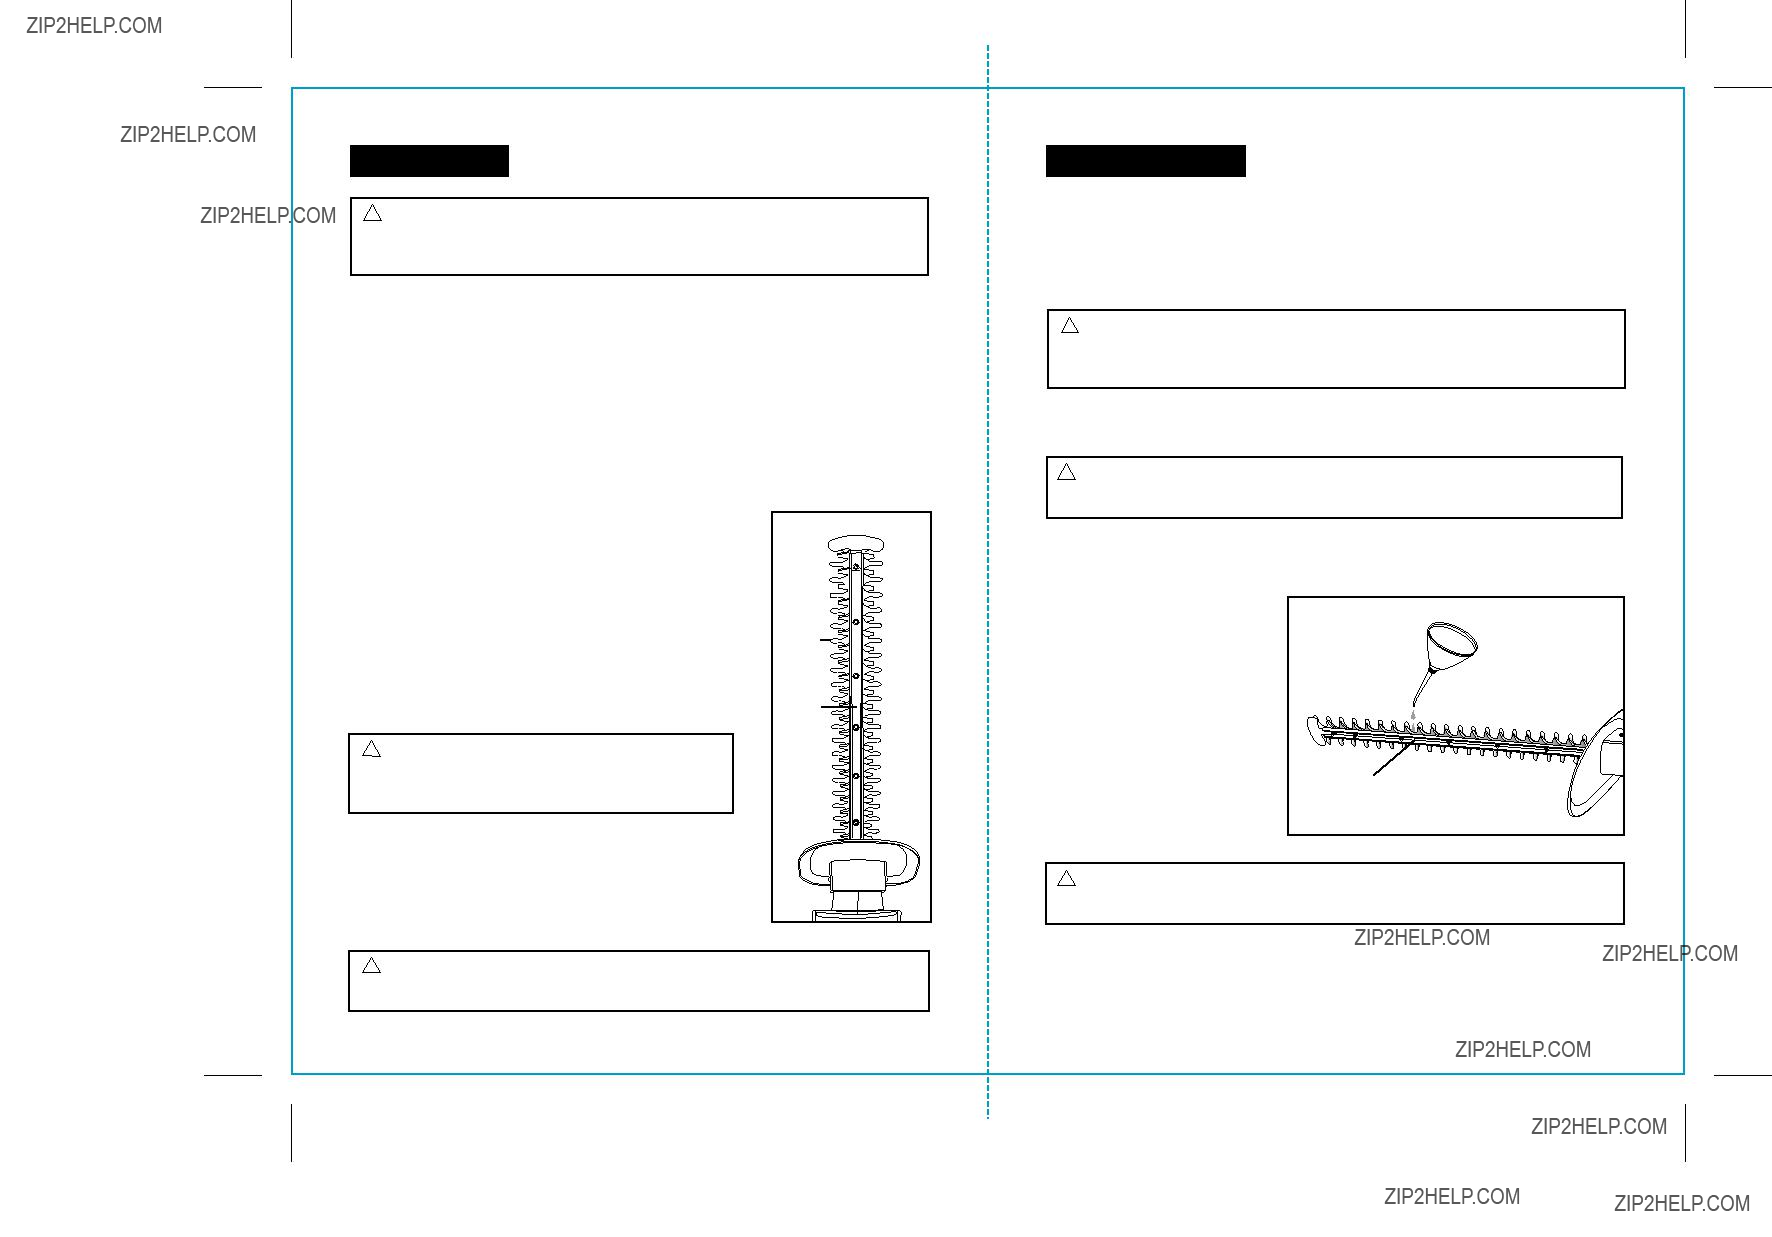
1.The trimmer comes fully assembled except for the blade guard, which must be attached.
2.Remove the hedge trimmer and guard from the carton and inspect them for damage.
3.Do not discard box or packing material until all parts are examined.
! WARNING: If any part of the hedge trimmer is missing or damaged, do not plug in the trimmer until the damaged part is repaired or replaced.
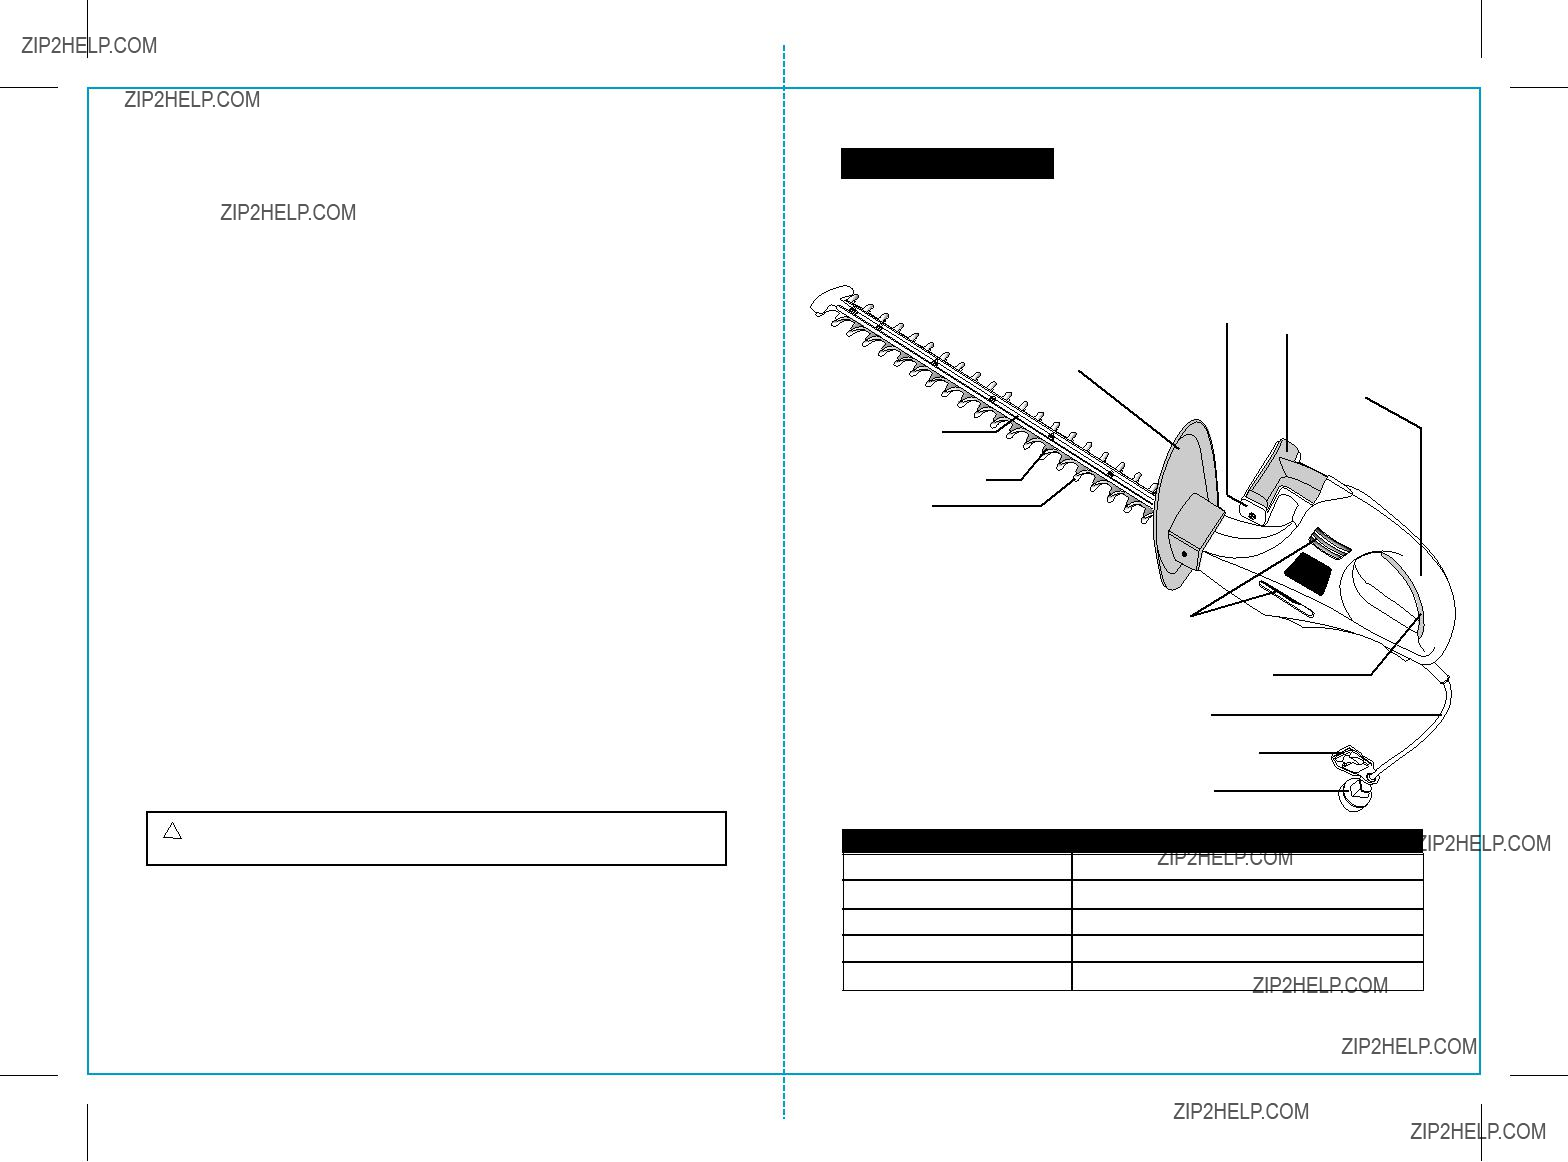
Fig. 1
1. Hedge Trimmer


 eliminates the need for the

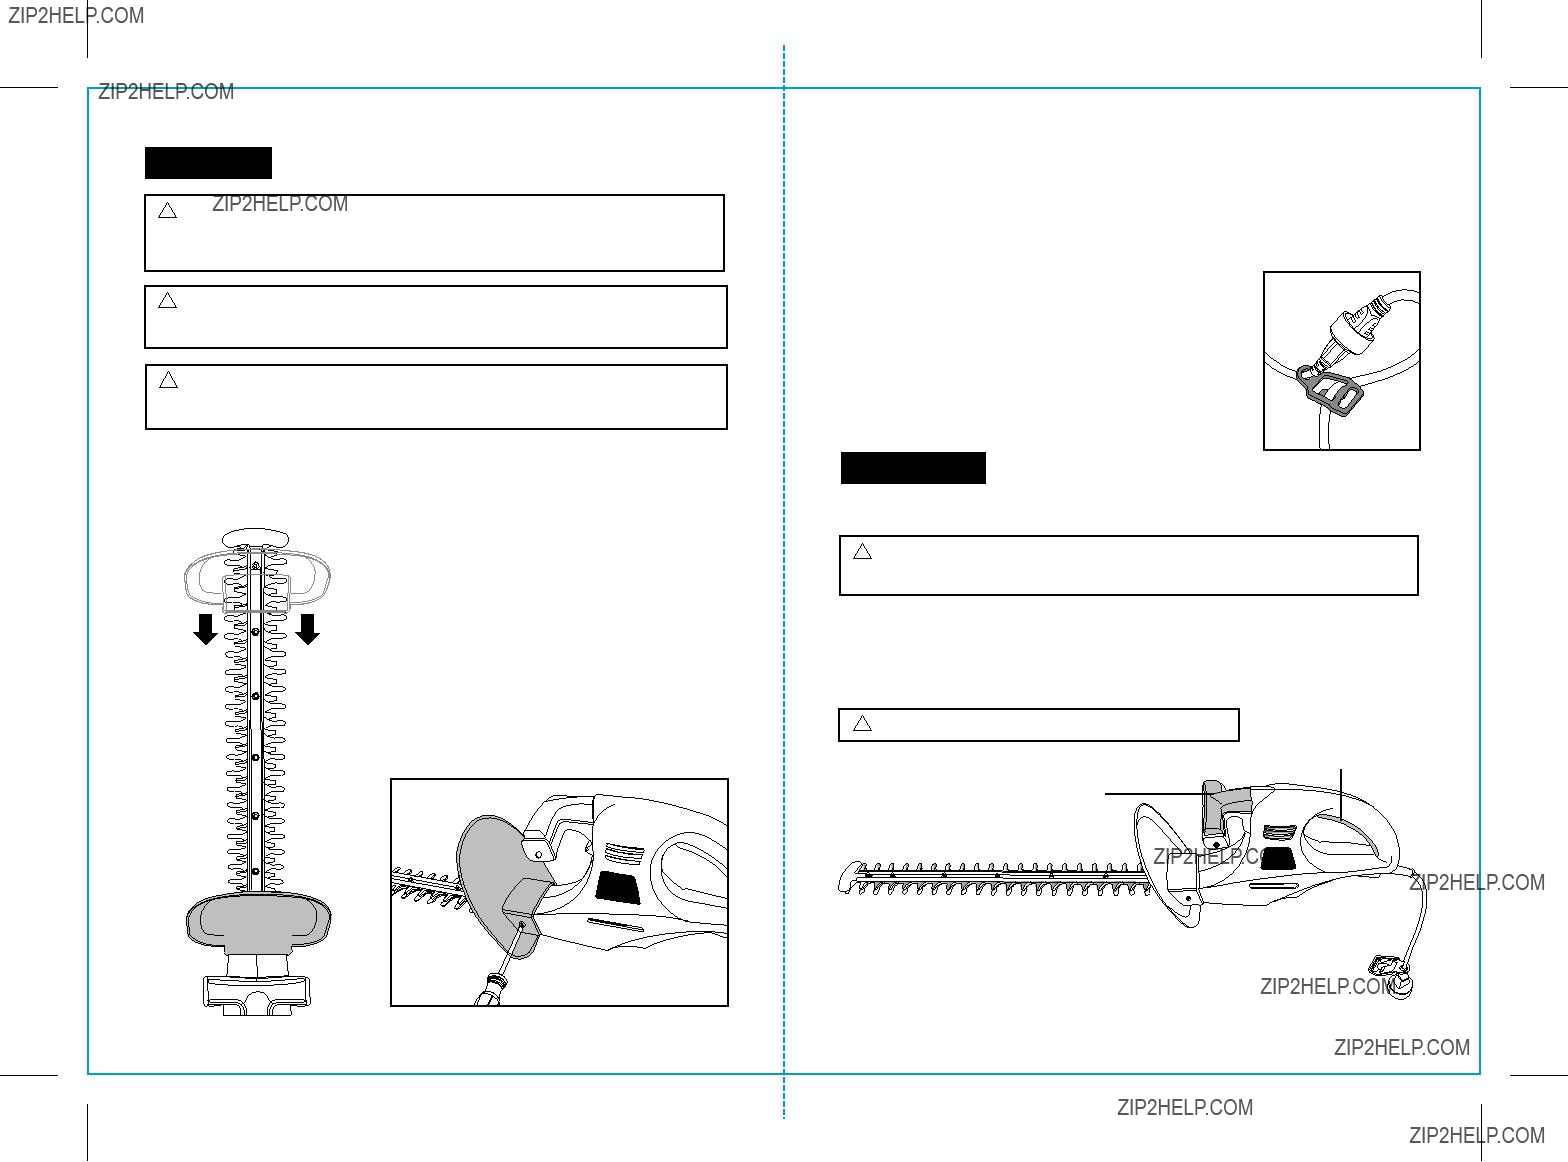


 Screw
Screw