Operators Manual

JACK STANDS

Model 950182 - 2-1/4 Ton Capacity per pair

???Safety

???Assembly

???Operation

BEFORE using this product, read this manual

!and follow all its Safety and Operating instructions. Failure to do so may result in personal injury and/or property damage.

Sears, Roebuck and Co., Hoffman Estates, IL 60179 Visit our Craftsman website: www.sears.com/craftsman

Printed in China

WARRANTY

CRAFTSMAN ONE YEAR FULL WARRANTYRAFTSMAN ONE YEAR FULL

If this Craftsman product fails due to a defect in material or workmanship within one year from the date of purchase, return it to any Sears store or other Craftsman outlet in the United States for free replacement.

This warranty applies for only 90 days from the date of purchase if this product is ever used for commercial or rental purposes.

This warranty gives you specific legal rights, and you may also have other rights which vary from state to state.

Sears, Roebuck and Co., Hoffman Estates, IL 60179

SAVE THESE INSTRUCTIONS

For your safety, read and understand the information contained with and on the product.

???The owner and operator shall have an understanding of this product and safe operating procedures before attempting to use this product.

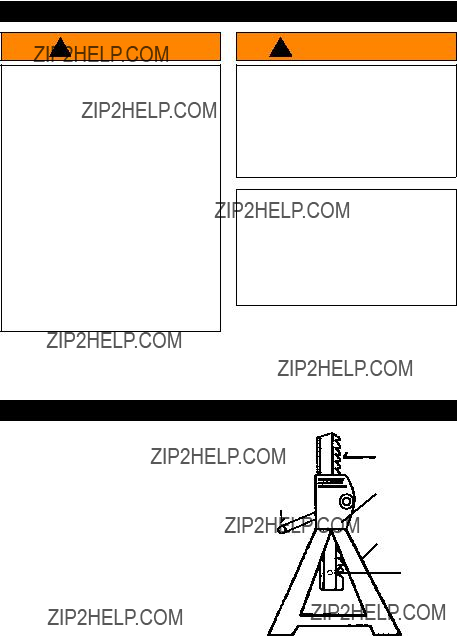
???Instructions and safety information shall be conveyed in the operators native language before use of this product is authorized. Make certain that the operator thoroughly understands the inherent dangers associated with the use and misuse of the product. If any doubt exists as to the safe and proper use of this product as outlined in the factory authorized manual, remove from immediately. These jack stands must be used as a matched pair to support one end of a vehicle only.

???Inspect before each use. Do not use if broken, bent, cracked or otherwise damaged parts are noted. If the product has been or suspected to have been subjected to a shock load, discontinue use until checked out by a Sears service center. Owners and operators of this equipment shall be aware that the use and subsequent repair of this equipment may require special training and knowledge.

???It is recommended that an annual inspection be done by qualified personnel and that any missing or damaged parts, decals, warning / safety labels or signs be replaced with Sears authorized replacement parts only. Any jack stand that appears to be damaged in any way, is worn or operated abnormally should be removed from service immediately.

???Labels and Operators Manual are available from Sears.

2

SAFETY INSTRUCTIONS

???Study, understand, and follow all printed materials provided with and on this device before use.

???Rated capacity is per pair! Do not exceed rated capacity.

???Use as matched pair to support one end of a vehicle only. Use only 1 pair per vehicle.

???Use only on hard, level surfaces.

???Center load on saddle.

???Jack stands are not to be used to simultaneously support both ends or one side of a vehicle.

???No alteration shall be made to this device.

???Failure to heed these markings may result in personal injury and/or property damage.

???Leer, comprender, y seguir las instrucci??nes antes de utilizar el aparato.

???El manual de instrucci??nes y la informaci??n de seguridad deben estar comunicado en lengua del operador antes del uso.

???No seguir estas indicaci??nes puede causar da??os personales o materiales.

! SAFETY MESSAGE !

Be sure all tools and personnel are clear before lowering load. No alterations shall be made to this device. Only attachments and/or adapters supplied by the manufacturer shall be used. Lift only on areas of the vehicle as specified by the vehicle manufacturer.

INSPECTION

Inspect the Jack Stands before each use. Do not use if bent, broken or cracked components are noted.

ASSEMBLY

CARTON CONTENTS

Inside the carton box, you will find:

1.Two jack stand frames.

2.Two ratchet bars.

3.Two lock pins.

HOW TO ASSEMBLE JACK STANDS (refer to Fig. 1)

1.Insert the ratchet bar into frame, orient the racthet side to the pawl side of frame.

2.Move the ratchet bar to lowest position by raising the locking handle and guiding the bar downward.

3.Support the ratchet bar with suitably sized wooden block. With hammer and punch or other suitable tool, drive the lock pin into the hole at the bottom of the ratchet bar to prevent overextension and loss of the bar.

FIG. 1

3

OPERATION

BEFORE USE

1.Inspect stands before each use. Do not use if bent, broken or cracked components are noted. Ensure that all parts move freely.

2.Before using this product, read the owner???s manual and familiarize yourself thoroughly with the product and the hazards associated with its improper use.

KNOW YOUR JACK STANDS

SADDLE

RATCHET

BAR

FIG. 2

HOW TO USE YOUR JACK STANDS

TO SUPPORT A VEHICLE

1.Raise the vehicle or load with an automotive jack.

2.Adjust jack stand height by pulling up on ratchet bar. The weight of the locking handle should lock the ratchet bar into a secure position. To verify this, simply push down on the locking handle to ensure that the ratchet bar is secured.

3.Carefully position the stands beneath the load so that when load is lowered it will contact the center of the jack stand saddles.

4.Always use jack stands as a pair and only on those parts of a vehicle which can be fully captured between the outer lugs of each stand???s saddle.

!Rated capacity of jack stands is per pair, it is NOT the sum of individual capacities unless specifically noted to the contrary by the jack stand manufacturer. Do Not exceed rated capacity. Ensure that the vehicle support points are fully captured between the outer lugs of both jack stands. Use a matched pair of jack stands per vehicle to support 1 end only. Use 1 pair per vehicle only. Failure to do so may result in sudden loss of load, which may cause personal injury and/or property damage.

5.Slowly and carefully lower the load completely onto the stands, ensure that the load is centered and captured as described in Step 4.

6.Check to ensure that load is secure on stands before working under vehicle.

TO REMOVE AND STORE JACK

STANDS

1.Raise vehicle clear of stands with suitable jack.

2.Raise the locking handle to allow ratchet bar to glide down to lowest position.

3.Carefully remove stands.

4.Carefully lower vehicle with jack.

5.Ensure that all tools, equipment and personnel are clear before lowering load.

SPECIFICATIONS

MAINTENANCE

INSPECTION

Periodically inspect each stand. Ensure all parts move freely. Do not apply oil or grease to any portion of this product. If rust appears, sand affected area and cover with suitable utility paint. Please note that there are no replacement parts applicable to this device.

STORAGE

Store stands in upright position and in a clean, dry area.

For after sale support and assistance:

Call 8:00 AM - 4:45 PM CST., Monday - Friday 1-888-332-6419

4

Get it ???xed, at your home or ours!

Your Home

For repair ??? in your home ??? of all major brand appliances, lawn and garden equipment, or heating and cooling systems, no matter who made it, no matter who sold it!

For the replacement parts, accessories and owner???s manuals that you need to do-it-yourself.

For Sears professional installation of home appliances and items like garage door openers and water heaters.

Our Home

For repair of carry-in items like vacuums, lawn equipment, and electronics, call or go on-line for the location of your nearest

Sears Parts and Repair Center.

1-800-488-1222 Call anytime, day or night (U.S.A. only)

www.sears.com

To purchase a protection agreement (U.S.A.)

or maintenance agreement (Canada) on a product serviced by Sears:

Para pedir servicio de reparaci??n a domicilio, y para ordenar piezas:

1-888-SU-HOGAR??

(1-888-784-6427)

Au Canada pour service en fran??ais:

1-800-LE-FOYERMC

(1-800-533-6937) www.sears.ca

?? Sears Brands, LLC

??Registered Trademark / TM Trademark / SM Service Mark of Sears Brands, LLC

??Marca Registrada / TM Marca de F??brica / SM Marca de Servicio de Sears Brands, LLC MC Marque de commerce / MD Marque d??pos??e de Sears Brands, LLC