To perform track scan, touch the [T.SCN] key. To perform track random, touch the [T-RDM] key.
To turn on/off Play Back Control function, touch the [PBC] key.
To switch the language, touch the [AUDIO] key.
???In CD mode:
To switch the playtime, touch the [P.TIME] key for 1 second or longer.
To perform track repeat, touch the [T.RPT] key. To perform track scan, touch the [T.SCN] key. To perform track random, touch the [T.RDM] key.
???In MP-3 mode:
To switch the playtime, touch the [P.TIME] key for 1 second or longer.
To perform folder repeat, touch the [F.RPT] key. To perform folder scan, touch the [F.SCN] key. To perform folder random, touch the [F.RDM] key.
To perform file (track) repeat, touch the [T.RPT] key.
To perform file (track) scan, touch the [T.SCN] key.
To perform file (track) random, touch the [T.RDM] key.
???To return to the STANDARD screen, touch the [OFF] key.
DVD Video Operations
Watching a DVD-Video
After disc loading, the play mode is automati- cally engaged.
???Button operation may not be allowed depend- ing on the story of the disc.
???After the menu screen is displayed
For normal DVD-Video discs, the menu screen appears.
After the menu screen is displayed, select an item in the following operations and play it back.
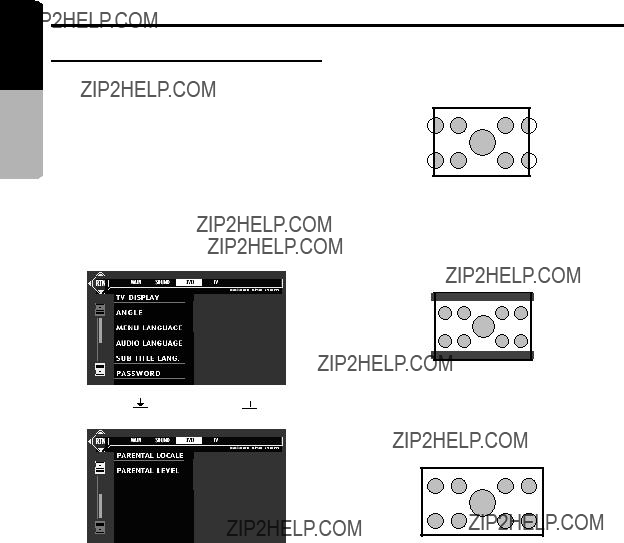
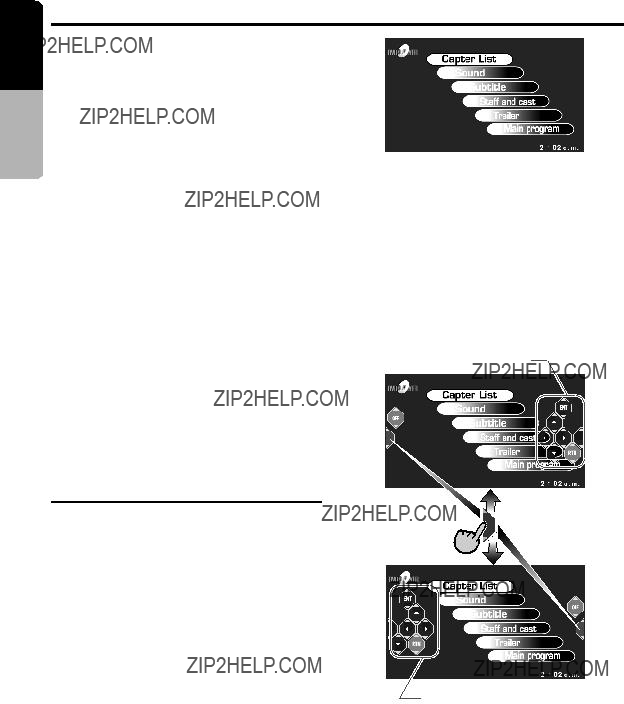
Showing the DVD menu
1.Press the [MENU] button during playback. The DVD menus appears.
The displayed contents may differ, depending on the DVD software.
??? Example showing menu display
2.To cancel to the DVD menu, press the [MENU] button again.
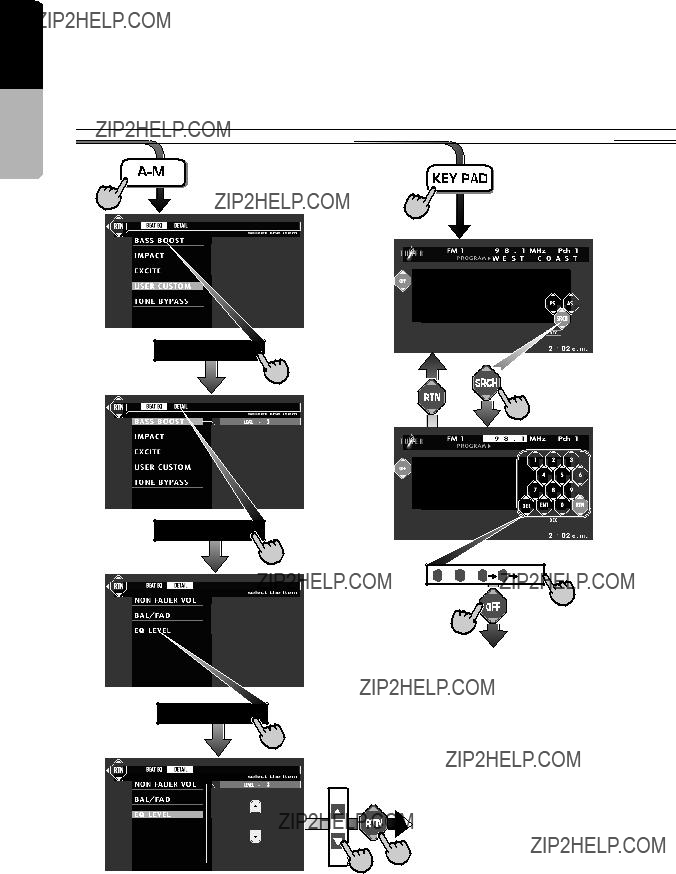
???To select the menu contents, press the [KEY PAD] button and use either the ???Cross KEY PAD??? or the ???Ten KEY PAD??? according to the disc contents menu.
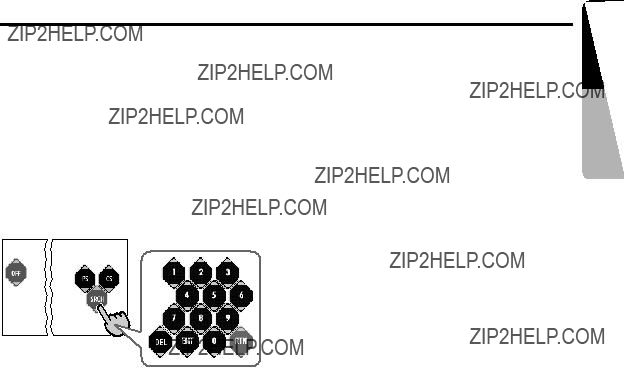
Switching KEY PAD position
When the KEY PAD becomes difficult to view in the menu display, you can move it to the other side of the screen.
KEY PAD
KEY PAD
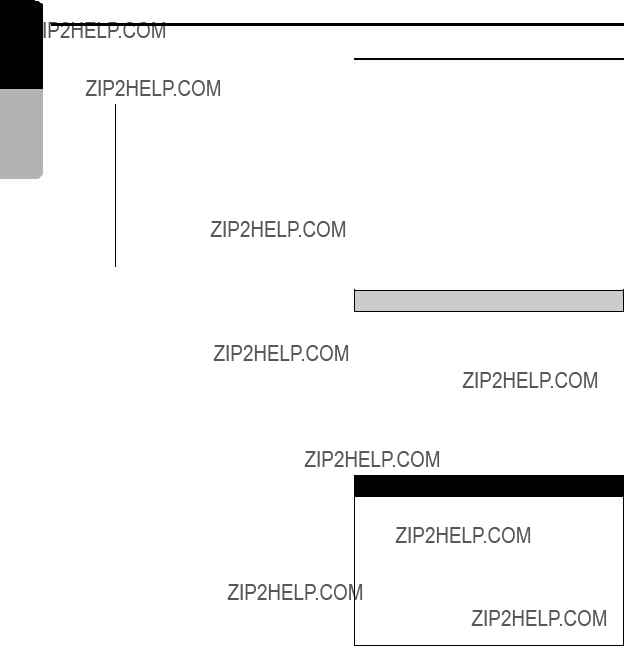
Stopping playback
1.Press and hold the [s] button for 1 second or longer during playback. Playback stops.
2.To resume playback. Press the [s] button, and playback resumes from the scene where playback is stopped.


 WARNING
 CAUTION
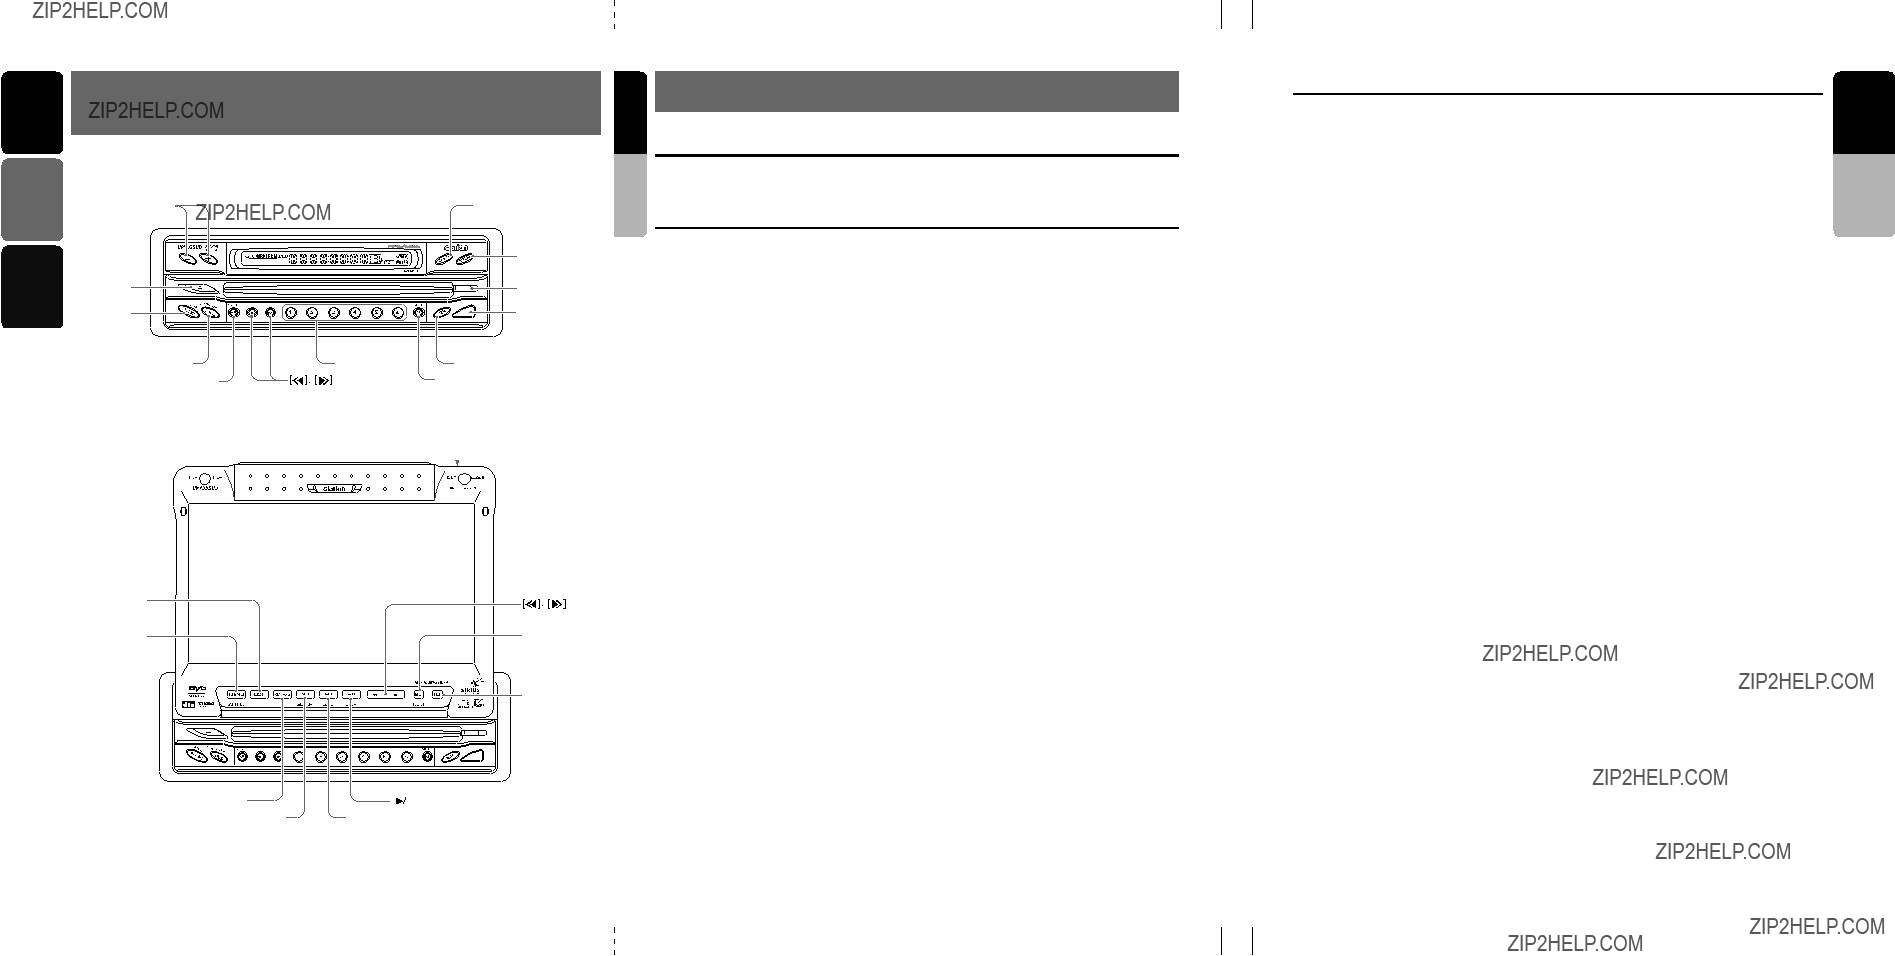


 Time has come
  Time has come
 Time has come
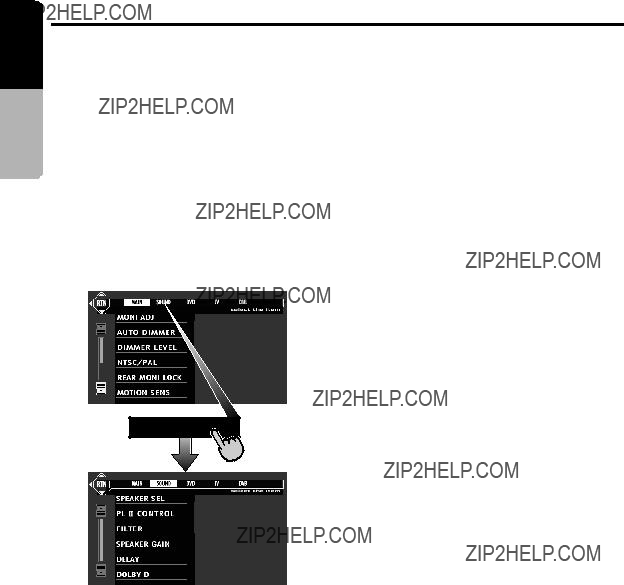
 ] key to go to the next menu.

 ] key to return to the previous menu.
 ] is displayed to indicate that the


 ???
??? 


 0
0  7 9
7 9 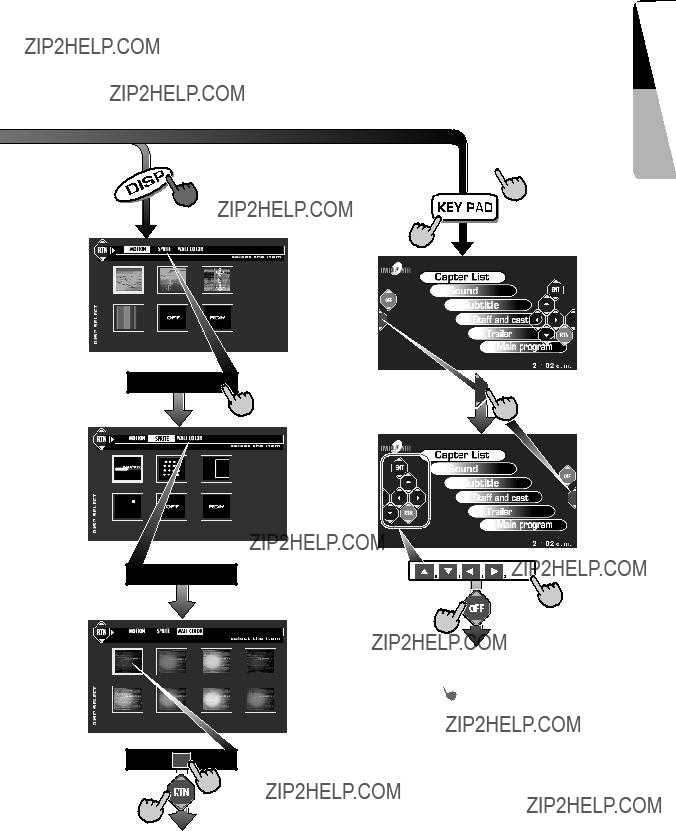

 1
1 ] is displayed to indicate that

 ] [
] [
 ] buttons
 CAUTION


 CAUTION
 CAUTION
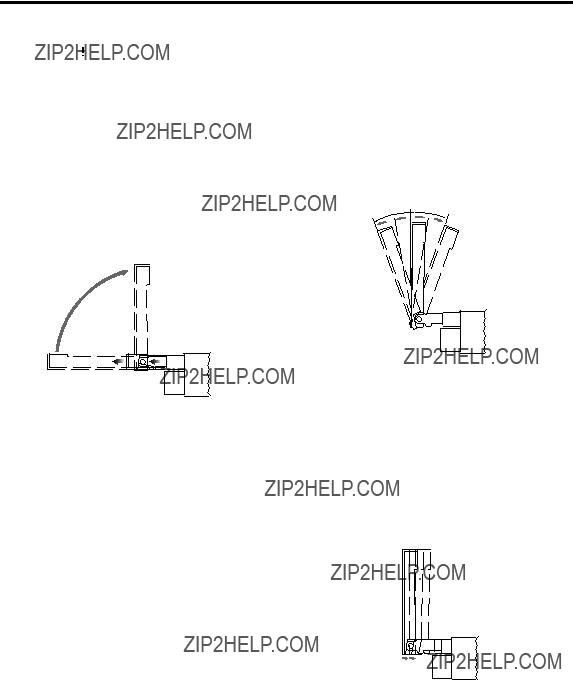


 WARNING


 ] key. Touch the [
 ] key to re- turn to the previus menu.
 CAUTION
 WARNING


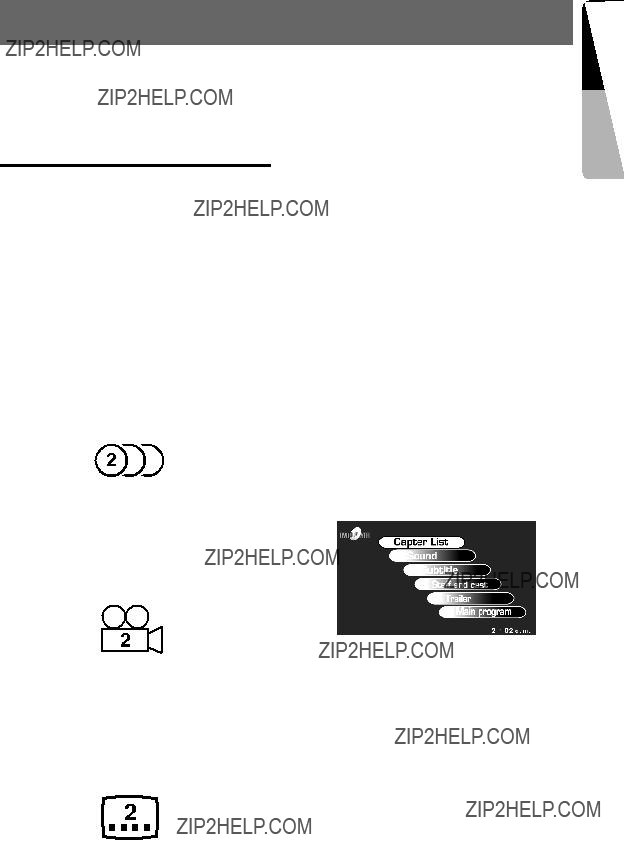
 : Indicates that 8 audios have been recorded).
 Subtitle 1
  Subtitle 2
 Subtitle X

 : Indicates
  TITLE ELAPSED TITLE REMAIN
 CHAPTER ELAPSED
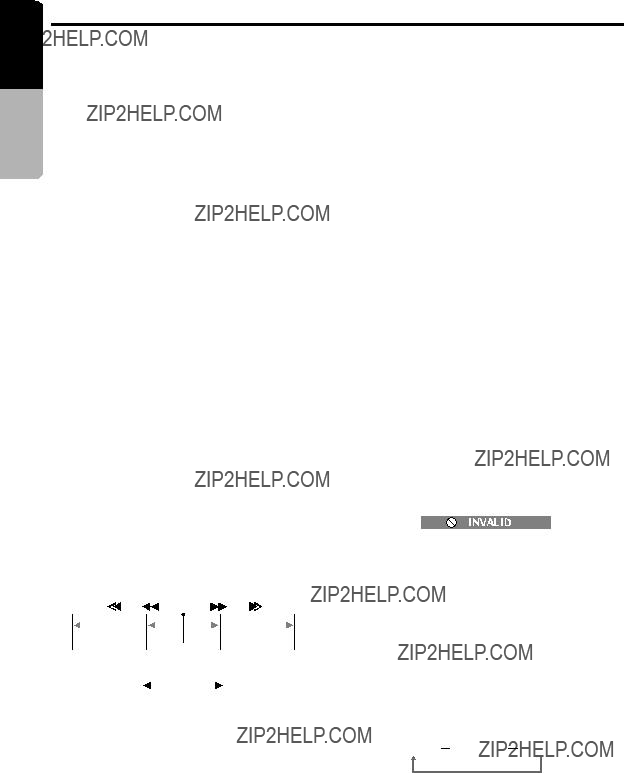


 WARNING

 CAUTION


 WARNING
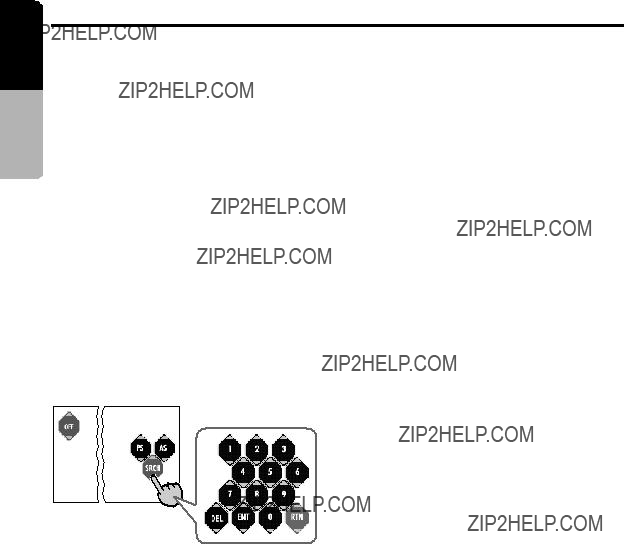


 ] or [
 ] on the screen to se- lect the desired category on the screen.
 ] or [
 ] on the screen to select the desired category on the screen.
 ] key to select ???
 ??? : Centering
 ] key to select ???
 ] key to select ???
 ] key to select ???