Troubleshooting (continued)
Certified Grill Parts And Accessories??, Char-Broil and Design??, Char-Broil (Gas Grill Briquettes)??, Char-Diamonds??, Cooking Zone and Design??, Diamond Flame??, Executive Chef??, Faststart??, Flare Fighter??, FlavorMaster??, Gas Grill Silouette and Design??, H2O Smoker??, Lava Flame??, MasterFlame??, MasterFlame Precision Cooking System??, PowerSpark??, Quantum??, VIP??, PrecisionFlame and Design??, Sierra??, and TruFlame?? are registered Trademarks of the W.C. Bradley Company. Thermos?? is a registered trademark of the Thermos Company and its affiliates.
Artisan Collection by Char-Broil ???, C3 and Design???, Char-Broil and Design???, Flame Design???, FlavorTents???, Grill 2 Go???, Grillin??? Stick???, Keeper of the Flame???, Keepers of the Flame???, Natural Grip???, Outdoor Cooking Collection and Design???, Patio Bistro???, PrecisionFlame???, Pro-Check???, QuickSet Grills and Design???, SmokerTents???, The Big Easy???, The Minute Grill???, The Edge???, The Tuscan Collection???, and The Urban Grill??? are Trademarks of the W.C. Bradley Company. Universal Grill Parts and Design??? is a trademark of the Thermos Company and its affiliates.
TEC??? is a registered trademark of TEC INFRA-RED GRILLS. US patents pending.
Protected under one or more of the following U.S. Patents: 4,598,692; 4,624,240; 4,747,391; 4,747,391; 4,817,583; 4,924,846; 4,989,579; 5,003,960; 5,076,256; 5,076,257; 5,090,398; 5,109,834; 5,224,676; 5,277,106; 5,421,319; 5,441,226; 5,452,707; 5,458,309; 5,566,606; 5,566,606; 5,579,755; 5,582,094; 5,613,486; 5,649,475; 5,706,797; 5,711,663; 5,765,543; 5,931,149; 5,996,573; 6,095,132; 6,135,104; 6,173,644B1; 6,279,566; 6,397,731; 6,418,923; 6,439,222; 6,523,461; D282,619; D339,714; D341,292; D343,337; D358,059; D361,466; D364,535; D372,637; D373,701; D377,735; D383,035; D397,910; D405,643; D405,643; D406,005; D406,009; D413,043; D413,229; D413,229; D414,982; D415,388; D416,164; D416,441; D416,441; D417,587; D422,516; D423,274; D423,876; D428,303; D435,396; D436,004; D438,059; D438,060; D438,427; D439,110; D442,505; D443,179; D443,354; D447,384; D447,385; D447,909; D448,610; D448,614; D448,615; D448,616; D448,975; D449,492; D451,759; D456,202S; D460,313, D461,359 and D504,048. Canada: 87743; 87744; 92607; 92608 and 1,316,424. Other Patents Pending. Assembly instructions ?? 2007.
 CAUTION:
  WARNING:
 CAUTION:

 24???
24???


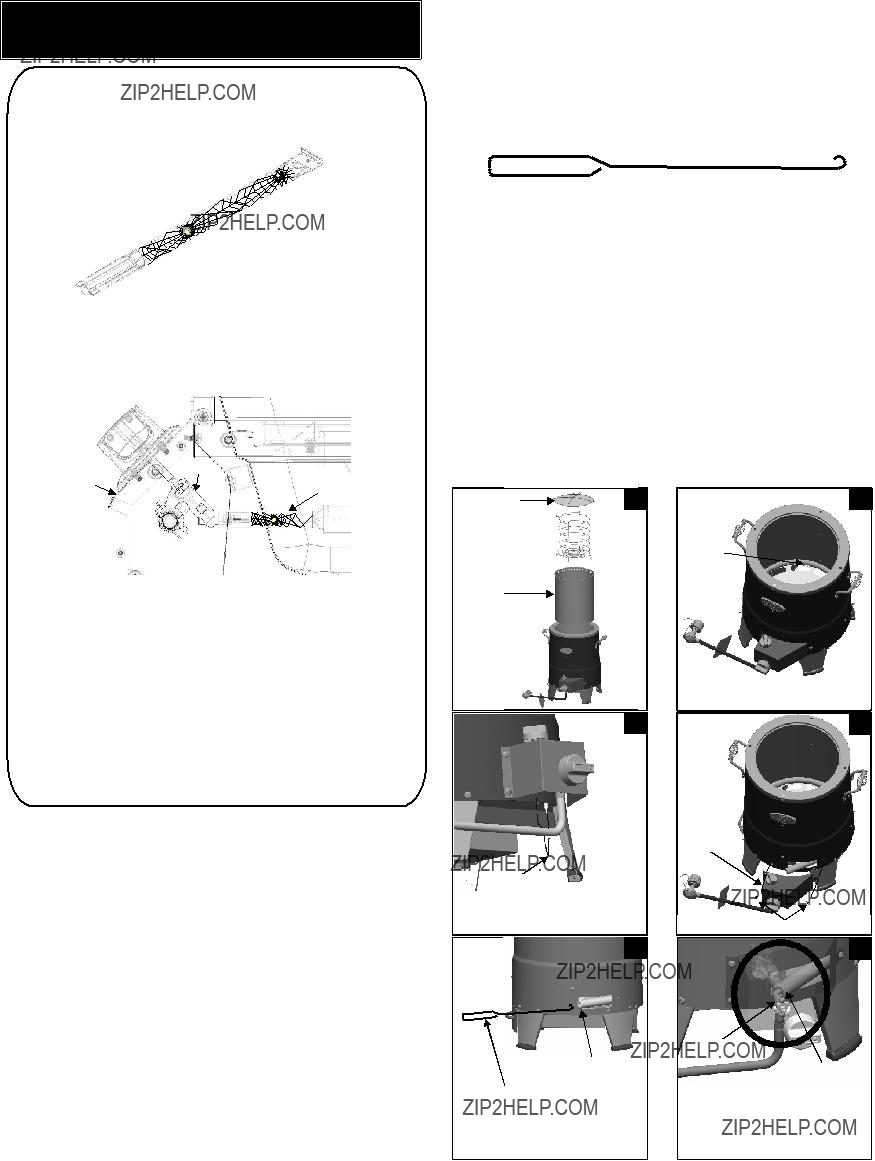

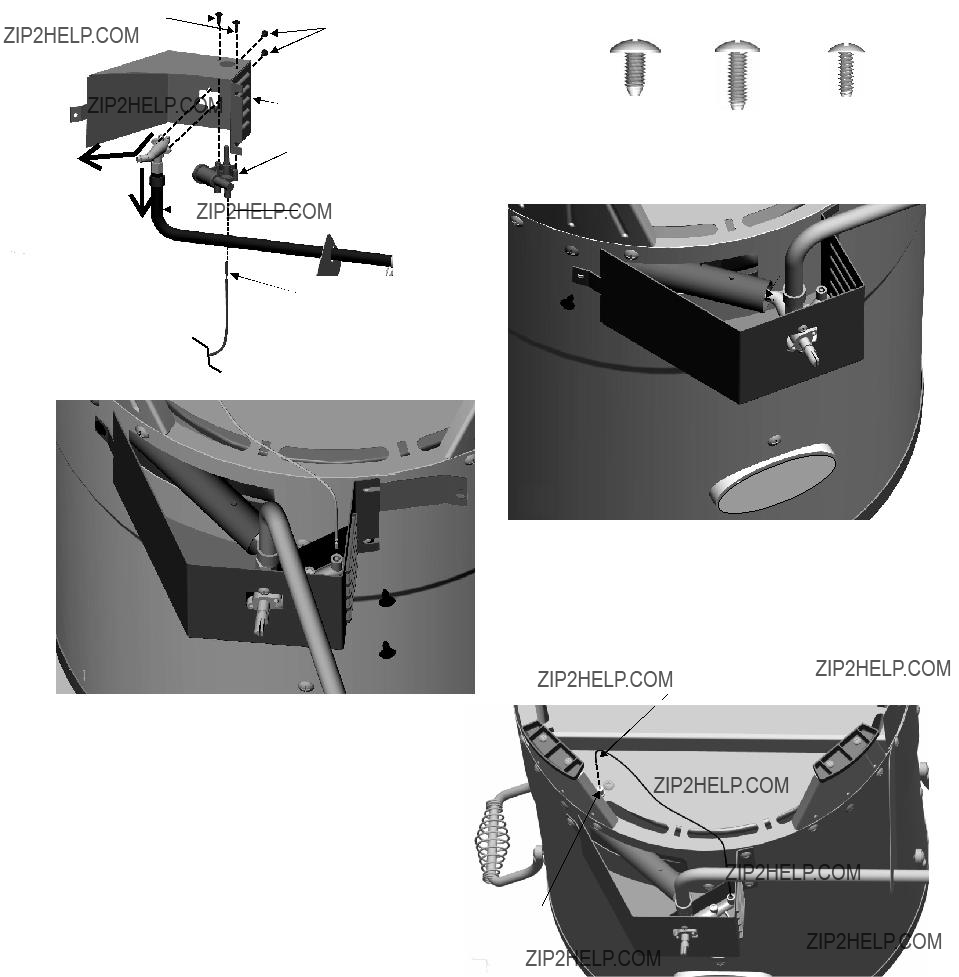
 Electrode
 I
I


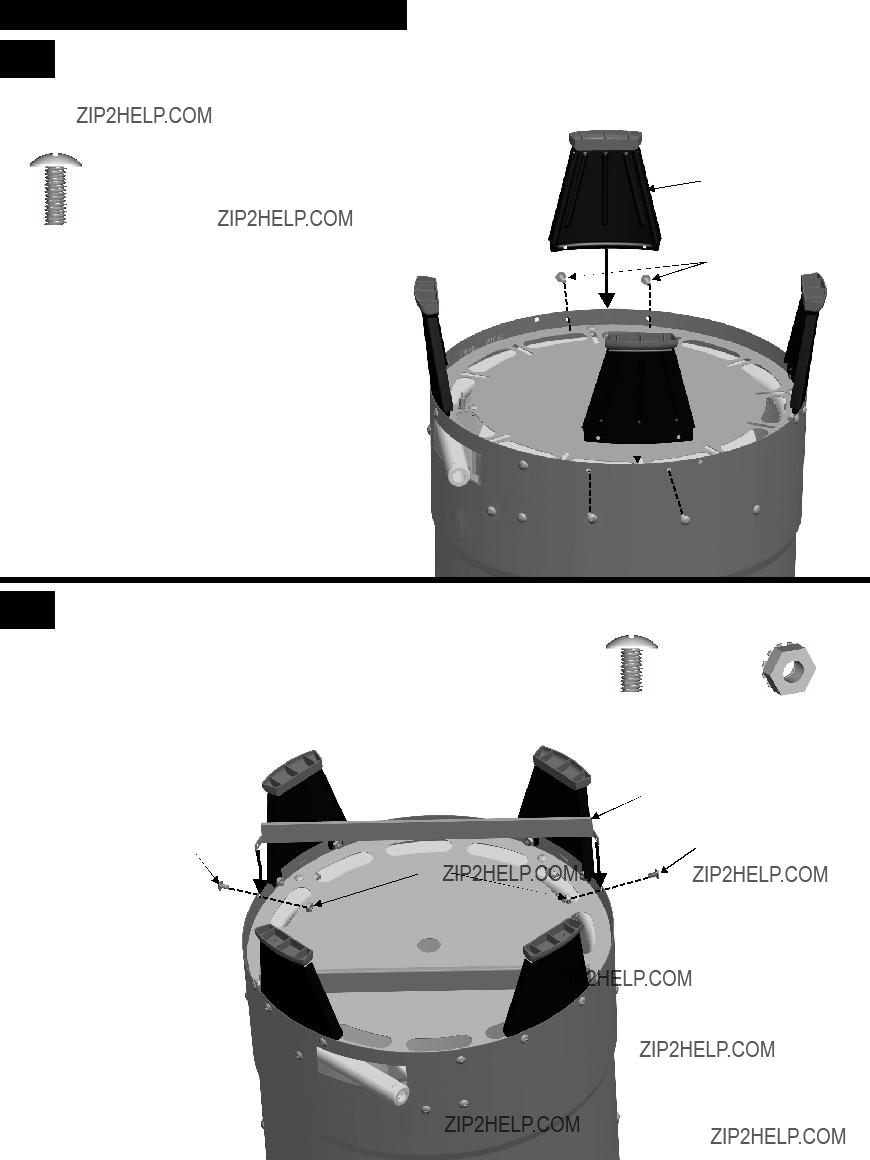

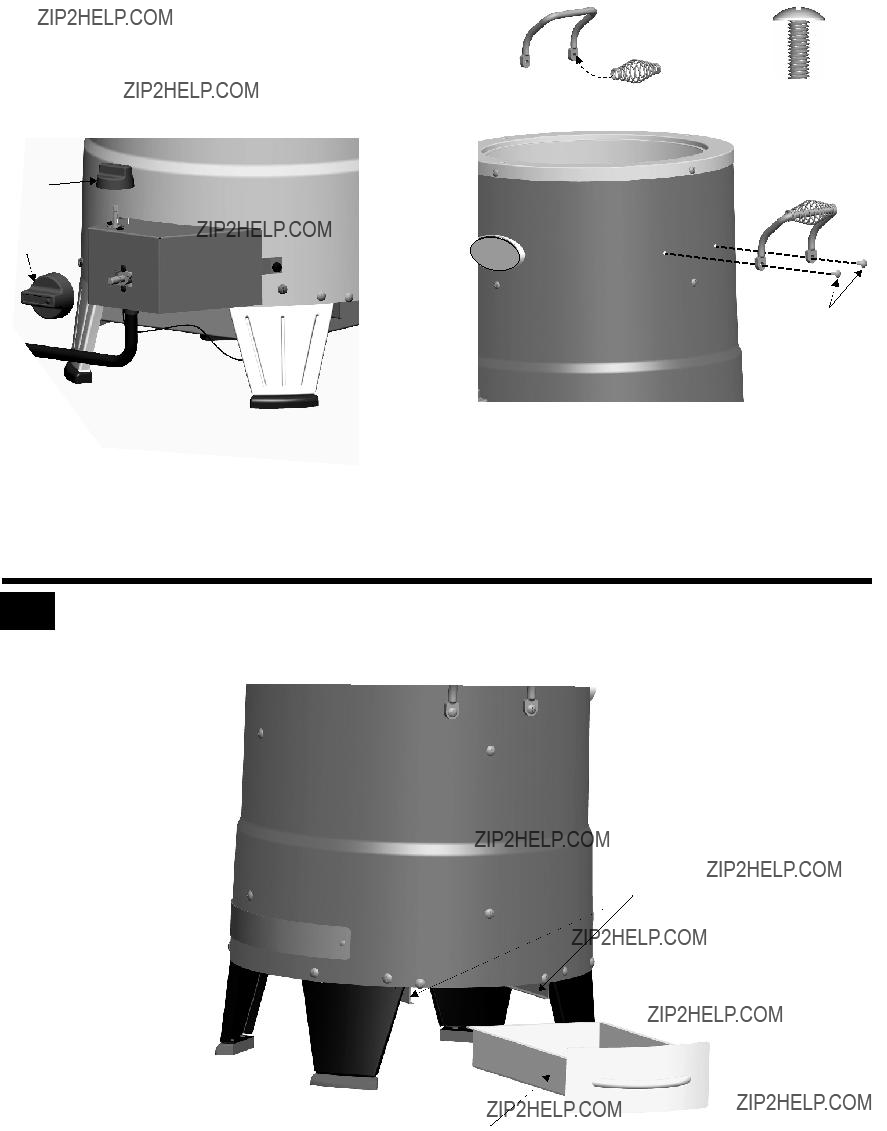

 Storage Lid