DVD 5.1 HOME THEATER SYSTEM
DVD 5.1 HOME THEATER SYSTEM


Features &Package Contents
Thank you for purchasing our product. Please read this manual carefully before connection and operation and keep it for future reference.
This DVD player is a next generation home player that can produce high quality video and audio for your continued enjoyment.
 Built in Dolby Digital, LPCM, MPEG etc. digital audio decoder
 HiFi, 96kHz/24bit audio digital processor
 COAXIAL digital audio output
 Compatible with DVD, CD, DVD+R/RW,
 Full function remote control
 AM/FM stereo tuning system
 High quality amplifier
Playable Disc and Media Types:
Package Contents:
AM AntennaFM AntennaSpeaker Cable

For Your Attention
IMPORTANT SAFETY INSTRUCTIONS
1.Read these instructions.
2.Keep these instructions.
3.Heed all warnings.
4.Follow all instructions.
5.Do not use this apparatus near water.
6.Clean only with a dry cloth.
7.Do not block any ventilation openings. Install in accordance with the manufacturer's instructions.
8.Do not install near any heat sources such as radiators, heat registers, stoves, or other apparatus (including amplifiers) that produce heat.
9.Do not defeat the safety purpose of the polarized or
10.Protect the power cord from being walked on or pinched particularly at plugs, convenience receptacles, and the point where they exit from the apparatus.
11.Only use attachments/accessories specified by the manufacturer.
12.Use only with the cart, stand, tripod, bracket, or table specified by the manufacturer, or sold with the apparatus. When a cart is used, use caution when moving the cart/apparatus combination to avoid injury from
13.Unplug this apparatus during lightning storms or when unused for long periods of time.
14.Refer all servicing to qualified service personnel. Servicing is required when the apparatus has been damaged in any way, such as
15.Where the mains plug or an appliance coupler is used as the disconnect device, the disconnect device shall remain readily operable.
IMPORTANT INFORMATION
To reduce risk of fire or electric shock, do not expose this WARNING apparatus to rain or moisture.
The apparatus must not be exposed to dripping or splashing. Objects filled with liquids, such as vases or drinking glasses, must never be placed on the apparatus.
This symbol indicates "dangerous voltage" inside the product that presents a risk of electric shock or personal injury.

For Your Attention
This symbol indicates important instructions accompanying the product.
Caution: To reduce the risk of electric shock, do not remove cover (or back). No user serviceable parts inside, Refer servicing to qualified service personnel.
This symbol indicates that this product incorporates double insulation between hazardous maims voltage are user accessible parts. When servicing use only identical replacement parts.
FCC Statement:
This device complies with Part 15 of the FCC Rules. Operation is subject to the following two conditions:
(1)This device may not cause harmful interference, and
(2)This device must accept any interference received, including interference that may cause undesired operation.
Note:
This equipment has been tested and found to comply with the limits for Class B digital devices, pursuant to Part 15 of the FCC rules. These limits are designed to provide reasonable protection against harmful interference in a residential installation. This equipment generates, uses and can radiate radio frequency energy and, if not installed and used in accordance with the instructions, may cause harmful interference to radio communications. However, there is no guarantee that interference will not occur in a particular installation. If this equipment does cause harmful interference to radio or television reception, which can be determined by turning the equipment off and on, the user is encouraged to try to correct the interference by one or more of the following measures:
-Reorient or relocate the receiving antenna.
-Increase the separation between the equipment and receiver.
-Connect the equipment into an outlet on a circuit different from that to which the receiver is connected.
-Consult the dealer or an experienced radio/TV technician for help
Use of shielded cable is required to comply with Class B limits in Subpart B of Part 15 of the FCC rules.
Do not make any changes or modifications to the equipment unless otherwise specified in the manual. If such changes or modifications should be made, you could be required to stop operation of the equipment.

Panel
FRONT PANEL:
REAR PANEL:

Connections
1 VIDEO SYSTEM CONNECTION
The following video outputs are available for this unit .
1.1 Composite Video
Use the cable with yellow plug of an AV cable to connect the composite video output of this unit to the video input of a TV/monitor.
1.2
Use a
1. 3 Component Video
Use a
1. 4 HDMI
HDMI output presents the highest possible resolutions and video quality. If an HDMI socket is present on your television, use it. Use an HDMI cable to connect the HDMI output of this unit to the HDMI input of a TV/monitor.
TV/Monitor Video Input
Y U/Pb V/Pr
Y 
Cr/Pb
Cr/Pr 
VIDEO
Component Video Output Composite Video and
DVD Player Video Output
Notes:
 Of the above video outputs, the HDMI is the best, Component Video is the second best,
 Don???t make all the connections above at one time, otherwise the produced pictures will be affected.
 Only when the video settings conform to the actual video system connections does the player produce the corresponding video output. (Please refer to the Video Setup in
System Setup).

Connections
2 AUDIO SYSTEM CONNECTION (OPTIONAL)
In addition to the
2.1 Stereo Audio
Use a pair of audio cables (red for right /white for left) to connect the stereo audio output of this unit to
TV/Monitor/Amplifier Audio Input
2CH Audio Input Digital Audio Input
other stereo audio input.
2.2 Coaxial Digital Audio
Use a coaxial cable to connect the coaxial output of this unit to the coaxial input of a power amplifier.
2.3 Speaker Output
Use speaker cables to connect the speaker output terminals of this unit to the corresponding
L1/2 R1/2
Speaker Output
COAXIAL
speakers.
2CH Audio Output Digital Audio Output
DVD Audio Output
2.4 Line Input
Audio Output of Extra Devices
This unit has two groups of extra
The audio settings should conform to the practical audio system connections. Please
refer to the Audio Setup in System Setup.

System Setup
MENU OPERATION:
then press [ENTER] to exit the setup menu.
1 GENERAL SETUP PAGE
1.1 TV DISPLAY
If the unit is connected to a conventional TV set, you are supposed to select 4:3 PAN SCAN or 4:3 LETTER BOX.
4:3 PAN SCAN: The
4:3 LETTERBOX: The
16: 9: If the unit is connected to a
The
1.2 ANGLE MARK
Set this item to ON. When a disc with multiple camera angles is playing, an angle mark will display on the screen. Then you can view the video of different camera angles by pressing [ANGLE] on the remote control.
Set this item to OFF to hide the angle mark.
1.3 OSD
Set the
1.4 CLOSED CAPTIONS
Set this item to ON to show the closed captions. Set it to OFF to hide it. NOTE: This function only work with those discs encoded with closed captions.
1.5 SCREEN SAVER
ON: If the image remains motionless on the screen, for example the disc is paused, stopped etc, for several minutes, a screen saver will appear on the screen. You can press any key or button except [STANDBY] to wake it up.
The unit will go into the standby mode after about 20 minutes being in the screen saver mode. You can press [STANDBY] to switch it on.
OFF: Disable the screen saver function.

System Setup
1.6 LAST MEMORY
ON: Each time you turn off the unit or stop the disc, it will memorize the last play time.
Next time you turn on the unit and play the same disc, the unit will play from that memorized point.
OFF: Disable the last memory function.
2 AUDIO SETUP PAGE
There are eight items in the AUDIO SETUP PAGE. They are ANALOG AUDIO,
D I G I T A L A U D I O , D O L B Y D I G I T A L , C H A N N E L D E L AY, E Q U A L I Z E R , 3 D PROCESSING and HDCD.
2.1 ANALOG AUDIO SETUP 2.1.1 DOWNMIX
LT/RT: The
STEREO: The
3D SURROUND: This mode creates a virtual surround effect from stereo or multi- channel audio contents.
5.1CH: Turn off the DOWNMIX mode. If a 5.1CH disc is playing or the unit is connected to
NOTE: This function only applies to the Dolby AC
2.1.2 FRONT, CENTER, REAR SPEAKER and
Only when the DOWNMIX mode is turned off (DOWNMIX is set to 5.1CH), the
CENTER SPEAKER and REAR SPEAKER are activated. The FRONT SPEAKER can be set to LARGE or SMALL. The CENTER SPEAKER, REAR SPEAKER can be set to LARGE, SMALL or OFF and the SUBWOOFER can be set to ON or OFF.
NOTE:
If the speaker is set to LARGE, the output level will be higher than that of SMALL. If the speaker is set to SMALL, the output level will be lower than that of LARGE. If a speaker is set to OFF, no audio is outputted from it.
If the sound from your speakers is distorted, try setting the speaker size to SMALL.
2.1.3 DIALOG
When DOWNMIX is set to LT/RT or STEREO, this item is available. Adjust the value of this item to control the dialog volume.
NOTE: When playing 5.1CH disc, this item can be used to adjust the volume of the speakers.
2.1.4 D.R.C.(Dynamic Range Control)
You can set this item to ON, OFF or AUTO.
2.2. DIGITAL AUDIO SETUP 2.2.1 DIGITAL OUTPUT
SPDIF/ OFF: There will be no digital audio signal output. (Coaxial off)
ALL: The digital audio signal output will be in its raw format.
PCM only: The digital audio signal output will be in PCM format.
System Setup
2.2.2 LPCM OUTPUT
When DIGITAL OUTPUT is set to PCM ONLY, this item is available.
Select a sample rating for the analog audio output. There are two options, 48KHz and 96KHz.
NOTE: Some amplifiers don't support 96KHz sampling which will affect the coaxial output.
2.3 DOLBY DIGITAL SETUP 2.3.1 DUAL MONO
STEREO: The player outputs the
R- MONO: The player outputs the
MIX- MONO: The player outputs the average signal of the
NOTE: This function only applies to the Dolby AC
2.3.2 DYNAMIC
When you watch films with large dynamic scope in low volume, for example at night, you can adjust the dynamic value up to avoid losing sound details resulted from the low volume.
2.4 CHANNEL DELAY
This item is used to set the delay time for the center, rear speakers and the subwoofer.
The delay is to compensate for the audio propagation time difference caused by the distance difference of the speakers to the listener.
NOTE:
The unit does not support delays when the distance between the center or surround speakers and the listener are longer than that between the front speakers and the listener.
In case the channel delay settings cannot match your speaker configuration, please set all distance difference to 0cm. If possible, use your receiver/amplifier to set the channel delay.
2.5 EQUALIZER 2.5.1 SOUND MODE
There are 8 kinds DSP mode for you to choose. They are NORMAL, ROCK, POP,
LIVE, DANCE, TECHNO, CLASSIC and SOFT.
2.5.2 BASS BOOST
Set it to ON to boost the bass sound.

System Setup
2.5.3 SUPER BASS
Set it to ON to get the super bass sound effect.
2.5.4 TREBLE BOOST
Set it to ON to boost the treble sound.
2.6 3D PROCESSING 2.6.1 PRO LOGIC II
Pro Logic II: This unit allows you to configure Dolby Pro Logic II to expand
NOTE: Pro Logic II functionality is effective only when DOWNMIX is set to 5.1CH and
DIGITAL OUTPUT is set to ALL.
2.6.1.1 PRO LOGIC II
This item is used to turn on or off the Pro Logic II processing. ON: Pro Logic II processing is always on.
OFF: Pro Logic II processing is disabled
AUTO: Pro Logic II processing is on only when Dolby Pro Logic II encoded content is detected.
2.6.1.2 MODE
This item is used to set the processing mode of Pro Logic II and is available only when the Pro Logic II processing is turned on.
MUSIC: Sound from all speakers arrive at the same time with no delay.
MOVIE: 10ms delay is added to the surround channels.
PRO LOGIC: Earlier version of Dolby Pro Logic processing.
AUTO: Automatically selects processing mode based on the input format.
2.6.1.3 PANORAMA
This item is used to turn on/off panorama mode and is available only when MODE is set to MUSIC.
When panorama mode is turned on, the front stereo audio is partially fed into the surround channels for an enveloping effect.
2.6.1.4 DIMENSION
This item is available only when MODE is set to MUSIC.
This item allows gradual adjustment of the soundfield either towards the front or towards the rear. This is useful in setting a more even balance from all speakers with some rooms.
2.6.1.5 CENTER WIDTH
This item is available only when MODE is set to MUSIC.
This item can be used to control the width of the center channel sound effect by blending the center speaker to the left and right speakers. As the level number increases, the center channel sound moves toward the left and right speakers.
2.6.2 REVERB MODE
You can select a reverb mode (NORMAL, CONCERT, LIVING ROOM, HALL,
BATHROOM, CAVE, ARENA or CHURCH) in this item.
2.7 HDCD(High Definition Compatible digital)
HDCD (High Definition Compatible digital) is a patented encode/decode process for delivering the full richness and details of the sound from
2.7.1 FILTER
You can select the digital filter at 2x, 1x or OFF.

System Setup
3 VIDEO SETUP PAGE
There are five items in the VIDEO SETUP PAGE. They are VIDEO OUTPUT, TV MODE, HD MODE, COLOR SETTING, and HDMI SETUP.
3.1 VIDEO OUTPUT
OFF: Set video output to the CVBS (composite video).
YUV: Set video output in analog component video format when the component video outputs are used.
NOTE: If the video setting differs from the physical video connection, the TV set may have poor picture. Press
3.2 TV MODE
When HDMI is set to OFF and when VIDEO OUTPUT is set to YUV, this item is available.
PROGRESSIVE: The video will be output in the form of progressive scanning.
INTERLACE: The video will be output in the form of interlaced scanning.
3.3 HD MODE (High Definition Mode)
When HDMI is set to OFF and when VIDEO OUTPUT is set to YUV, this item is available.
Select a HD mode: OFF, 720p or 1080i.
NOTE: This item requires that your TV support HD input and output.
3.4 COLOR SETTING
3.4.1 SHARPNESS
There are three options (HIGH, MEDIUM and LOW) for you to choose in this item.
3.4.2 BRIGHTNESS, CONTRAST, HUE and SATURATION
Enter these items respectively, use direction key [ ]/[
]/[ ] to adjust the value, then press [ENTER] to confirm it.
3.4.3 GAMMA
There are four options (HIGH, MEDIUM, LOW and NONE) for you to choose in this item.
3.4.4 LUMA DELAY
There are two options (0T and 1T) for you to choose in this item.

System Setup
3.5 HDMI SETUP
About HDMI
HDMI
HDMI is an uncompressed,
HDMI supports standard video formats, enhanced video and
3.5.1 HDMI
You can set it to ON or OFF.
NOTE: When HDMI is set to ON, the items VIDEO OUTPUT, TV MODE , HD MODE
and TV TYPE are unavailable.
3.5.2 RESOLUTION
This item is available when HDMI is set to ON.
Select a resolution: 720p(50Hz) or 1080i(50Hz).
3.6 DIVX VOD (DivX
The registration code for DivX
With the registration code you can rent and purchase movies using the DivX Video-
4 P R E F E R E N C E P A G E
If there's no disc in the disc tray, the disc tray is open or the disc in the disc tray is stopped, this item is available.
There are seven items in the PREFERENCE SETUP PAGE. They are TV TYPE, PBC, AUDIO, SUBTITLE, DISC MENU, PARENTAL and DEFAULT.
4.1 TV TYPE
This product supports both NTSC (National Television System Committee) and PAL
(Phase Alternating Line) television broadcasting standards.

System Setup
NTSC: If the connected TV is NTSC system which is used in Taiwan, America and Canada, etc, select this mode. It will change the video signal of a PAL disc and output in NTSC format.
PAL : If the connected TV is PAL system which is used in China, Hongkong and Europe, etc, select this mode. It will change the video signal of a NTSC disc and output in PAL format.
MULTI: If the connected TV is multi system, select this mode. The output format video signal of the disc will be in accordance with the video signal of the disc.
Note: If a wrong selection is made, the viewing image will be very poor. In such a case, change the option in this item to fix the error.
4.2 PBC (Play Back Control)
ON: Activate the PBC function.
OFF: Disable the PBC function.
NOTE: This function only works with those discs encoded with PBC function DVD,
4.3 AUDIO, SUBTITLE and DISC MENU
Select a preferred audio language, subtitle language and disc menu language in these items.
You can also make selection of the audio language by using the [AUDIO] and the subtitle language by the [SUBTITLE] on the remote control.
NOTE: If the selected language is not available for the currently playing disc, the disc's default audio, subtitle, disc menu language setting works.
4.4 PARENTAL
This item allows the user to set a maximum rating of the movies that can be viewed without inputting the correct password. Movies rated higher than the level set for the parental lock can not be viewed. What's more, to key in the correct password is needed to reset the level. The default password is 136900.
NOTE: This function only works with those discs with parental function.
4.5 DEFAULT
Restore all the default settings except the settings in PARENTAL and PASSWORD MODE item.
5 PASSWORD SETUP PAGE
5.1 PASSWORD MODE
You can switch on/off the password function in this item.
NOTE: You must key in the correct password and press [ENTER] before you change the option in this item. The default password is 136900.
5.2 PASSWORD
You can reset the password in this item.
NOTE: The default password (136900) is always active even if the password has been reset. So if you forget your reset password, use it.

Remote Control
1
2
3
4
5
6
7
8
9
10
11
12
13
14
15
Remote Control Operation
Install two AAA/1.5V batteries into the remote control. Point the remote control at the remote sensor on the front panel. The remote control works within about 8 metres from the sensor and within an angle of about 30 degrees from the left and right side.
Battery Installation
1.Remove the battery compartment cover on the back of the remote control.
2.Load the batteries into the battery compartment making sure that the batteries have been inserted with the correct polarities matching the symbols +, - as indicated inside the battery compartment.
3.Replace the cover.
NOTE:
 Remove the batteries when you do not intend to use it for a long time.
 Do not mix the new and the used batteries, or the different types of batteries.
 Weak batteries can leak and severely damage the remote control.
 Be environmentally friendly and dispose of batteries according to your government regulations.
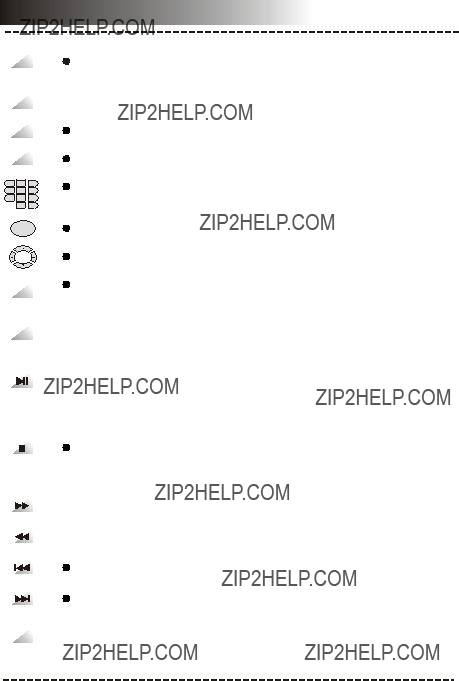
Remote Control Function
STANDBY
SOURCE
SETUP
OPEN/CLOSE
1 2 3
4 5 6
7 8 9
0/10 10+
ENTER
GOTO
PROGRAM
STEP
Press to switch on the unit. Press it again to put the unit in standby mode.
 Press repeatedly to select a video/audio source among TUNER, LINE 1,
LINE 2 and DVD.
Press to enter/exit the setup menu.
Press to open /close the disc tray.
The digit keys can be used to input numbers or make selection of a track or a chapter, etc.
Press to enter an item in the menu or to confirm and execute a selection.
The direction keys can be used to move the highlight in the menu.
Press to enter the GOTO menu. Use the digit keys to select a title, chapter, track, track time or disc time to play. Press it again to exit.
 You can play the contents of the disc in your desired order by programming in the program menu.
Press this button to enter the program menu. Press it again to exit the menu.
 Press to temporarily pause a playback. Press it again to resume the playback.
Or, press to resume the normal playback from the fast forward, fast reverse,
Press once to pause a playback, then press [
 ] to continue the playback;
Press it twice to stop a playback and the disc will be reset to the starting point.
 Fast forward playback. The available speed are 2X, 4X, 8X, 16X and 32X.
 Fast reverse playback. The available speeds are 2X, 4X, 8X, 16X and 32X.
Press to return to the previous chapter/track.
Press to skip to the next chapter/track.
 Press repeatedly to advance the video frame by frame. Press [
 ] to resume the normal playback. (Applies to DVD, VCD, MPEG4 discs etc)

REPEAT
MUTE
VOLUME+/-
S.EFFECT
TONE
TITLE
MENU
SUBTITLE
OSD
AUDIO
Remote Control Function
 Press repeatedly to switch the repeat modes. (Note: This function is invalid when the PBC function is activated.)
DVD: CHAPTER(chapter repeat) TITLE(title repeat) ALL(repeat all) (cancel repeat)
CD: TRACK(track repeat) ALL(repeat all) (cancel repeat)
You can repeat a specific section of a disc with this button.
Press this button to mark down the starting point (A) and press it again to mark down the ending point (B). Then, the unit will playback this section over and over again. Press it for the third time to cancel
Note: Points A and B must be in the same title/ track.
 Press this button to switch off the sound temporarily. Press it again to switch it on.
 Press [VOLUME+] to turn up the volume; press
Press repeatedly to switch the sound effects or switch off the sound effect. Note: You are recommended to switch off the sound effect when playing a
Dolby 5.1 channel disc so that to obtain the real 5.1 effect.
 Press this key repeatedly to select a channel or the overall volume, then press [VOLUME+]/[
 Press to select BASS or TREBLE, then use
Press to access the title menu.
Press to return to the root menu.
 When playing disc encoded with PBC function, press to display the PBC menu. Press it again to disable the PBC function.
Press repeatedly to switch the subtitles or switch off the subtitle function. (Note: This function only works with those discs encoded with subtitles.)
 Press repeatedly to switch or hide the relative information of the playing disc.
Press repeatedly to select the available audio languages provided by the disc (for DVD).
 Press repeatedly to switch the available audio channels

Remote Control Function
ANGLE
ZOOM
USB
Press to switch the viewing angles.
(Note: This function only works with the discs encoded with multiple camera angles.)
 Press repeatedly to switch the video output modes between CVBS (OFF) and YUV.
 Press repeatedly to switch the audio output modes between 5.1 CHANNELS OUTPUT and STEREO OUTPUT.
Press this button to zoom in/ out the scene. The available zoom ratios are: 2X, 3X, 4X, 1/2 X, 1/3 X and 1/4 X. In
 Press repeatedly to switch to the available extra signal source USB or SD/MS/MMC CARD, or return to the DVD mode.
USB DRIVE and SD/MS/MMC CARD PLAYBACK
 Insert a USB drive in the USB port, then press [USB] to play the readable files in it. Press [USB] again to switch to the DVD mode.
 Insert a SD, MS or a MMC card into the SD/MS/MMC card port, then press [USB] to play readable files in it. Press [USB] again to switch to the DVD mode.
NOTE: If a USB drive and a memory card are inserted at the same time, press [USB] once to select USB and press twice to select memory card. Press for the third time to return to the DVD mode.
This USB Port is designed to be used with most flash memory drives. Other USB drives may not be supported.
 Press to switch between the AM mode and the FM mode.
 Press to switch between Mono and Stereo reception of the broadcast signal in FM mode.
 Press to scan the broadcasting stations automatically.
 Press the direction key [LEFT]/[RIGHT] to do manual scanning for broadcasting station of lower/highter frequency.
 Press to fine tune (increase/decrease) the frequency.
 During scanning broadcasting stations, press to stop the process.
 After tuning in a new frequency, press [MEMORY], then select a preferred station by inputting the corresponding numbers to save it as a preset station.
 The digit keys can be used to select a preset station.
For example, press[0] and [2] to go to channel 2; press [1] and [5] to go to the channel 15.
 Press to skip to the next/previous preset station.
NOTE: In Tuner mode,

Playback
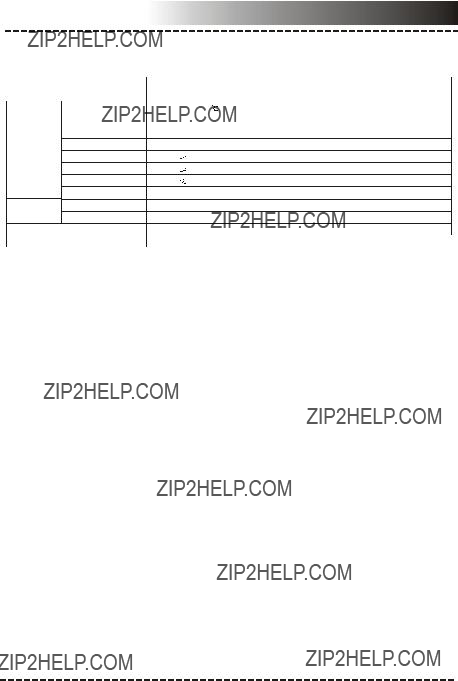
JPEG PICTURE PLAYBACK
 Place a JPEG picture CD in the disc tray, then the unit will load the disc automatically.
Press [ ] to enter the thumbnail mode to preview the pictures.
In the thumbnail mode, use the direction keys to select a picture, then press [ENTER] to start the playback from the selected picture.
In the thumbnail mode, use the direction keys and [ENTER] to make selections of the Slide Show, Menu, PREV or NEXT at the bottom of the screen.
Slide Show: Start slide show playback.
Menu: Enter the instruction menu for remote key function. In the menu, press [ENTER] to turn over to the next menu page and again to exit the instruction menu. PREV/NEXT: Turn over to the previous/next page.
Remote key function introduction
[  ]: Enter the thumbnail mode to preview the pictures.
[ZOOM]: During playback, press [ZOOM], then press [  ]/[
]/[ ] to zoom in/out the picture. When the picture is zoomed in, the direction keys can be used to move the picture. Press [ZOOM] again to exit the zooming mode.
MP3 PLAYBACK
Insert a MP3 disc into the player, then a content menu will display on the screen.
MENU OPERATION:
Use the direction key [ ]/[
]/[ ] to select a folder or a file, then press [ENTER] to enter the selected folder or play the selected file. You can also use the digit keys to make selection of a folder to enter or a file to play.
 [PROG]: Press repeatedly to switch between FOLDER playback mode and
FILELIST playback mode.
NOTE: During playback, [  ], [
], [ ], [REPEAT],
 ], [
], [  ](press to stop the playback),
Troubleshooting
If you have a problem with this device, please read the troubleshooting guide below and check our website at www.cobyusa.com for Frequently Asked Questions (FAQs) and firmware updates. If these resources do not resolve the problem, please contact Technical Support.
Specifications