LTC 9449 Series Unity?? Dome
Instruction Manual
EN Prepackaged
Camera Line
LTC 9449 Series Unity?? Dome
Instruction Manual
EN Prepackaged
Camera Line

Important Safeguards
1.Read, Follow, and Retain Instructions - All safety and operating instructions should be read and followed before operating the unit. Retain instructions for future reference.
2.Heed Warnings - Adhere to all warnings on the unit and in the operating instructions.
3.Attachments - Attachments not recommended by the product manufacturer should not be used, as they may cause hazards.
4.Installation Cautions - Do not place this unit on an unstable stand, tripod, bracket, or mount. The unit may fall, causing serious injury to a person and serious damage to the unit. Use only manufacturer- recommended accessories, or those sold with the product. Mount the unit per the manufacturer's instructions. Appliance and cart combination should be moved with care. Quick stops, excessive force, or uneven surfaces may cause the appliance and cart combination to overturn.
5.Cleaning - Unplug the unit from the outlet before cleaning. Follow any instructions provided with the unit. Generally, using a damp cloth for cleaning is sufficient. Do not use liquid cleaners or aerosol cleaners.
6.Servicing - Do not attempt to service this unit yourself. Opening or removing covers may expose you to dangerous voltage or other hazards. Refer all servicing to qualified service personnel.
7.Damage Requiring Service - Unplug the unit from the main AC power source and refer servicing to qualified service personnel under the following conditions:
???When the power supply cord or plug is damaged.
???If liquid has been spilled or an object has fallen into the unit.
???If the unit has been exposed to water and/or inclement weather (rain, snow, etc.).
???If the unit does not operate normally, when following the operating instructions. Adjust only those controls specified in the operating instructions. Improper adjustment of other controls may result in damage, and require extensive work by a qualified technician to restore the unit to normal operation.
???If the unit has been dropped or the cabinet damaged.
???If the unit exhibits a distinct change in performance, this indicates that service is needed.
8.Replacement Parts - When replacement parts are required, the service technician should use replacement parts specified by the manufacturer or that have the same characteristics as the original part. Unauthorized substitutions may result in fire, electrical shock or other hazards.
9.Safety Check - Upon completion of servicing or repairs to the unit, ask the service technician to perform safety checks to ensure proper operating condition.
10.Power Sources - Operate the unit only from the type of power source indicated on the label. If unsure of the type of power supply to use, contact your dealer or local power company.
???For units intended to operate from battery power, refer to the operating instructions.
???For units intended to operate with External Power Supplies, use only the recommended approved power supplies.
???For units intended to operate with a limited power source, this power source must comply with EN60950. Substitutions may damage the unit or cause fire or shock.
???For units intended to operate at 24VAC, normal input voltage is 24VAC. Voltage applied to the unit's power input should not exceed 30VAC.
11.Coax Grounding - If an outside cable system is connected to the unit, ensure that the cable system is grounded. U.S.A. models only - Section 810 of the National Electrical Code, ANSI/NFPA No.70, provides information regarding proper grounding of the mount and supporting structure, grounding of the coax to a discharge unit, size of grounding conductors, location of discharge unit, connection to grounding electrodes, and requirements for the grounding electrode.
12.Grounding or Polarization - This unit may be equipped with a polarized alternating current line plug (a plug with one blade wider than the other). This safety feature allows the plug to fit into the power outlet in only one way. If unable to insert the plug fully into the outlet, try reversing the plug. If the plug still fails to fit, contact an electrician to arrange replacement of the obsolete outlet. Do not defeat the safety purpose of the polarized plug.
Alternately, this unit may be equipped with a
into a grounding power outlet only. If unable to insert the plug into the outlet, contact an electrician to arrange replacement of the obsolete outlet. Do not defeat the safety purpose of the grounding plug.
13.Lightning - For added protection during a lightning storm, or when this unit is left unattended and unused for long periods of time, unplug the unit from the wall outlet and disconnect the cable system. This will prevent damage to the unit due to lightning and power line surges.
Bosch Security Systems | October 10, 2006

For Indoor Product
1.Water and Moisture - Do not use this unit near water - for example, in a wet basement, in an unprotected outdoor installation or in any area classified as a wet location.
2.Object and Liquid Entry - Never push objects of any kind into this unit through openings, as they may touch dangerous voltage points or short out parts that could result in a fire or electrical shock. Never spill liquid of any kind on the unit.
3.Power Cord and Power Cord Protection - For units intended to operate with 230VAC, 50Hz, the input and output power cord must comply with the latest versions of IEC Publication 227 or IEC Publication 245.
Power supply cords should be routed so they are not likely to be walked on or pinched. Pay particular attention to location of cords and plugs, convenience receptacles, and the point of exit from the appliance.
4.Overloading - Do not overload outlets and extension cords; this can result in a risk of fire or electrical shock.
For Outdoor Product
Power Lines - An outdoor system should not be located in the vicinity of overhead power lines, electric lights or power circuits, or where it may contact such power lines or circuits. When installing an outdoor system, extreme care should be taken to keep from touching power lines or circuits, as this contact might be fatal. U.S.A. models only - refer to the National Electrical Code Article 820 regarding installation of CATV systems.
For
1.Ventilation - This unit should not be placed in a
2.Mechanical Loading - Mounting of the equipment in a rack shall be such that a hazardous condition is not achieved due to uneven mechanical loading.
Safety Precautions
CAUTION: TO REDUCE THE RISK OF
ELECTRIC SHOCK, DO NOT REMOVE COVER
(OR BACK). NO USER SERVICEABLE PARTS
INSIDE. REFER SERVICING TO QUALIFIED
SERVICE PERSONNEL.
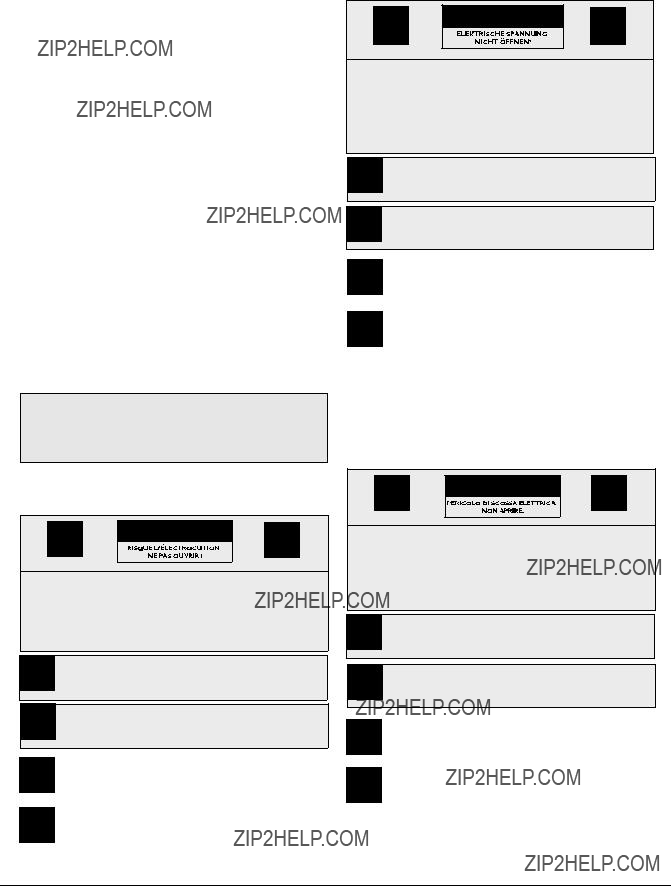
This symbol indicates the presence of uninsulated ???dangerous voltage??? within the product???s enclosure. This may constitute a risk of electric shock.
The user should consult the operating and maintenance (servicing) instructions in the literature accompanying the appliance.
Attention: Installation should be performed by qualified service personnel only in accordance with the National Electrical Code or applicable local codes.
Power Disconnect. Units with or without
Bosch Security Systems | October 10, 2006
FCC & ICES INFORMATION
(U.S.A. and Canadian Models Only)
This device complies with part 15 of the FCC Rules. Operation is subject to the following two conditions:
(1)This device may not cause harmful interference, and
(2)This device must accept any interference received, including interference that may cause undesired operation.
NOTE: This equipment has been tested and found to comply with the limits for a Class A digital device, pursuant to Part 15 of the FCC Rules and
Intentional or unintentional changes or modifications, not expressly approved by the party responsible for compliance, shall not be made. Any such changes or modifications could void the user???s authority to operate the equipment. If necessary, the user should consult the dealer or an experienced radio/television technician for corrective action. The user may find the following booklet, prepared by the Federal Communications Commission, helpful: How to Identify and Resolve
Sicherheitshinweise
VORSICHT: UM EINEN ELEKTRISCHEN SCHLAG ZU
VERMEIDEN, IST DIE ABDECKUNG (ODER R??CKSEITE) NICHT
ZU ENTFERNEN. ES BEFINDEN SICH KEINE TEILE IN DIESEM
BEREICH, DIE VOM BENUTZER GEWARTET WERDEN
K??NNEN. LASSEN SIE WARTUNGSARBEITEN NUR VON
QUALIFIZIERTEM WARTUNGSPERSONAL AUSF??HREN.
Das Symbol macht auf nicht isolierte ???gef??hrliche Spannung" im Geh??use aufmerksam. Dies kann zu einem elektrischen Schlag f??hren.
Der Benutzer sollte sich ausf??hrlich ??ber Anweisungen f??r die Bedienung und Instandhaltung (Wartung) in den begleitenden Unterlagen informieren.
Achtung! Die Installation sollte nur von qualifiziertem
Kundendienstpersonal gem???? jeweils zutreffender
Elektrovorschriften ausgef??hrt werden.
Unterbrechung des Netzanschlusses. Ger??te mit oder ohne Netzschalter haben Spannung am Ger??t anliegen, sobald der Netzstecker in die Steckdose gesteckt wird. Das Ger??t ist jedoch nur betriebsbereit, wenn der Netzschalter (EIN/AUS) auf EIN steht. Wenn das Netzkabel aus der Steckdose gezogen wird, ist die Spannungszuf??hrung zum Ger??t vollkommen unterbrochen.
WARNING: This is a Class A product. In a domestic environment, this product may cause radio interference, in which case, the user may be required to take adequate measures.
S??curit??
ATTENTION : POUR ??VITER TOUT RISQUE D'??LECTROCUTION,
N'ESSAYEZ PAS DE RETIRER LE CAPOT (OU LE PANNEAU
ARRI??RE). CET APPAREIL NE CONTIENT AUCUN COMPOSANT
SUSCEPTIBLE D'??TRE R??PAR?? PAR L'UTILISATEUR. CONFIEZ
LA R??PARATION DE L'APPAREIL ?? DU PERSONNEL QUALIFI??.
Ce symbole signale que le produit renferme une ?? tension potentiellement dangereuse ?? non isol??e susceptible de provoquer une ??lectrocution.
Ce symbole invite l'utilisateur ?? consulter les instructions d'utilisation et d'entretien (d??pannage) reprises dans la documentation qui accompagne l'appareil.
Attention : l'installation doit exclusivement ??tre r??alis??e par du personnel qualifi??, conform??ment au code national d'??lectricit?? am??ricain (NEC) ou au code d'??lectricit?? local en vigueur.
Coupure de l'alimentation. Qu'ils soient pourvus ou non d'un commutateur ON/OFF, tous les appareils re??oivent de l'??nergie une fois le cordon branch?? sur la source d'alimentation. Toutefois, l'appareil ne fonctionne r??ellement que lorsque
le commutateur est r??gl?? sur ON. Le d??branchement du cordon d'alimentation permet de couper l'alimentation des appareils.
Precauciones de Seguridad
PRECAUCI??N: PARA DISMINUIR EL RIESGO DE DESCARGA
EL??CTRICA, NO RETIRE LA CUBIERTA (NI LA PARTE
POSTERIOR). NO EXISTEN PIEZAS DE RECAMBIO EN EL
INTERIOR DEL EQUIPO. EL PERSONAL DE SERVICIO
CUALIFICADO SE ENCARGA DE REALIZAR LAS
REPARACIONES.
Este s??mbolo indica que existen puntos de tensi??n peligrosos sin aislamiento dentro de la cubierta de la unidad. Estos puntos pueden constituir un riesgo de descarga el??ctrica.
El usuario debe consultar las instrucciones de funcionamiento y mantenimiento (reparaci??n) en la documentaci??n que se suministra con el aparato.
Atenci??n: la instalaci??n la debe realizar ??nicamente personal cualificado de conformidad con el National Electric Code o las normas aplicables en su pa??s.
Desconexi??n de la alimentaci??n. Las unidades con o sin interruptores de encendido/apagado reciben alimentaci??n el??ctrica siempre que el cable de alimentaci??n est?? conectado a la fuente de alimentaci??n. Sin embargo, la unidad s??lo funciona cuando el interruptor est?? en la posici??n de encendido. El cable de alimentaci??n es la principal fuente de desconexi??n de todas las unidades.
Bosch Security Systems | October 10, 2006

VOORZICHTIG: OPEN DE BEHUIZING OF DE ACHTERKANT
VAN HET APPARAAT NIET. ZO VERMINDERT U HET RISICO
OP ELEKTRISCHE SCHOKKEN. IN HET APPARAAT
BEVINDEN ZICH GEEN ONDERDELEN DIE U ZELF KUNT
REPAREREN. LAAT SERVICE EN ONDERHOUD UITVOEREN
DOOR GEKWALIFICEERD PERSONEEL.
CUIDADO: PARA REDUZIR O RISCO DE CHOQUE
EL??CTRICO, N??O RETIRE A TAMPA (OU A PARTE
POSTERIOR). NO INTERIOR, N??O EXISTEM PE??AS QUE
POSSAM SER REPARADAS PELO UTILIZADOR. REMETA A
ASSIST??NCIA PARA OS T??CNICOS QUALIFICADOS.
Dit symbool geeft aan dat er binnen in het apparaat onge??soleerde, gevaarlijke spanning aanwezig is die mogelijk elektrische schokken kan veroorzaken.
De gebruiker dient de bedienings- en onderhoudsvoorschriften te raadplegen in de documentatie die werd meegeleverd met het apparaat.
Attentie: het apparaat mag alleen door gekwalificeerd personeel worden ge??nstalleerd. De installatie dient in overeenstemming met de nationale elektrische richtlijnen of de van toepassing zijnde lokale richtlijnen te worden uitgevoerd.
Spanning uitschakelen. Apparatuur met of zonder
Este s??mbolo indica a presen??a de "tens??o perigosa" n??o isolada dentro da estrutura do produto, o que pode constituir risco de choque el??ctrico.
O utilizador deve consultar as instru????es de funcionamento e manuten????o (assist??ncia) nos documentos que acompanham o aparelho.
Aten????o: a instala????o deve ser executada apenas por t??cnicos qualificados da assist??ncia, de acordo com o c??digo el??ctrico nacional ou os c??digos locais aplic??veis.
Corte de corrente. As unidades com ou sem interruptores
Sicurezza
ATTENZIONE: PER RIDURRE IL RISCHIO DI SCOSSE
ELETTRICHE NON RIMUOVERE LA COPERTURA (O IL
PANNELLO POSTERIORE). L'UNIT?? NON CONTIENE
COMPONENTI INTERNI RIPARABILI DALL'UTENTE. PER
QUALSIASI INTERVENTO, RIVOLGERSI A PERSONALE
TECNICO QUALIFICATO.
Questo simbolo indica la presenza di "tensione pericolosa" non isolata all'interno del contenitore del prodotto. Ci?? comporta un potenziale rischio di scosse elettriche.
Si consiglia di consultare le istruzioni operative e di manutenzione (interventi tecnici) contenute nella documentazione fornita con il dispositivo.
Attenzione: l'installazione deve essere effettuata esclusivamente da personale tecnico qualificato in conformit?? con il National Electrical Code o con le normative locali vigenti.
Scollegamento dell'alimentazione. Le unit?? dotate o sprovviste di interruttori
Bosch Security Systems | October 10, 2006

Table of Contents
Important Safeguards . . . . . . . . . . . . . . . . . . . . . . . . . . . . . . . . . . . . . . . . . . . . . . . . . . . . . . . . . . . . . . . . . .2 FCC Information . . . . . . . . . . . . . . . . . . . . . . . . . . . . . . . . . . . . . . . . . . . . . . . . . . . . . . . . . . . . . . . . . . . . .4 1 UNPACKING . . . . . . . . . . . . . . . . . . . . . . . . . . . . . . . . . . . . . . . . . . . . . . . . . . . . . . . . . . . . . . . . . .7 2 SERVICE . . . . . . . . . . . . . . . . . . . . . . . . . . . . . . . . . . . . . . . . . . . . . . . . . . . . . . . . . . . . . . . . . . . . .7 3 DESCRIPTION . . . . . . . . . . . . . . . . . . . . . . . . . . . . . . . . . . . . . . . . . . . . . . . . . . . . . . . . . . . . . . . .7 4 INSTALLATION . . . . . . . . . . . . . . . . . . . . . . . . . . . . . . . . . . . . . . . . . . . . . . . . . . . . . . . . . . . . . . .8 4.1 Pipe Mounting . . . . . . . . . . . . . . . . . . . . . . . . . . . . . . . . . . . . . . . . . . . . . . . . . . . . . . . . . . . . . . . . . .8 4.2 Vertical Surface Mounting . . . . . . . . . . . . . . . . . . . . . . . . . . . . . . . . . . . . . . . . . . . . . . . . . . . . . . . . .9 4.3 Attaching the Dome to the Mount . . . . . . . . . . . . . . . . . . . . . . . . . . . . . . . . . . . . . . . . . . . . . . . . . . .9 4.4 Connections for F and N Suffix Models . . . . . . . . . . . . . . . . . . . . . . . . . . . . . . . . . . . . . . . . . . . . .10 4.5 Dome Removal . . . . . . . . . . . . . . . . . . . . . . . . . . . . . . . . . . . . . . . . . . . . . . . . . . . . . . . . . . . . . . . .10 5 CAMERA SETUP . . . . . . . . . . . . . . . . . . . . . . . . . . . . . . . . . . . . . . . . . . . . . . . . . . . . . . . . . . . . . .10 5.1 Camera/Lens Positioning . . . . . . . . . . . . . . . . . . . . . . . . . . . . . . . . . . . . . . . . . . . . . . . . . . . . . . . .10 5.2 Lens Varifocal Range Adjustment . . . . . . . . . . . . . . . . . . . . . . . . . . . . . . . . . . . . . . . . . . . . . . . . . .10 6 CAMERA & LENS SETTINGS . . . . . . . . . . . . . . . . . . . . . . . . . . . . . . . . . . . . . . . . . . . . . . . . . . .11 6.1 Backlight Compensation, White Balance, Line Lock, and Phase Settings . . . . . . . . . . . . . . . . . . . .11 7 OPERATION . . . . . . . . . . . . . . . . . . . . . . . . . . . . . . . . . . . . . . . . . . . . . . . . . . . . . . . . . . . . . . . . .12 8 MAINTENANCE . . . . . . . . . . . . . . . . . . . . . . . . . . . . . . . . . . . . . . . . . . . . . . . . . . . . . . . . . . . . . .12 9 SERVICE PARTS . . . . . . . . . . . . . . . . . . . . . . . . . . . . . . . . . . . . . . . . . . . . . . . . . . . . . . . . . . . . . .12
Bosch Security Systems | October 10, 2006

1UNPACKING
This electronic equipment should be unpacked and handled carefully.
???Verify the unit model number.
See DESCRIPTION for detailed specification of model ordered.
If an item appears to have been damaged in shipment, replace it properly in its carton and notify the shipper. If any items are missing, notify your Bosch Security Systems Inc. Sales Representative or Customer Service.
The shipping carton is the safest container in which the unit may be transported. Save it for possible future use.
2SERVICE
If the unit ever needs repair service, the customer should contact the nearest Bosch Security Systems, Inc. Service Center for authorization to return and shipping instructions.
Service Centers
USA
For additional information, see
www.boschsecurity.com.
3DESCRIPTION
Bosch Security Systems | October 10, 2006

LTC 9449 Series | Instruction Manual | Installation
4INSTALLATION
CAUTION: These units must be properly and securely mounted to a supporting structure capable of sustaining the unit weight. Use care when selecting mounting hardware (not supplied) for installation, the mounting surface and unit's weight should be carefully considered.
4.1Pipe Mounting
1.The Ceiling Mount (LTC 9543/00) is used to mount the unit to the ceiling.
2.Attach a safety cable to an appropriate point on the ceiling.
3.Feed the cables through the ceiling mount and fasten the mount to the ceiling using 4 fasteners (FIGURE 1). Allow enough cable for the length of the pipe + 1m (3ft). 10mm (3/8in.) bolts/studs are recommended. Bolts should be secured with nuts, washers, and lock washers. Surface fasteners and surface should withstand 270kg (600lb).
4.Each end of the pipe should be threaded to a minimum length of 25.4mm (1in.). Pipe thread standards which may be used are as follows:
American National Standard - NPT.
British Standard - BSP.
5.If metric pipe thread is used, an adaptor is required at each end of the pipe.
6.Feed the cables through pipe and mounting cap.
7.Make the electrical connection to the supplied mating connector. (See FIGURE 2).
NOTE: On both 24VAC and 12VDC units, either wire can go to either of the specified pins on the mating connector. In multiple camera installations using 24VAC units, connect the wires to the same connectors to ensure proper camera phasing.
a.Connect the 24VAC or 12VDC power leads to the 24VAC pins and tighten screws.
b.Connect the video lead to the BNC connector located on the top of the housing.
8.Connect the mating connector securely to the connector on the connector plate.
9.Securely tighten the mounting cap onto the pipe to approximately 44N.m (30ft lb).
EN | 8
10.Torque the pipe into ceiling bracket to approximately 44N.m (30ft lbs).
11.If a significant length of pipe is used, support the pipe with braces or guy wires to prevent the swaying motion of the unit from being noticed on the video display.
Wire Entry Hole
325
12.8
Figure 1: Ceiling/Pipe Mounting
Power Leads
Figure 2: Connector Plate
Bosch Security Systems | October 10, 2006

3.Make the electrical connection to the supplied mating connector. (See FIGURE 2).
NOTE: On both 24VAC and 12VDC units, either wire
can go to either of the specified pins on the Figure 4: Attaching the Dome mating connector.
Bosch Security Systems | October 10, 2006

4.4Connections for F Suffix and
N Suffix Models
Connections for models containing fiber optic or twisted pair interfaces are defined in a separate Addendum, provided with those model types.
4.5Dome Removal
1.Remove the bottom piece of the dome by vertically pulling on the lower half. A safety strap prevents the bottom from dropping.
2.The cameras used in the LTC 9449 Unity Dome Series can be adjusted in a variety of ways; refer to Section 5 for more information.
3.Reattach the dome's bottom half by aligning up its tabs and vertically inserting the unit into the top half until it snaps into place.
4.Adjust the dome bubble to align the viewing slot with the camera.
5CAMERA SETUP
5.1Camera/Lens Positioning
The camera mounting brackets allow for camera view adjustments in the X (pan), Y (tilt), and Z (diagonal) planes. Be sure that the alignment indicator on the camera mounting bracket is pointing in an upward direction.
Diagonal (Z)
Adjustment
Screw
Diagonal (Z)
Adjustment
Screw
Figure 5: Camera/Lens Positioning
1.X (Pan) Adjustment:
a.The camera may be rotated by grasping the slotted bracket, just above the two wing nuts, and twisting it from
side to side.
2.Tilt (Y) Adjustment:
a.Loosen the wing nut on the side bracket to adjust camera tilt. Pliers may be required to loosen it since the unit is shipped with the wing nut tightened.
b.Tilt the camera to the desired position. The camera depth can be adjusted at the same time, by moving the camera along the slots.
c.Be sure that the camera alignment is correct. The alignment indicator should be pointing in an upward direction (see FIGURE 4).
4.Diagonal (Z) Adjustment:
a.Loosen the two diagonal adjustment screws.
b.Grasp the slotted bracket just above the two wing nuts, and twist the bracket along the two curved slots. To prevent pan
c.Tighten the two diagonal adjustment screws.
5.Be sure that all adjustment nuts are tight after completing camera positioning.
5.2Lens Varifocal Range Adjustment
These models are provided with either a
Adjust focal range to the desired view, as with any varifocal type lens.
Bosch Security Systems | October 10, 2006
6CAMERA & LENS SETTINGS
6.1Backlight Compensation, White Balance, Line Lock, and Phase Settings
As received, the unit will be set with the backlight compensation off, the white balance on, and the line lock on. See FIGURE 6a or 6b (depending on the supplied camera) for location of the dip switches and the phase control. See FIGURE 7 for a detailed view. Note that white balance applies to color cameras only.
1.Dip Switches: The dipswitches may be changed from their default positions if desired. Remove the lens connector on black cameras to access the dip switches.
2.Phase Control: The phase may be adjusted as required by using a small blade screwdriver.
See Detail
Figure 6a: Location of Camera & Lens Settings; White Camera
Phase Control Opening
Figure 6b: Location of Camera & Lens Settings; Black Camera
The control functions and settings described below are shown in the same sequence as they appear in FIGURE 7.
Phase Control
V - P H A S E Vertical Phase Adjustment
Phase Control
ON OFF
Dip Switches
Figure 7: Detail of Adjustments - Default Position
Bosch Security Systems | October 10, 2006

7OPERATION
These units require no operational adjustments.
8MAINTENANCE
No special maintenance is required.
Occasionally, dust may accumulate inside the housing and coat the transparent dome/trim ring. Remove any dust in the transparent dome/trim ring interior with clean compressed air, preferably from a spray can. If heavy residue accumulates, flush with water and immediately dry with pressurized air to prevent water spotting.
If internal wiping is necessary, use only microwave- type paper towels, or equivalent soft paper towels. Roll a section into a tightly wound tube, tear tube in half, and wet fuzzy torn end with a solution of isopropyl alcohol diluted with water. While holding the dome with its opening facing down, wipe the interior using a circular motion spiraling in toward the center. Use a new paper towel for each two passes.
To clean the exterior of a transparent dome, use any nonabrasive cleaning that is safe for use on acrylic plastic. Liquid or spray cleaner/wax for use on fine furniture or automobiles, such as Megular's Mirror Glaze Cleaner/Wax 6, is acceptable.
9SERVICE PARTS
?? 2006 Bosch Security Systems
F01U032546_01