Use and Care Manual
Dual Fuel Range
Use and Care Manual
Dual Fuel Range

Table of Contents
About This Manual . . . . . . . . . . . . . . . . . . . . . . . . . . . . . . . . . . . . . . . . . . . . . . . 1
Safety . . . . . . . . . . . . . . . . . . . . . . . . . . . . . . . . . . . . . . . . . . . . . . . . . . . . . . . . . 2
Important Safety Instructions . . . . . . . . . . . . . . . . . . . . . . . . . . . . . . . . . . . . . . . . . . . . . . . . . . . . . . . . . . . 2
Getting Started . . . . . . . . . . . . . . . . . . . . . . . . . . . . . . . . . . . . . . . . . . . . . . . . . . 7
Parts and Accessories . . . . . . . . . . . . . . . . . . . . . . . . . . . . . . . . . . . . . . . . . . . . . . . . . . . . . . . . . . . . . . . . 7 Control (Panel) . . . . . . . . . . . . . . . . . . . . . . . . . . . . . . . . . . . . . . . . . . . . . . . . . . . . . . . . . . . . . . . . . . . . . 15 Before Using the Appliance for the First Time . . . . . . . . . . . . . . . . . . . . . . . . . . . . . . . . . . . . . . . . . . . . . 19
Operation - Cooktop . . . . . . . . . . . . . . . . . . . . . . . . . . . . . . . . . . . . . . . . . . . . . 20
About the Cooktop . . . . . . . . . . . . . . . . . . . . . . . . . . . . . . . . . . . . . . . . . . . . . . . . . . . . . . . . . . . . . . . . . . 20
Operation . . . . . . . . . . . . . . . . . . . . . . . . . . . . . . . . . . . . . . . . . . . . . . . . . . . . . . . . . . . . . . . . . . . . . . . . . 20
Operation - Oven . . . . . . . . . . . . . . . . . . . . . . . . . . . . . . . . . . . . . . . . . . . . . . . 22
About the Oven . . . . . . . . . . . . . . . . . . . . . . . . . . . . . . . . . . . . . . . . . . . . . . . . . . . . . . . . . . . . . . . . . . . . . 22
Operation . . . . . . . . . . . . . . . . . . . . . . . . . . . . . . . . . . . . . . . . . . . . . . . . . . . . . . . . . . . . . . . . . . . . . . . . . 22
Operation - Warming Drawer (some models) . . . . . . . . . . . . . . . . . . . . . . . . . . 26
About the Warming Drawer . . . . . . . . . . . . . . . . . . . . . . . . . . . . . . . . . . . . . . . . . . . . . . . . . . . . . . . . . . . 26
Operation . . . . . . . . . . . . . . . . . . . . . . . . . . . . . . . . . . . . . . . . . . . . . . . . . . . . . . . . . . . . . . . . . . . . . . . . . 27
Getting the Most Out of Your Appliance . . . . . . . . . . . . . . . . . . . . . . . . . . . . . . 29
Getting the Most Out of Your Cooktop . . . . . . . . . . . . . . . . . . . . . . . . . . . . . . . . . . . . . . . . . . . . . . . . . . . 29 Getting the Most Out of Your Oven . . . . . . . . . . . . . . . . . . . . . . . . . . . . . . . . . . . . . . . . . . . . . . . . . . . . . 30 Getting the Most Out of Your Warming Drawer . . . . . . . . . . . . . . . . . . . . . . . . . . . . . . . . . . . . . . . . . . . . 37
Cleaning - Cooktop . . . . . . . . . . . . . . . . . . . . . . . . . . . . . . . . . . . . . . . . . . . . . . . . . . . . . . . . . . . . . . . . . . 39 Cleaning - Oven . . . . . . . . . . . . . . . . . . . . . . . . . . . . . . . . . . . . . . . . . . . . . . . . . . . . . . . . . . . . . . . . . . . . 42 Cleaning - Drawers (Storage or Warming) . . . . . . . . . . . . . . . . . . . . . . . . . . . . . . . . . . . . . . . . . . . . . . . . 45 Maintenance . . . . . . . . . . . . . . . . . . . . . . . . . . . . . . . . . . . . . . . . . . . . . . . . . . . . . . . . . . . . . . . . . . . . . . . 45
Service . . . . . . . . . . . . . . . . . . . . . . . . . . . . . . . . . . . . . . . . . . . . . . . . . . . . . . . 48
Before Calling Service . . . . . . . . . . . . . . . . . . . . . . . . . . . . . . . . . . . . . . . . . . . . . . . . . . . . . . . . . . . . . . . 48
Questions?
www.boschappliances.com 5551 McFadden Ave.
Huntington Beach, CA 92649
We look forward to hearing from you!

About This Manual
How This Manual Is Organized
This manual contains several sections:
???The Getting Started section describes the features and functionality of the range, including a description of how to set up the range and operate the control panel.
???The Operation sections describe how to operate each range component.
???The Getting the Most out of Your Appliance section includes information about the modes, cooking charts and tips for improving performance.
???The Cleaning and Maintenance section describes how to clean and main- tain your appliance.
???The Service section includes troubleshooting tips and your Warranty.
Before using your range, be sure to read this manual. Pay special attention to the Safety Sections located at the beginning of the manual.
English 1
Safety
Important Safety Instructions
READ AND SAVE THESE INSTRUCTIONS
Important Safety Instruc- tions
WARNING:
TO REDUCE THE RISK OF A RANGE TOP GREASE FIRE:
a)Never leave surface units unattended at high settings. Boilovers cause smoking and greasy spillovers that may ignite. Heat oils slowly on low or medium settings.
b)Always turn hood ON when cooking at high heat or when flamb??ing food (i.e. Crepes Suzette, Cherries Jubilee, Peppercorn Beef Flambe').
c)Clean ventilating fans frequently. Grease should not be allowed to accumulate on fan or filter.
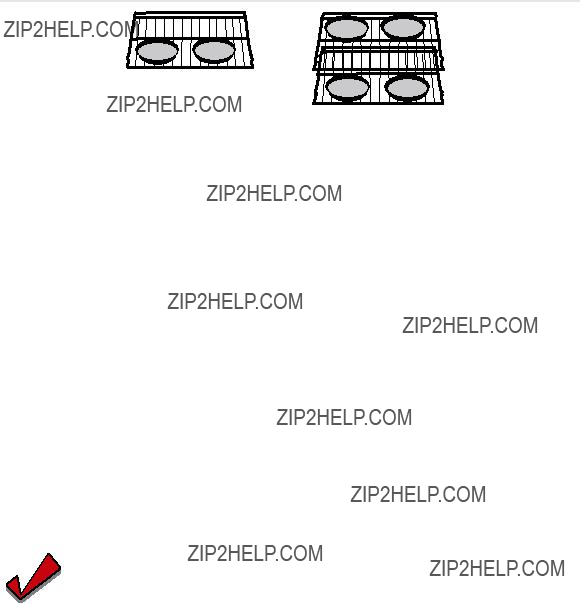
d)Use proper pan size. Always use cookware appropriate for the size of the surface element.
???In the event that personal clothing or hair catches fire, drop and roll immedi- ately to extinguish flames.
???Smother flames from food fires other than grease fires with baking soda. Never use water on cooking fires.
???Take care that drafts like those from fans or forced air vents do not push the flames so that they extend beyond the edges of the pan.
English 2

Safety
WARNING:
If the information in this manual is not followed exactly, a fire or explosion may result causing property dam- age, personal injury or death.
Do not store or use combustible materials, gasoline or other flamma- ble vapors and liquids in the vicinity of this or any other appliance.
??? WHAT TO DO IF YOU SMELL GAS:
??? Do not try to light any appliance.
??? Do not touch any electrical switch.
??? Do not use any phone in your building.
??? Immediately call your gas supplier from a neighbor???s phone. Follow the gas supplier???s instructions.
??? If you cannot reach your gas supplier, call fire department.
Installation and service must be performed by a qualified installer, authorized service agency or the gas supplier.
??? Have the installer show you where the gas
??? If a burner goes out and gas escapes, open windows and doors. Wait until gas dissipates before using the appliance.
??? If you smell gas, your installer has not done a proper job of checking for leaks. If the connections are not perfectly tight, you can have a small leak and, therefore, a faint smell. Finding a gas leak is not a
English 3
Safety
position and this must be done by a qualified service technician. See warn- ing in ???Gas Safety??? on page 3.
English 4
Safety

Safety
???This appliance must be properly installed and grounded by a qualified tech- nician. Connect only to properly grounded outlet. Refer to Installation Instructions for details.
???All ranges can tip. Injury to persons could result. Install
Figure 1: Tipping Precautions
???This appliance is intended for normal family household use only. It is not approved for outdoor use. See the Warranty. If you have any questions, contact the manufacturer.
???Do not store or use corrosive chemicals, vapors, flammables or nonfood products in or near this appliance. It is specifically designed for use when heating or cooking food. The use of corrosive chemicals in heating or clean- ing will damage the appliance and could result in injury.
???Do not operate this appliance if it is not working properly, or if it has been damaged. Contact an authorized service person.
???Do not obstruct oven vents.
???Do not repair or replace any part of the appliance unless specifically recom- mended in this manual. Refer all servicing to a factory authorized service center.
???In the event of an error the display flashes and beeps continuously. If this happens during
???In the event of an error the display flashes and beeps continuously. Discon- nect appliance from the power supply and call a qualified technician.
Food Safety
CAUTION:
To maintain food safety, follow these guidelines:
1)DO NOT use the warming drawer to heat cold food (excep- tion: it is safe to use the drawer to crisp crackers, chips or dry cereal and to warm plates.)
2)Be sure to maintain proper food temperature. The USDA rec- ommends holding hot food at 140??F or warmer.
3)DO NOT warm food for longer than one hour.
English 6
Getting Started
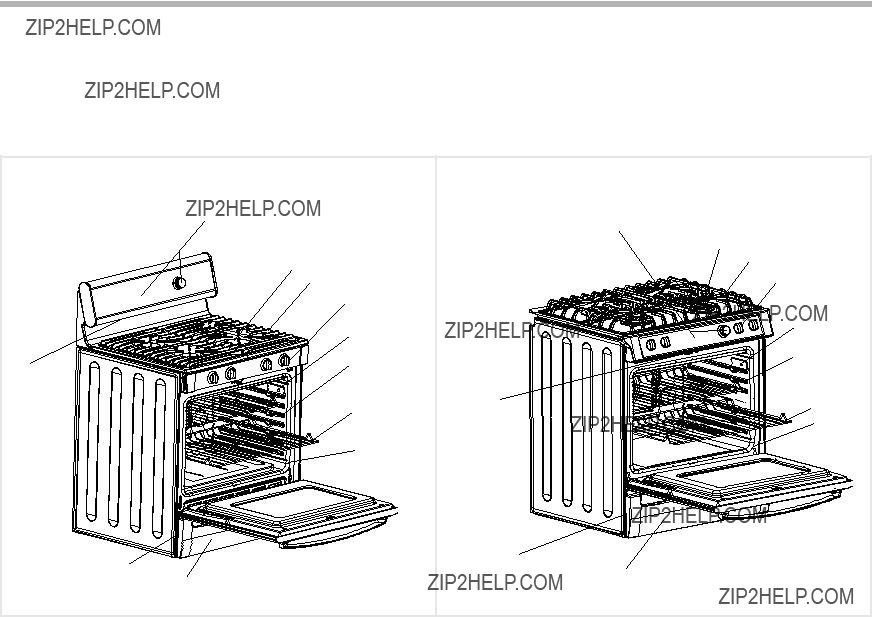
Parts and Accessories
Figure 2: Parts and Accessories
Table 1: Parts and Accessories Key
English 7
Getting Started
Table 1: Parts and Accessories Key
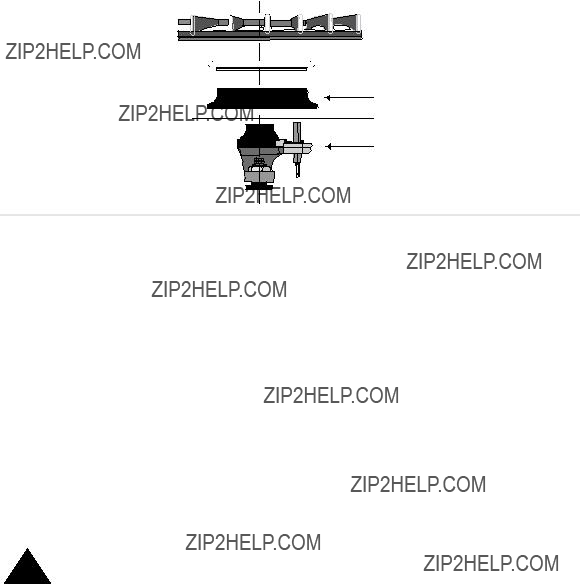
Burner Grate


 Burner Cap
Burner
Cooktop
Ignitor
English 8
Getting Started
burner cap. Burner grates should rest flat on the cooktop. The rubber feet on the grates should rest in the indents on the cooktop.
Left Side
Burner Grate
Right Side
Burner Grate
Figure 4: Grates for
Models with Glass Ceramic Cooktop:
There are four burner grates: one for each burner.
Figure 5: Grates for
Position them so that the circular opening is over the burner cap. In the back, the edge of the right side grate rests on top of the edge of the left side grate. In the front, the edge of the left side grate rests on top of the edge of the right side grate.
Back Grates
Front Grates
Figure 6: Installing Grates for
English 9

Getting Started
The locating pins on the outside edges of the cooktop fit into notches on the bot- tom of the grates.
Inserting Racks Into Oven
1.Grasp rack firmly on both sides.
2.Tilt rack up to allow stop into rack guide.
English 10
Getting Started
3.Bring rack to a horizontal position and press the rest of the way in. Rack should be straight and flat, not crooked.
Back of rack
Front of rack
Insert rack with the back of the rack toward the back wall of the range.
Figure 8: Inserting a Rack
Removing Flat Racks From Oven
1.Grasp rack firmly on both sides and pull rack toward you.
2.When the stop is reached, tilt rack up and pull the rest of the way out.
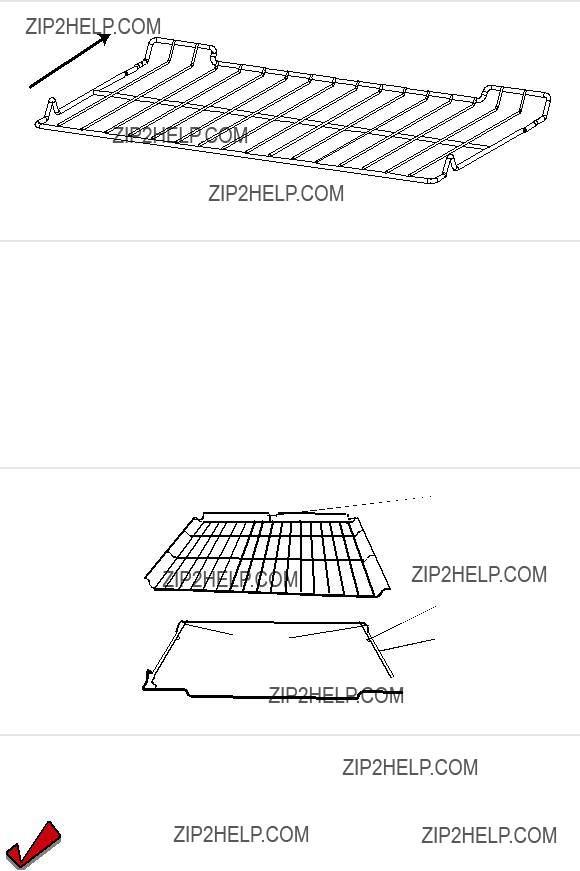
Extension Oven Rack (some models) The Full Extension Rack allows for easier access to cooking foods. The bottom section extends as far as the standard flat rack. However, the top section extends beyond the bottom section bringing the food closer to the user. To order a full extension rack, contact Service or a dealer near you.
Top Rack
Top Rack
 Stop (Ball)
 Top Rack Rest
Front of Rack
Figure 9: Full Extension Rack
Removing and Replacing
Note:
The full extension rack must be in the closed position when removing and replacing. Grasp the entire rack (both sections).
1.Grasp the bottom section and pull straight out.
2.Once the stop is reached, grasp the top section and pull straight out until the second stop is reached. If the top rack will not extend fully, it is not installed correctly. Reinstall it so that the pan stop is in the back of the oven.
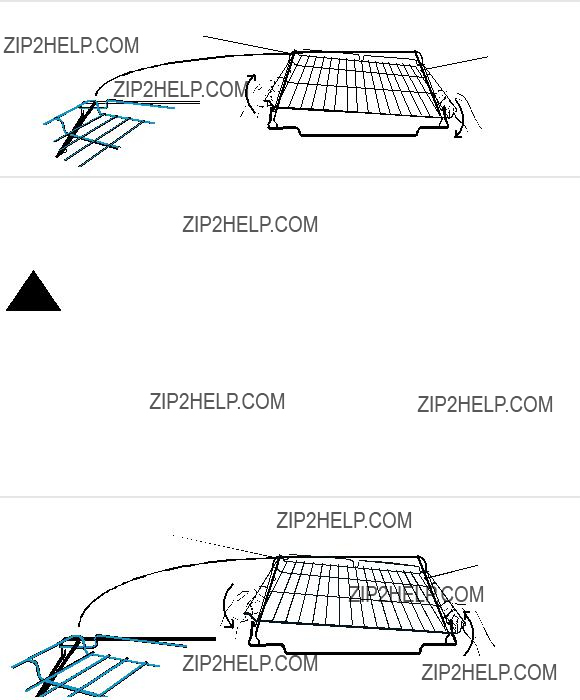
Disassembly (for cleaning)
The two sections of the rack are designed to come apart for easier cleaning.
1. Place rack on flat surface in the closed position top side up.
English 11
Getting Started
2.Rotate one side of top rack towards you until it is past the stop (ball).
3.Pull the rack up and out, rotated side first.
Stop (Ball)
Front of Rack
Figure 10: Disassembly
Reassembly
CAUTION:
Always verify that top rack is installed correctly after reassembly. The back edges of the top rack must be under the rack guide on the bottom rack. DO NOT simply rest the top rack on top of the bottom one.
1.To reassemble rack, hold top rack diagonally across bottom rack.
2.Insert one side of top rack to closed position.
3.Rotate the other side toward the back of the rack until it passes the stop (ball).
4.Push top rack the rest of the way in.
Stop (Ball)
English 12
Getting Started
Tip:
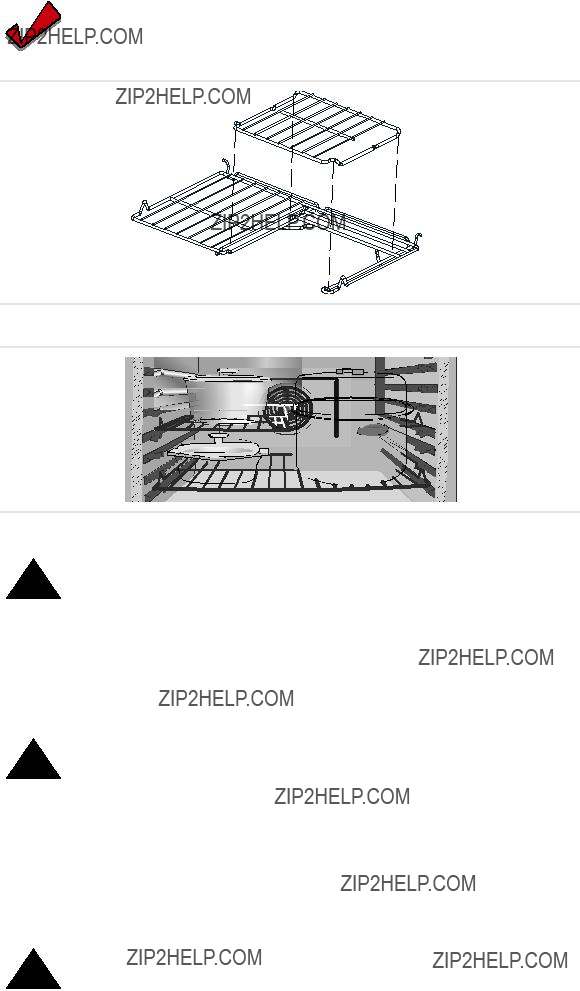
The removable section can also be used outside of the oven as a trivet or cooling rack.
Oven Bottom
Combustion Vents
Figure 12: Half Oven Rack
Figure 13: Half Oven Rack in Use
CAUTION:
Do not place food directly on oven bottom. Do not use aluminum foil or protective liners to line any part of an appliance, especially surface unit drip bowls or oven bottom. Installation of these liners may result in a risk of electric shock or fire.
The combustion vents are located along the back edge of the cooktop. They allow the burners to operate properly. Do not block these vents.
English 13

Getting Started
Automatic Shutoff
Self Cleaning
Indicators and Other Features
Cooling Fan
Convection Fan
area may be warm when the oven is in use. Do not block the vent as it is impor- tant for air circulation.
The oven will automatically shut off after 12 hours (24 hours if the time format is set for 24 hour in the Select Function section).
The oven features a
Beep - Signals that more information must be entered or confirms the receipt of an entry. A Beep also signals the end of a program or an oven error.
Default Settings - The cooking modes automatically select the default tempera- ture. These can be changed when a different one is needed.
Flashing Symbol or Number - Signals an incomplete setting and calls for another step or START to be pressed.
F Number Codes
The cooling fan runs during all oven modes. It may run during heavy cooktop use as well. You may hear it running and you may feel warm air as it is released from the oven vent. The cooling fan may continue to run after the oven is shut off. This is normal.
The convection fan operates during any convection mode and dehydrate. When the oven is operating in the convection mode, the fan will turn off automatically when the door is opened. The convection fan does run during
Note:
On some models, the convection fan also runs during preheat for the bake mode.
English 14
Getting Started
Control (Panel)
Oven Control Panel
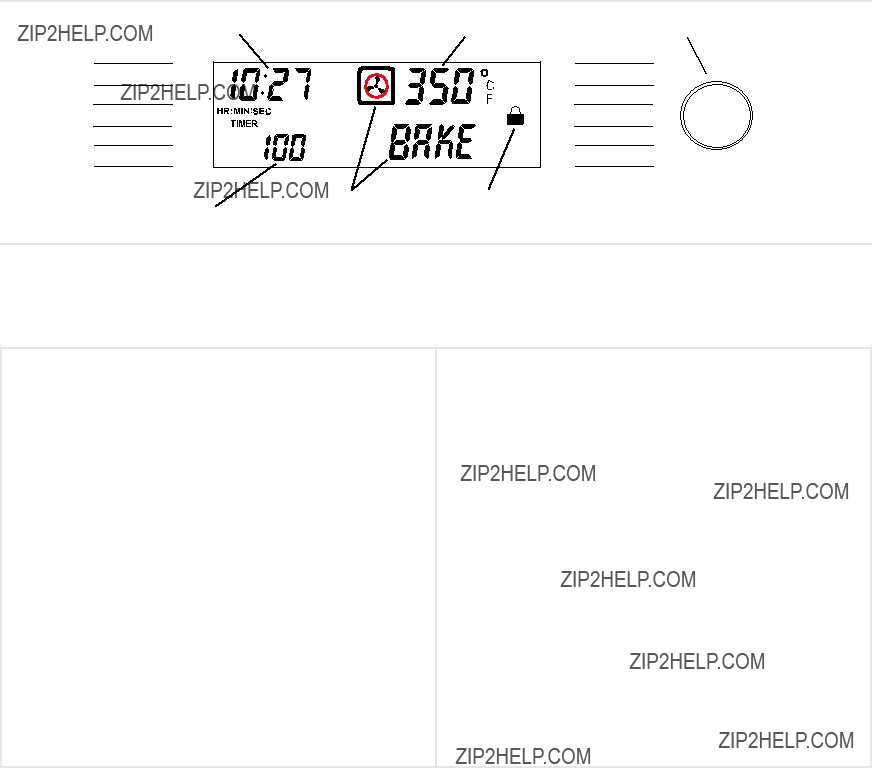
Figure 14: Oven Control Panel
Table 2: Oven Control Panel
Clock??? Shows the time of day with a 12 or 24 hour option. Also displays the timer and times associated with delayed cooking and cleaning modes. Turn the control knob to tog- gle between timer and clock display. Press TIME and turn the control knob to change the time of day or the timer.
Cooking Mode - Press pad to display cooking mode.
Cooking Mode Icon ??? Shows the cooking elements that are active for the mode that is selected. The icon will also display a fan if the convection fan is utilized in the selected mode.
Control Knob - Used to set the clock, timers, select cook- ing mode and temperature. Turn clockwise to increase and turn counterclockwise to decrease.
Light - Press pad to turn oven light on or off.
Door Locking Indicator - Icon is displayed during the
Off - Press pad to turn off oven and/or warming drawer.
Oven Temperature - Shows the oven temperature.
Preheat Temperature - Displays temperature of oven dur- ing preheat mode.
Probe Indicator (some models) - Indicates that the probe is properly inserted into the probe receptacle in the oven.
Start - Press pad to complete an entry.
Temperature - Press pad to select cooking temperature.
Time - Press pad to set or change the time of day or the timer.
Timer ??? There are two timers - TIMER 1 AND TIMER 2; Each counts down the time in hours and minutes. With less than 60 minutes remaining, the timer also displays seconds. Press Time to access the timers.
Warming Drawer Indicator - Indicates that the warming drawer (some models) is on. Also displays the warming drawer setting.
You control the operation of the range by using the touch pads, dial and control knobs.
The touchpads, in conjunction with the dial, are used to select an oven mode, set the oven temperature, set the time(s) and to set up your range. To use the touchpad, press the center part of the pad with the flat part of your fingertip. A beep will sound to indicate that the selection has been made. Turn the dial to the desired setting and press START.
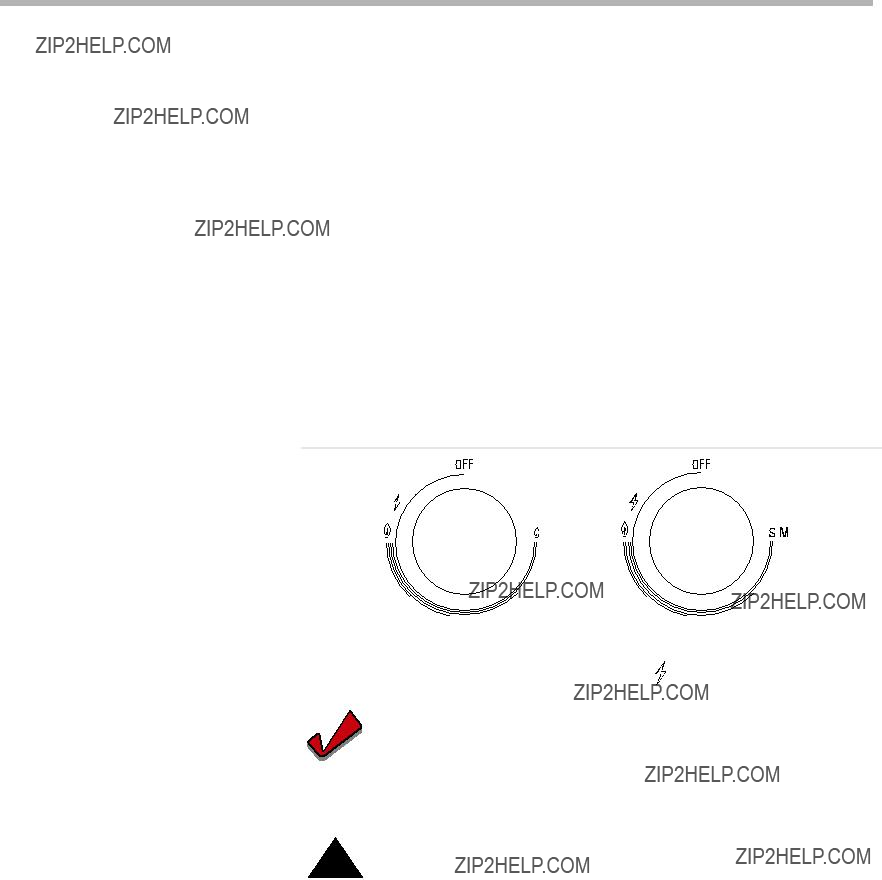
The knobs are used to control the heat level of the burners. Push down and turn to the  symbol to light and then to the desired heat setting.
English 15
Getting Started
2.Press TIME. CLOCK will still be displayed and the minute digits will flash.
3.Turn knob. Set minutes.
4.Press TIME and the clock is now set.
Note:
If operation is not completed, the oven will beep periodically as a reminder to set clock time. Press OFF.
1 Time
Time
The Select Functions
Menu
Note:
To cancel the TIME selection when setting the clock, press OFF any- time while in the clock mode.
SELECT FUNCTIONS is the section of the menu where you can set or change the range features listed below.
To access the SELECT FUNCTION menu
1.Press and hold COOKING MODE pad for five (5) seconds. SELECT FUNC- TION is displayed.
2.Turn knob slowly to desired feature. There will be a slight delay before each message (or feature) can be seen in the display. Turn knob slowly and wait approximately one second for display to show next feature.
3.Press START to choose the function.
4.Turn knob to desired setting and press START.
When all settings for the function are complete, SELECT FUNCTION flashes again.
5.Press OFF to exit the Select Functions Menu.
English 16

Getting Started
Change the Beep Volume The volume of the control beep can be changed from LOW (softest) to HIGH (loudest). The control default for beep volume is Medium.
1.Access SELECT FUNCTIONS Menu.
2.Turn knob clockwise until VOLUME is displayed.
3.Press START.
4.Turn knob to select volume level Low, Medium or High.
5.Press START.
Change the Temperature The oven has been preset to the Fahrenheit temperature scale. The feature Scaleallows you to switch between Fahrenheit and Celsius temperature.
1.Access SELECT FUNCTIONS Menu.
2.Turn knob clockwise until SELECT TEMP
3.Press START.
4.Turn knob to select Fahrenheit (F) or Celsius (C).
5.Press START to accept new selection.
Turn Clock Display ON or Clock time display can be turned off. The default display is on.
OFF
1.Access SELECT FUNCTIONS Menu.
2.Turn knob clockwise until CLOCK DISPLAY is displayed.
3.Press START.
4.Turn knob to select ON or OFF
5.Press START to accept new selection.
Access Demo Mode
Change the Display Lan- guage
Lock / Unlock the Oven
Control Panel
Change the Oven
Temperature Offset
The demo mode is for appliance store use only.
Language choices are English, Spanish, and French. English is the default lan- guage.
Note:
The SELECT FUNCTIONS menu is displayed in English only, regard- less of which language is selected.
1.Access SELECT FUNCTIONS Menu.
2.Turn knob clockwise until desired language is displayed.
3.Press START.
4.Turn knob clockwise to select a different language.
5.Press START to accept a language change.
The oven keypad can be locked for safety purposes. This feature can be used to prevent changes to the oven function. This function DOES NOT lock the oven door.
1.Access SELECT FUNCTIONS Menu.
2.Turn knob clockwise until LOCK KEYS is flashing.
3.Press START. KEY PAD LOCKED is displayed. The display will beep if a key is pressed to indicate that the keypad is locked.
4.To unlock keypads, press COOKING MODE and hold for 5 seconds. Dis- play will read UNLOCKING KEY PAD.
5.When unlocked, the clock will again appear in the display.
This feature allows the adjustment of the oven temperature if food is consistently too brown or too light.
1.Access SELECT FUNCTIONS Menu.
2.Turn knob clockwise until OVEN TEMP OFFSET is displayed.
3.Press START. 0?? F is displayed.
English 17

Getting Started
Reset the Factory Set- tings
Set the Sabbath Feature
4.Turn the knob to the right to increase temperature to +25?? F and to the left to decrease to
5.Press START to accept a temperature change.
This feature is used to change all the ???Select Functions??? settings back to the original factory settings (or defaults).
1.Access SELECT FUNCTIONS Menu.
2.Turn knob clockwise until RESET DEFAULTS is displayed.
3.Press START. Display reads SELECT FUNCTIONS.
About the Sabbath Feature
The Sabbath Feature enables those of particular faiths to use their ovens on the Sabbath.
???The oven will bake for 73 hours before automatically turning off.
???While baking in Sabbath mode, the display will show SABBATH and the BAKE icon will be displayed. The clock will be off and no temperature will show in the display.
???During the Sabbath mode, only the OFF key will operate. Press OFF at any- time during the Sabbath mode to end the mode and turn off the oven.
???At the end of 73 hours, the oven will turn off automatically and the display will show SABBATH END. Press OFF to return to time of day.
???The warming drawer does not operate with the Sabbath feature unless the feature is also activated in the oven.
???The probe CANNOT be used during the Sabbath mode.
Setting the Sabbath Feature for the Oven Only
1.Verify that the oven is turned off.
2.Access SELECT FUNCTIONS Menu.
3.Turn knob clockwise until SABBATH OPTION appears.
4.Press START. BAKE will show in display and temperature will flash.
5.Turn knob to set oven temperature.
6.Turn oven light on if desired (press LIGHT).
Note:
The light cannot be changed after this point. It will stay on or off, as selected, during the entire Sabbath mode.
7. Press START. Oven starts after 5 seconds.
The oven operates for 73 hours and then turns off automatically.
Setting the Sabbath Feature for both the Warming Drawer and the Oven
Note:
Warming drawer does not operate with the Sabbath feature unless the feature is also activated in the oven.
1.Turn the warming drawer on to the desired heat setting. See ???Turning on the Warming Drawer??? on page 27
2.Verify that the oven is turned off.
3.Access SELECT FUNCTIONS Menu.
4.Turn knob clockwise until SABBATH OPTION appears.
5.Press START. BAKE will show in display and temperature will flash.
6.Turn knob to set oven temperature.
7.Turn oven light on if desired (press LIGHT).
English 18
Getting Started
Note:
The light cannot be changed after this point. It will stay on or off, as selected, during the entire Sabbath mode.
8.Press START. Oven starts after 5 seconds. Sabbath Feature is activated for both the warming drawer and the oven.
The oven and warming drawer operate for 73 hours and then turn off automati- cally.
Setting the Sabbath Feature for the Warming Drawer Only
The warming drawer does not operate with the Sabbath feature unless the fea- ture is also activated in the oven. See ???Setting the Sabbath Feature for both the Warming Drawer and the Oven??? on page 18.
Change the Time Format The clock can be set to a 12 hour or 24 hour format. The default for clock format is 12 hour.
1.Access SELECT FUNCTIONS Menu.
2.Turn knob clockwise until TIME FORMAT is displayed.
3.Press START.
4.Turn knob to select 12 hour or 24 hour format.
5.Press START to accept new selection.
0.0Turn Automatic Convec- This feature automatically converts package or recipe temperatures for use with
tion Conversion ON or
OFF
the convection bake mode. The default setting is ???on???.
1.Access SELECT FUNCTIONS Menu.
2.Turn knob clockwise until AUTO CONVECT BAKE is displayed.
3.Press START.
4.Turn knob to select ON or OFF.
5.Press START to accept new selection.
Before Using the Appliance for the First Time
???Remove all packing materials and labels from range. Remove packing materials from inside the oven and inside the drawer.
???While cool, wipe with a clean, damp sponge and dry.
???For models with a glass ceramic cooktop, apply the glass ceramic cooktop cleaner. Buff with a clean cloth. See ???Cleaning and Maintenance??? on page 39.
???There may be a slight odor during first uses; this is normal and will disap- pear.
???Read and understand all Safety Precautions and Use and Care Manual information prior to operating.
English 19
Operation - Cooktop
This section explains how to operate the cooktop. See ???Getting the Most Out of
Your Cooktop??? on page 29 for guidelines to improve cooktop results.
About the Cooktop
Use the cooktop for surface cooking applications such as boiling, frying, simmer- ing, steaming and sauteing.
Operation
Setting the Burner Heat
Level
Burner Control Knobs (some models) .
English 20

Operation - Cooktop
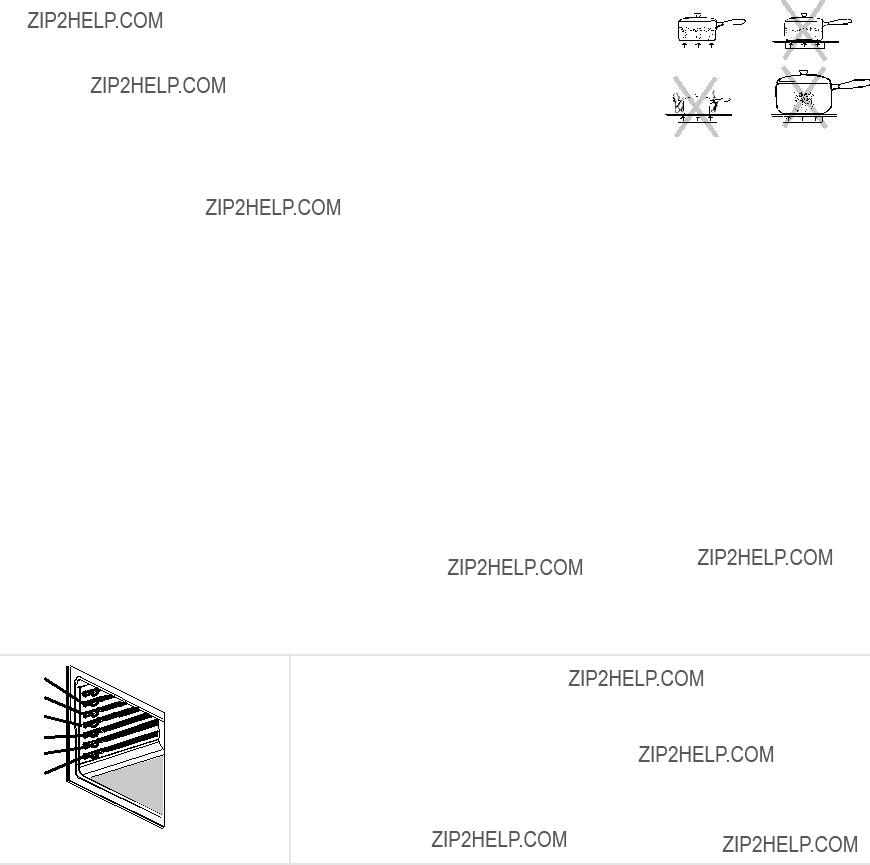
CAUTION:
To prevent possible burns, the flame should not extend beyond the edge of the cookware. This instruction is based on safety consider- ations. Damage to the cookware or the appliance may also result.
Note:
A ???pop??? may be heard when the burner is turned off. The ???pop??? may be louder with LP gas than with natural gas. This is normal.
English 21
Operation - Oven
This section explains how to operate the oven. See ???Getting the Most Out of
Your Oven??? on page 30 for guidelines to improve oven results.
About the Oven
Operation
Setting the Cooking Mode
and Temperature
Automatic Convection Conversion (models with convection bake)
English 22
CAUTION:
Do not use aluminum foil or protective liners to line any part of an appliance, especially surface unit drip bowls or oven bottom. Installa- tion of these liners may result in a risk of electric shock or fire.
Note:
To back out of a current mode, press OFF. (Selecting OFF when not setting the cooking mode will turn the oven off.)
1.Press COOKING MODE.
2.BAKE will flash in the display.
4.To change the cooking mode, turn knob.
5.Press START.
6.The selected mode will appear in the display, along with the default temper- ature for that mode, which will be blinking.
7.To select a different temperature, turn knob to the right or left (in 5?? incre- ments) to desired temperature.
8.Press START. If not pressed, oven automatically turns on in 5 seconds.
9.The display alternates between the cooking mode and preheat.
The preheated temperature is displayed, starting at 100??F. The actual tempera- ture increases until set temperature is reached, at which point the oven will beep.
10.To change temperature during cooking, press TEMPERATURE. Turn the knob to select new temperature and press START.
11.Once cooking has been completed, press OFF to turn off oven.
In the convection bake mode, the temperature is automatically reduced 25?? F from the package or recipe temperature. Simply enter the package or recipe temperature when setting the mode and the range calculates the correct tem- perature.
The Automatic Convection Conversion feature can be turned off to allow for manual temperature adjustment. See ???Turn Automatic Convection Conversion ON or OFF??? on page 19 for details.
When the Automatic Convection Conversion feature is activated, the display will read AUTO CONV BAKE. When the feature is turned off, it will read CONV BAKE.
Using the Timer
Note:
???If you do not finish setting the timer, the oven will beep periodi- cally as a reminder to set the time. Press OFF to exit the TIMER mode. (Selecting OFF when not setting the timer will turn the oven off.)
???Turn the knob to display the time of day or further information about the oven mode when the timers are in use.
Turn clockwise and TIMER 2 will be displayed. Select TIMER 1 or 2, then press TIME. SET TIMER 1 (2) appears in display. Minutes flash.
0: 00
TIMER 1
1 : 00
HR:MIN SET TIMER 2
the display. Minute digits flash.
3.Turn knob clockwise or counterclockwise to change minutes.
4.Press TIME again and hour digits will flash.
5.Turn knob clockwise or counterclockwise to change hours.
6.Press TIME and new time is set.
Using Timed or Delayed Cook
Setting a Timed Mode
The TIMED COOK feature sets the oven to a cooking mode for a set period of time and then turns it off. The TIMED COOK feature is available for each of the following oven modes: Bake, Convection Bake and Convection Roast.
???Be sure that the
???At end of the programmed cooking time, the oven will automatically turn off.
???Delayed cooking is not recommended for foods that need to rise (i.e.; cook- ies, cakes, breads, souffles, etc.)
1.Press COOKING MODE.
2.BAKE will be displayed. To select a different cooking mode, turn the knob.
English 23
Operation - Oven
Delaying the Start of a Timed Mode
To Check the Cooking Time and Stop Time After a Delay Has Been Set
Setting the Sabbath Feature
Using the Probe (some models)
3.Press START.
4.Turn knob to select desired temperature.
Note:
Time required for the oven to reach temperature must be included in the set cooking time.
7.Set minutes. Press TIME.
8.Hours Flash. Set hours. Press START.
9.TIMED BAKE appears in display and the oven begins to preheat.
After cooking is complete, display flashes TIME COOK END and reminder beeps will sound. Press OFF to clear.
1.Follow steps 1 through 5 above.
2.Turn knob until DELAYED BAKE appears.
Note:
The clock automatically calculates time of day at which cooking mode starts and stops. The displayed cooking time counts down by the minute.
10.At the end of the programmed cooking time, the oven will automatically turn off. Display will show TIME COOK END and reminder beeps will sound. Press OFF to clear.
Note:
Remove food from oven immediately after cycle has finished to pre- vent overcooking. Food left in the oven will cook even after the cycle is complete.
1.Press TIME.
2.Turn knob to BAKE END or BAKE TIME.
3.Press TIME.
See ???Set the Sabbath Feature??? on page 18.
This section explains how to operate the probe. See ???The Probe (some models)??? on page 31 for guidelines, tips and suggestions.
The probe can be used to determine the internal doneness or the ???END??? temper- ature of many foods,especially meats and poultry.
The temperature range for the probe is 135??F to 200??F (57??C to 93??C). Oven temperature can be set for 100??F up to 450??F (38??C up to 232??C).
English 24

Note:
Always remove probe from oven when cooking is complete. The probe symbol will remain in the display until the probe is removed. Do not leave probe attachment in oven during
English 25
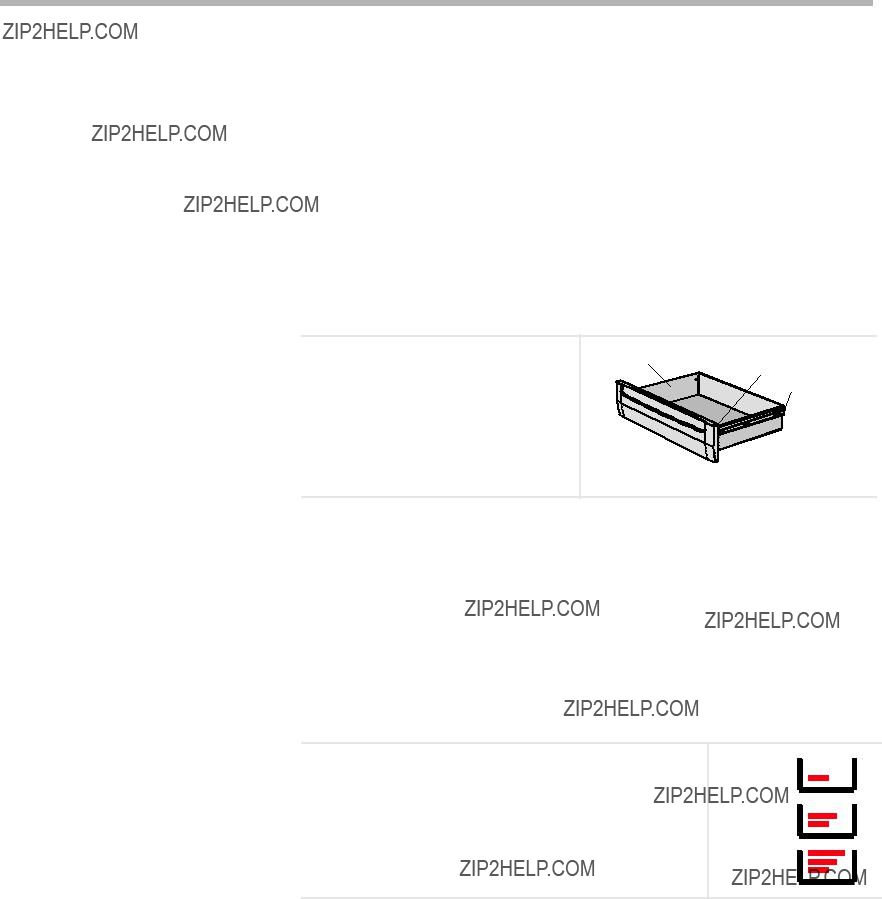
Operation - Warming Drawer (some models)
This section explains how to operate the warming drawer. See ???Getting the Most Out of Your Warming Drawer??? on page 37 for guidelines to improve warming drawer results.
About the Warming Drawer
The warming drawer will keep hot, cooked foods at serving temperature. Warm- ing drawer settings are Low, Medium, and High.
Warming Drawer Specifi- cations
1
3
1. Stainless Steel Drawer Interior
2. Gasket
3. Rail Lock
Figure 16: Warming Drawer Parts
Drawer Interior: 25" W x 17" D x 5" H
Dish sizes:
???2
???2
???4
???3
Warming Drawer Settings: The warming drawer has
three settings: Low, Medium and High. These icons are seen in the display when the corresponding setting is selected:
For recommended settings, see ???Warming Drawer Chart??? on page 38.
Low
Medium
High
Figure 17: Warming Drawer Settings
English 26

Operation - Warming Drawer (some models)
Operation
CAUTION:
To maintain food safety, follow these guidelines:
??? DO NOT use the warming drawer to heat cold food (exception: it is safe to use the drawer to crisp crackers, chips or dry cereal and to warm plates).
??? Be sure to maintain proper food temperature. The USDA recom- mends holding hot food at 140??F or warmer.
??? DO NOT warm food for longer than one hour.
CAUTION:
Plastic containers, plastic wrap or aluminum foil can melt if in direct contact with the drawer or a hot cooking container. If it melts onto the drawer, it may not be removable.
Turning on the Warming
Drawer
When Only Using the Warming
Drawer
1.Press COOKING MODE.
2.Turn knob to select WARMING DRAWER.
3.Press START.
4.Turn knob to select heat setting.
5.Press START.
Turning Off the Warming
Drawer
When Only Using the Warming
Drawer
When Using the Warming Drawer
and the Oven
1. Press OFF.
1.Press OFF.
2.Turn knob to select CANCEL DRWR, CANCEL OVEN, or CANCEL BOTH.
3.Press OFF.
English 27
Operation - Warming Drawer (some models)
Crisping Stale Items
???Place food in low sided dishes or pans.
???Preheat on Low.
???Check crispness after 45 minutes. Add time as needed.
Warming Empty Serving
Bowls and Plates
???Use only
???Warm on setting appropriate for cooking container.
???Check dish temperature during warming period.
???Place empty plates or dishes in a cold warming drawer. Do not preheat drawer prior to placing dishes.
English 28
Getting the Most Out of Your Appliance
Getting the Most Out of Your Cooktop
Cooktop Cooking Guide
Cookware Selection Guide
English 29
Getting the Most Out of Your Appliance
Getting the Most Out of Your Oven
Oven Cooking Guide
Rack Position
???RACK POSITION 2 ??? Used for pies, casseroles, breads, bundt or pound cakes, small roasts or poultry.
???RACK POSITION 1 (lowest position) ??? Used for angel food cake, large roasts, turkey.
English 30
Getting the Most Out of Your Appliance
Inserting the Probe
???For meats, insert the probe tip into the thickest part and do not touch bone, fat, or gristle.
???For large poultry products and turkeys, insert the probe in the thickest part of the inner thigh.
???For other foods, such as a meatloaf, the probe tip should be located in the center of the thickest part of the food.
English 31
Getting the Most Out of Your Appliance
Oven Cooking Modes
Baking is cooking with dry, heated air. Both the Bake, Proof and Warm upper and lower element cycle to maintain the oven temperature. Bake mode can be used to
prepare foods like pastries and casseroles as well as to roast meats.
Note:
Depending on the model, you may hear the convection fan while the oven is preheating for the bake mode. This is normal.
In the Proofing mode, the oven will use the upper and lower element to maintain a low temperature to proof bread.
???Proofing is the rising of a yeast dough.
???The Proofing mode temperatures are 85?? to 110?? F. The default temperature is 100?? F.
???Loosely cover the bowl or pan and use any rack that accommodates the size of the container.
???Keep the door closed and use the oven light to check the rising of the dough.
In Warming mode, the upper and lower elements maintain a low temperature in the oven cavity in order to keep food at serving temperature.
???Use the Warming setting on the oven to keep foods hot until ready to serve.
???Warming mode temperatures are 140?? - 220?? F. Default temperature is 170??.
???Foods that must be kept moist should be covered with a lid or aluminum foil.
CAUTION:
When using Warm mode, follow these guidelines:
???Do not use the Warm Mode to heat cold food.
???Be sure to maintain proper food temperature. The USDA recom- mends holding hot food at 140??F or warmer.
???DO NOT warm food for longer than one hour.
Convection baking is similar to baking. Heat Convection Bake comes from the lower heating element and a
third element behind the backwall. The main difference in convection baking is that the heat is circulated throughout the oven by the con- vection fan.
The Convection Bake mode is
racks. It can be used to prepare cookies, pies, cupcakes, pastries, breads, snack foods and appetizers among other items. The benefits of Convection Bak- ing include:
???Slight decrease in cooking time
???Three rack cooking (more even browning)
???Higher Volume (yeast items rise higher)
???Ability to cook more items at once
English 32

Getting the Most Out of Your Appliance
For Best Results:
???Reduce recipe temperature by 25?? F. Refer to Convection Baking chart.
???Place food in
???Center baking pans side to side on the oven rack
Automatic Convection Conversion In the convection bake mode, the temperature is automatically reduced 25?? F from the package or recipe temperature. Simply enter the package or recipe temperature when setting the mode and the range calculates the correct tem- perature.
The Automatic Convection Conversion feature can be turned off to allow for manual temperature adjustment. See ???Turn Automatic Convection Conversion ON or OFF??? on page 19 for details.
When the Automatic Convection Conversion feature is activated, the display will read AUTO CONV BAKE. When the feature is turned off, it will read CONV BAKE.
Table 4: Convection Baking Chart
a.This temperature must be manually reduced by 25?? F if the Automatic Convection Conversion feature has been turned off.
b.This chart is a guide. Actual times depend on the mixes or recipes baked. Follow recipe or package directions.
Broiling uses intense heat radiated from the Broilupper element. The Broil mode is best suited to
cooking thin, tender cuts of meat (1??? or less), poultry and fish. It can also be used to brown breads and casseroles. Always broil with the door closed.
The benefits of Broiling include:
???Fast and efficient cooking
???Cooking without the addition of fats or liquids
???Browning as the food cooks
English 33

Getting the Most Out of Your Appliance
For Best Results:
???Preheat oven
???Steaks and Chops should be at least 3/4??? thick
???Brush fish and poultry with butter or oil to prevent sticking
???Use the broil pan and grid included with your range
???Do not cover the broiler grid with foil. It is designed to drain fats and oils away from the cooking surface to prevent smoking and spattering
???Turn meats once halfway through the recommended cooking time (see Broil Chart for examples).
???When top browning casseroles, use only metal or glass ceramic dishes such as Corningware??.
???Never use
Table 5: Broiling Chart
a.Broiling times are approximate and may vary slightly, Times are based on cooking with a preheated broil element.
Convection Broil (some models)
Convection Broil is similar to Broil. It combines intense heat from the upper element with heat circulated by a convection fan. The Convection Broil mode is well suited for cooking thick, ten- der cuts of meat, poultry and fish. Convection Broil is typically not recommended for browning breads, casseroles and other foods.
Always convection broil with the door closed. In
addition to the benefits of standard broiling, convection broiling is faster than standard Broiling.
Note:
The only heat setting for the Convection Broil mode is High.
English 34

Getting the Most Out of Your Appliance
For Best Results:
???Preheat oven
???Meats should be at least 1 1/2??? thick.
???Turn meats once halfway through the cooking time (See Convection Broil Chart for examples).
???Use the broil pan and grid included with your range.
???Do not cover the broiler grid with foil. It is designed to drain fats and oils away from the cooking surface to prevent smoking and spattering.
???Salt after cooking.
Table 6: Convection Broiling Chart
a.Convection broiling times are approximate and may vary slightly. Times are based on cooking with a pre- heated broil element.
Convection Roast uses heat from the top and Convection Roast bottom elements as well as heat circulated by
the convection fan. The Convection Roast mode is well suited to preparing tender cuts of meat and poultry.
The benefits of Convection Roasting, include:
???As much as 25% faster cooking than stan- dard Roasting/ Baking
???Rich, golden browning
For Best Results:
???Use the same temperature as indicated in the recipe.
???Check doneness early as roasting time may decrease by as much as 25%. Refer to Convection Roast Chart for examples.
???Do not cover meat or use cooking bags.
???Use the broil pan and grid provided with the range for roasting. A
???Use a meat thermometer to determine the internal temperature of the meat.
???If the meat is browned to your liking, but is not yet done, a small strip of foil can be placed over the meat to prevent overbrowning.
???Let meat stand covered with foil
English 35

Getting the Most Out of Your Appliance
Table 7: Convection Roast Chart
a.Roasting times are approximate and may vary depending on the shape of the meat.
b.Stuffed turkey requires additonal roasting time. The minimum safe temperature for stuffing in poultry is 165??F.
For Best Results:
???Dry most fruits and vegetables at 140?? F. Dry herbs at 100?? F. (Refer to the Dehydrate Chart for examples).
???Drying times vary depending on the moisture and sugar content of the food, the size of the pieces, the amount being dried and the humidity in the air. Check food at the minimum drying time.
???Multiple drying racks (not included) can be used simultaneously. Contact your dealer to order drying racks.
???Treat fruits with antioxidants to avoid discoloration.
???Consult a food preservation book, county Cooperative Extension Office or library for additional information.
English 36
Getting the Most Out of Your Appliance
Table 8: Dehydrate Chart
Getting the Most Out
of Your Warming Drawer
General Tips
Refer to the Warming Drawer Chart for recommended settings.
???To keep several different foods hot, set the temperature for the food needing the highest setting.
???Place items needing the highest setting toward the side of the drawer and items needing less heat in the center of the drawer.
???Food should be at serving temperature (above 140?? F) before being placed in the warming drawer. DO NOT use to heat cold food other than crisping crackers, chips, and dry cereal, or warming dishes or plates.
???Preheat empty serving dish while preheating drawer if desired.
???Place cooked, hot food in warming drawer in its original cooking container or in a
???Aluminum foil may be used to cover food; However, DO NOT line the warm- ing drawer with aluminum foil.
???Do not use the warming drawer for storage.
English 37
Getting the Most Out of Your Appliance
Table 9: Warming Drawer Chart
English 38
Cleaning and Maintenance
Cleaning - Cooktop
CAUTION:
Do not clean the appliance while it is still hot. Some cleaners produce noxious fumes when applied to a hot surface. Wet clothes or sponges can cause burns from steam.
CAUTION:
Daily Cleaning
Cleaning Guidelines
All ignitors spark when any single burner is turned on. Do not touch any of the burners when the cooktop is in use.
Wipe with a warm soapy water; Rinse and dry. After a spill or boilover, turn off the burner and allow the cooktop to cool. Clean around the burner and burner ports. Reassemble burner(s) and check for proper operation.
Additional Steps for Glass Ceramic Models:
Apply glass ceramic cooktop cleaner.
English 39
Cleaning and Maintenance
Table 10: Cooktop Cleaning Chart
English 40
Table 11: Cleaning Techniques for Stubborn Soil (Glass Ceramic Cooktop Models)
English 41

Cleaning - Oven
Daily Cleaning
Daily cleaning of the inside of the oven is not necessary. When soil builds up, use the
Cleaning Guidelines
Table 12: Oven Cleaning Chart
English 42

??? Do not clean parts or accessories in the
??? It is common to see smoke and/or an occasional
??? The oven door locks at the beginning of the
??? The oven light does not operate during this mode.
??? During
??? Four hours is the preset length of cleaning. The range can also be set to clean for 3 or 5 hours.
??? The mode automatically stops at the end of the clean hours.
??? When the oven cools after cleaning, the automatic door lock will release and the door can be opened.
??? To cancel or stop while the mode is operating, press OFF.
??? The door will not unlock until the oven reaches a safe temperature.
A flexible door gasket is necessary for a good seal. Do not clean, rub, damage or move the gasket.
1.Remove all utensils and bakeware.
2.Remove oven racks. If oven racks are left in the oven during the
3.Wipe up excessive soil, spills and grease before
English 43

Cleaning and Maintenance
Setting the
Delaying the Start of
the
Do
Do not
Do
Do
Figure 21: Cleaning Guidelines
4.Review illustration above. Some areas of the oven must be cleaned by hand before the cycle begins. Use a soapy sponge or plastic scrubber or a deter-
5.Be sure oven light is turned off and the light bulbs and lens covers are in place. Do not operate oven without light bulb and cover in place.
Important: Do not use Commercial Oven Cleaners on the
1.Press COOKING MODE.
2.Turn knob until SELF CLEAN mode appears. Press START.
3.The default cleaning time is 4 hours. To
4.Press START. SELF CLEAN flashes. Press START.
5.REMOVE RACKS appears in the dis-
Note:
The door locks at the beginning of the cycle; The door lock symbol will appear in the display at this point. If door does not lock, press OFF and do not
Note:
The time of day must be correctly set for this option to work properly. See section ???Setting the Clock??? in ???Getting Started???.
1.Press COOKING MODE.
2.Turn knob until SELF CLEAN mode appears. Press START.
3.The default cleaning time is 4 hours. To change cleaning time, turn knob to change number of hours. Otherwise, continue to step 4.
English 44
Cleaning and Maintenance
4.Press START.
5.Turn knob until DELAYED CLEAN mode
Cleaning - Drawers (Storage or Warming)
English 45
Oven Maintenance
Removing the Door
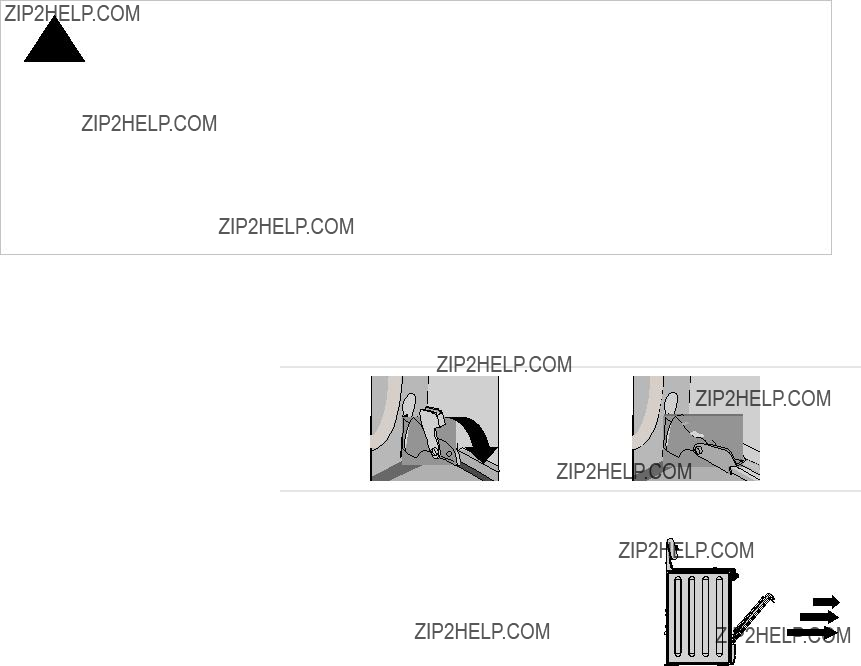
WARNING:
When removing the door:
???Make sure oven is cool and power to the oven has been turned off before removing the door. Fail- ure to do so could result in electrical shock or burns.
???The oven door is heavy and fragile. Use both hands to remove the oven door. The door front is glass. Handle carefully to avoid breaking.
???Grasp only the sides of the oven door. Do not grasp the handle as it may swing in your hand and cause damage or injury.
???Failure to grasp the oven door firmly and properly could result in personal injury or product damage.
???To avoid injury from hinge bracket snapping closed, be sure that both levers are securely in place before removing door. Also, do not force door open or closed - the hinge could be damaged and injury could result.
1.Be sure to read the above WARNING before attempting to remove oven door.
2.Open the door completely.
3.Flip lever on hinge toward you.
English 46

WARNING:
???Make sure the appliance and lights are cool and power to the appliance has been turned off before replacing the light bulb(s). Failure to do so could result in electrical shock or burns.
???The lenses (if equipped) must be in place when using the appliance.
???The lenses (if equipped) serve to protect the light bulb from breaking.
???The lenses (if equipped) are made of glass. Handle carefully to avoid breaking. Broken glass could cause an injury.
???Light socket is live when door is open
1.Read the WARNING above.
2.Turn off power at the main power supply (fuse or breaker box).
3.Remove the lens by unscrewing it.
4.Remove the light bulb from its socket by unscrewing it.
5.Replace the bulb with a new 40 watt appliance bulb. Avoid touching the bulb with fingers, as oils from hands can damage the bulb when it becomes hot.
6.Screw the lens back on.
7.Turn power back on at the main power supply (fuse or breaker box).
English 47

Service
Before Calling Service
Use these suggestions before calling for service to avoid service charges
Troubleshooting Charts
The Cooktop
Table 13: Cooktop Troubleshooting Chart
English 48
Service
The Oven
Table 14: Oven Troubleshooting Chart
English 49
Service
Table 14: Oven Troubleshooting Chart
How to Obtain Service or Parts
Product Data Plate
To reach a service representative, see the contact information at the front of the manual. Please be prepared with the information printed on your product data plate when calling.
The data plate shows the model and serial number. Refer to the data plate on the appliance when requesting service. It is located on the frame near the drawer. Open the drawer to view it.
Data Plate 
Figure 23: Data Plate
Warranty
What this Warranty Covers & Who it Applies to:
The limited warranty provided by BSH Home Appliances (???Bosch???) in this State- ment of Limited Product Warranty applies only to the Bosch freestanding and
(2) new at retail (not a display, "as is", or previously returned model), and not for resale, or commercial use; and (3) within the United States or Canada, and has at all times remained within the country of original purchase. The warranties stated herein apply only to the first purchaser of the Product and are not trans- ferable.
Please make sure to return your registration card; while not necessary to effec- tuate warranty coverage, it is the best way for Bosch to notify you in the unlikely event of a safety notice or product recall.
English 50
Service
How Long the Warranty Lasts: Bosch warrants that the Product is free from defects in materials and workman- ship for a period of three hundred
Repair/Replace as Your Exclusive
Remedy:
During this warranty period, Bosch or one of its authorized service providers will repair your Product without charge to you (subject to certain limitations stated herein) if your Product proves to have been manufactured with a defect in mate- rials or workmanship. If reasonable attempts to repair the Product have been made without success, then Bosch will replace your Product (upgraded models may be available to you, in Bosch 's sole discretion, for an additional charge). All removed parts and components shall become the property of Bosch at its sole option. All replaced and/or repaired parts shall assume the identity of the original part for purposes of this warranty and this warranty shall not be extended with respect to such parts. Bosch 's sole liability and responsibility hereunder is to repair
Service
other structures or objects around the Product. Also excluded from this warranty are scratches, nicks, minor dents, and cosmetic damages on external surfaces and exposed parts; Products on which the serial numbers have been altered, defaced, or removed; service visits to teach you how to use the Product, or visits where there is nothing wrong with the Product; correction of installation prob- lems (you are solely responsible for any structure and setting for the Product, including all electrical, plumbing or other connecting facilities, for proper founda- tion/flooring, and for any alterations including without limitation cabinetry, walls, floors, shelving, etc.); and resetting of breakers or fuses. TO THE EXTENT
ALLOWED BY LAW, THIS WARRANTY SETS OUT YOUR EXCLUSIVE REM-
EDIES WITH RESPECT TO PRODUCT, WHETHER THE CLAIM ARISES IN
CONTRACT OR TORT (INCLUDING STRICT LIABILITY, OR NEGLIGENCE)
OR OTHERWISE. THIS WARRANTY IS IN LIEU OF ALL OTHER WARRAN-
TIES, WHETHER EXPRESS OR IMPLIED. ANY WARRANTY IMPLIED BY
LAW, WHETHER FOR MERCHANTABILITY OR FITNESS FOR A PARTICU-
LAR PURPOSE, OR OTHERWISE, SHALL BE EFFECTIVE ONLY FOR THE
PERIOD THAT THIS EXPRESS LIMITED WARRANTY IS EFFECTIVE. IN NO
EVENT WILL THE MANUFACTURER BE LIABLE FOR CONSEQUENTIAL,
SPECIAL, INCIDENTAL, INDIRECT, "BUSINESS LOSS", AND/OR PUNITIVE
DAMAGES, LOSSES, OR EXPENSES, INCLUDING WITHOUT LIMITATION
TIME AWAY FROM WORK, HOTELS AND/OR RESTAURANT MEALS,
REMODELLING EXPENSES IN EXCESS OF DIRECT DAMAGES WHICH ARE DEFINITIVELY CAUSED EXCLUSIVELY BY Bosch, OR OTHERWISE. SOME
STATES DO NOT ALLOW THE EXCLUSION OR LIMITATION OF INCIDEN-
TAL OR CONSEQUENTIAL DAMAGES, AND SOME STATES DO NOT
ALLOW LIMITATIONS ON HOW LONG IMPLIED WARRANTY LASTS, SO
THE ABOVE LIMITATIONS MAY NOT APPLY TO YOU. THIS WARRANTY
GIVES YOU SPECIFIC LEGAL RIGHTS, AND YOU MAY ALSO HAVE OTHER RIGHTS, WHICH VARY FROM STATE TO STATE. No attempt to alter, modify or amend this warranty shall be effective unless authorized in writing by an officer of BSH.
How to Obtain Warranty Service:
To obtain warranty service for your Product, you should contact the nearest Bosch authorized service center.
BSH Home Appliances - 5551 McFadden Avenue, Huntington Beach, CA 92649
/
English 52

5551 McFadden Avenue, Huntington Beach, CA 92649 ???