BLACK & DECKER?? warrants to the original purchaser that the pump of the BLACK
& DECKER?? pressure washer covered under this warranty is free from manufacturer???s defects in material and workmanship for one year from the date of purchase. The one year limited warranty applies to the pump only.
BLACK & DECKER?? will repair or replace, at BLACK & DECKER??'s option, products or components which have failed within the above warranty periods. Service will be scheduled according to the normal work flow and business hours at the service center
location, and the availability of replacement parts. All decisions of BLACK & DECKER?? with regard to this limited warranty shall be final.
This warranty gives you specific legal rights, and you may also have other rights which vary from state to state.
ENGINE WARRANTY
The engine warranty is covered under the terms and conditions as outlined by the engine manufacture???s warranty contained herein and is sole responsibility of the engine manufacturer.
RESPONSIBILITY OF ORIGINAL PURCHASER (INITIAL USER):
???To process a warranty claim on your BLACK & DECKER?? pressure washer, report the concern to www.BlackandDecker-la.com for authorization and direction to the nearest authorized service centre in your area.
???Retain original cash register sales receipt as proof of purchase for warranty work.
???Use reasonable care in the operation and maintenance of the product as described in the Owners Manual(s).
THIS WARRANTY DOES NOT COVER:
???Merchandise sold as reconditioned, used as rental equipment, or floor or display models.
???Merchandise that has become damaged or inoperative because of ordinary wear, misuse, cold, heat, rain, excessive humidity, freeze damage, use of improper chemicals, negligence, accident, failure to operate the product in accordance with the instructions provided in the Owners Manual(s) supplied with the product, improper maintenance, the use of accessories or attachments not recommended by BLACK & DECKER?? , or unauthorized repair or alterations.
???Repair and transportation costs of merchandise determined not to be defective.
???Costs associated with assembly, required oil, adjustments or other installation and start-up costs.
???Expendable parts or accessories supplied with the product which are expected to become inoperative or unusable after a reasonable period of use, including but not limited to springs, nozzles, o-rings, washers, and similar accessories.
???Merchandise sold by BLACK & DECKER?? which has been manufactured by and identified as the product of another company, such as gasoline engines. The product manufacturer???s warranty, if any, will apply.
???ANY INCIDENTAL, INDIRECT OR CONSEQUENTIAL LOSS, DAMAGE,
OR EXPENSE THAT MAY RESULT FROM ANY DEFECT, FAILURE OR
MALFUNCTION OF THE PRODUCT IS NOT COVERED BY THIS WARRANTY.
Some states do not allow the exclusion or limitation of incidental or consequential damages, so the above limitation or exclusion may not apply to you.
???IMPLIED WARRANTIES, INCLUDING THOSE OF MERCHANTABILITY OR
FITNESS FOR A PARTICULAR PURPOSE, ARE LIMITED TO ONE YEAR FROM THE DATE OF ORIGINAL PURCHASE. Some states do not allow limitations on how long an implied warranty lasts, so the above limitations may not apply to you.


 PELIGRO: RIESGO RESPIRATORIO (ASFIXIA)


 PELIGRO: RIESGO DE INYECCI??N DE L??QUIDO Y LACERACI??N
 PELIGRO: RIESGO DE LESI??N POR PULVERIZACI??N
 PELIGRO: RIESGO DE LESI??N O DA??O A LA PROPIEDAD AL
 TRANSPORTAR O ALMACENAR LA UNIDAD
 ADVERTENCIA: RIESGO DE SUPERFICIES CALIENTES
 ADVERTENCIA: RIESGO DE DESCARGA EL??CTRICA


 C
C
 demasiado alto, esta
 AVERTENCIA: Para reducir la posibilidad de contaminaci??n proteja siempre el sistema contra la contracorriente cuando realice una conexi??n al sistema de agua potable.
 DANGER: Riesgo de inyecci??n de l??quido. No dirija el flujo de agua hacia personas, piel y ojos desprotegidos, ni animales o mascotas. Se producir??n lesiones graves.
 ADVERTENCIA:
  ADVERTENCIA:
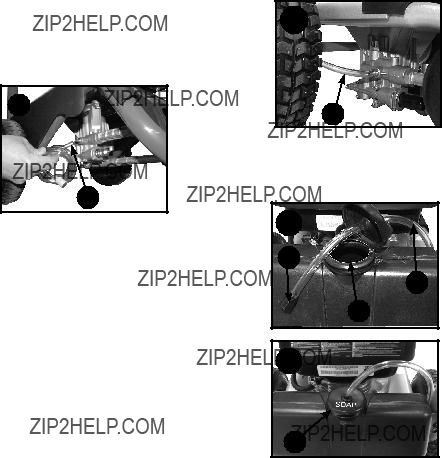

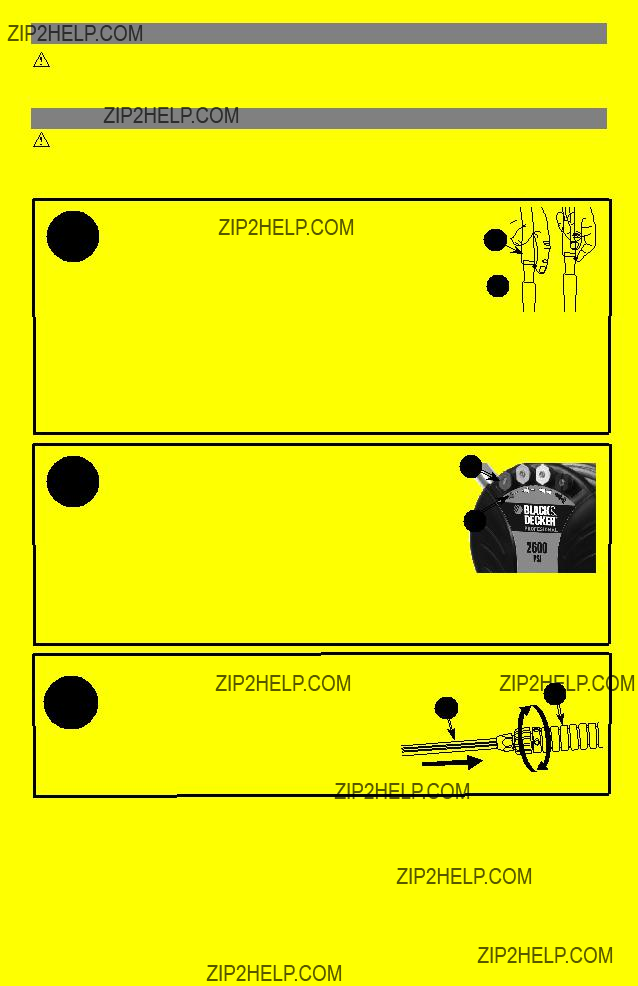
 AVERTENCIA: Para reducir el riesgo de lesi??n, lea los manuales de instrucciones de la lavadora a presi??n y del motor antes de poner en marcha la unidad.
 PELIGRO: Riesgo de inyecci??n de l??quido y laceraci??n Cuando utilice la configuraci??n de alta presi??n, NO permita que el pulverizador entre en contacto con personas, piel y ojos desprotegidos, ni con animales o mascotas. Se producir??n lesiones graves.
 AVERTENCIA: Riesgo de incendio, asfixia y quemadura. Nunca llene el tanque de combustible cuando el motor est?? encendido o caliente. No fume mientras llena el tanque.
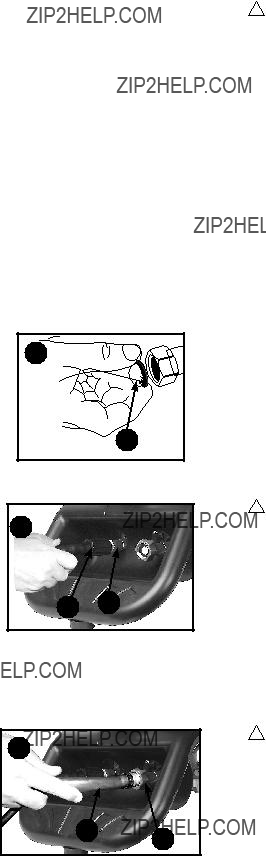
 AVERTENCIA: Para reducir la posibilidad de contaminaci??n proteja siempre el sistema contra la contracorriente cuando realice una conexi??n al sistema de agua potable.
 AVERTENCIA: Riesgo de operaci??n insegura. Si el motor no arranca despu??s de halar dos veces, apriete el disparador de la pistola para aliviar la presi??n de la bomba. Hale del cable de arranque lentamente hasta sentir cierta resistencia. Entonces, hale de ??l r??pidamente para evitar el retroceso y que se produzcan lesiones en las manos o los brazos.
 AVERTENCIA: Riesgo de operaci??n insegura. P??rese en una superficie estable y agarre la pistola/ varilla firmemente con ambas manos. Espere que la pistola retroceda cuando la dispare.
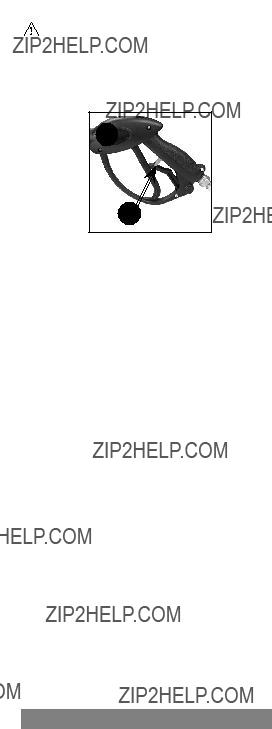
 ADVERTENCIA: Riesgo de quemadura. Cuando realice el mantenimiento, es posible que se exponga a superficies calientes, presi??n de agua o partes movibles, que pueden causar lesiones graves o la muerte.
 ADVERTENCIA: Riesgo de incendio. Siempre desconecte el cable de la buj??a, deje que el motor se enfr??e y libere toda la presi??n del agua antes de realizar cualquier tarea de mantenimiento o reparaci??n. El motor contiene combustible inflamable. No fume ni trabaje cerca de llamas mientras hace el mantenimiento.
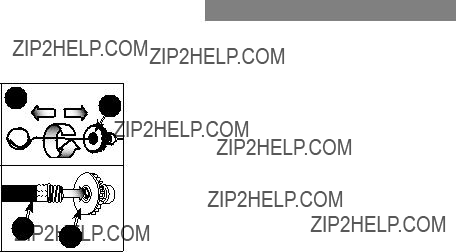


 DANGER: RISK OF EXPLOSION OR FIRE

 TRANSPORTING OR STORING

 WARNING: RISK OF BURSTING


 WARNING: RISK OF HOT SURFACES


 K
K


 C
C
 WARNING: To reduce the possibility of contamination always protect against backflow when connected to a potable water system.
 DANGER: Risk of fluid injection. Do not direct discharge stream toward persons, unprotected skin, eyes or any pets or animals. Serious injury will occur.

 WARNING: To reduce the possibility of contamination always protect against backflow when connected to a potable water system.
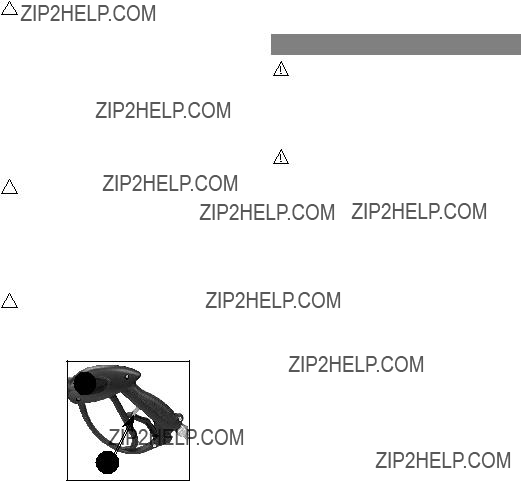
 WARNING: Risk of unsafe operation. If engine does not start after two pulls, squeeze trigger of gun to relieve pump pressure. Pull starter cord slowly until resistance is felt. Then pull cord rapidly to avoid kickback and prevent hand or arm injury.
 WARNING: Risk of unsafe operation. Stand on a stable surface and grip gun/spray wand firmly with both hands. Expect the gun to kick when triggered.
 WARNING: Risk of injury from spray. Always engage the trigger lock