OmniView?? E Series
KVM Switch
User Manual
F1DB102P2
F1DB104P2
OmniView?? E Series
KVM Switch
User Manual
F1DB102P2
F1DB104P2

Introduction
Congratulations on your purchase of this Belkin OmniView KVM Switch (the KVM Switch). Our diverse line of KVM solutions exemplifies the Belkin commitment to
delivering
one console, Belkin KVM switches come in a variety of capacities suitable for all
configurations, large or small. This compact, affordable KVM switch is backed by a Belkin
This User Manual will provide details about your new E Series KVM Switch, from installation and operation to
Thank you for purchasing the Belkin OmniView E Series KVM Switch. We appreciate your business and have confidence that you will soon see for yourself why Belkin is the
1
2
3
4
5
6
7
8
section
Package Contents
?????????????????????????????????????????????????????? ?????????????????????????????????
??????????????????????????????
??????????????????????????????????????????????????? ???????????????????????????????????????????????????
?????????????????????????????????????????????????????? ??????????????????????????????????????????????????????
1

Overview
Feature Overview
???Hot Keys
???AutoScan
The AutoScan feature allows you to automatically scan and monitor the activities of all connected computers, one by one.
???Video Resolution
The E Series KVM Switch supports video resolutions of up to 1920x1440@75Hz.
???
Push buttons, conveniently located on the front panel of the E Series KVM Switch, allow for simple, manual port selection.
???LED Display
An LED display on the front panel of the E Series KVM Switch serves as a status monitor. An LED illuminates to indicate the console that currently controls the corresponding computer.
2

Overview
Equipment Requirements
Cables:
Connecting the E Series KVM Switch to a computer requires a Belkin KVM Cable Kit.
Belkin E Series Cable Kits:
F1D9002x06
1
2
3
4
5
6
7
8
section
3

Overview
System Requirements
OS Platforms
The E Series KVM Switch is compatible with CPUs running on, but not limited to, the following OS platforms:
???Windows?? NT??, 2000, XP, Server 2003, or VistaTM
???Microsoft?? DOS 5.x and above
???Red Hat?? Linux?? 8.x and above
???Novell?? NetWare?? 5.x
Keyboards
???
???Supports
Mice
???
???
Monitors
???CRT
???LCD (with VGA support)
Optional Power Supply
An optional 9V 600mA power supply is available (Belkin part number
4

Overview
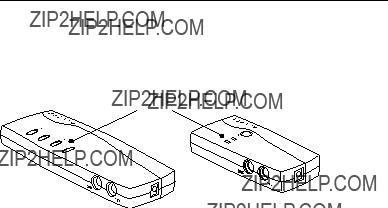
Unit Display Diagrams
Front/Rear View of the
Console Keyboard
and Mouse
Front/Rear View of the
1
2
3
4
5
6
7
8
section
5

Overview
Specifications
Note: Specifications are subject to change without notice.
6

Installation
Where to Place the KVM Switch
The OmniView E Series KVM Switch is designed to sit on top of your desktop. Where you place the KVM Switch will be based on the location of your CPUs and the length of your cables.
Consider the following when deciding where to place the KVM Switch:
???whether or not you intend to use the
???the lengths of the cables attached to your keyboard, monitor, and mouse
???the location of your computers in relation to your console
???the lengths of the cables you use to connect your computers to the KVM Switch
For PS/2 Computers:
VGA signals transmit best up to 25 feet (7.6m). Beyond that length, the probability of video degradation increases. For this reason, Belkin recommends that the length of the cables between the KVM Switch and the connected computers does not exceed 25 feet (7.6m).
Note: The Belkin OmniView CAT5 Extender (F1D084) may be used to extend your console (keyboard, mouse, and monitor) by up to 300 feet (91m).
Cautions and Warnings!
Avoid placing cables near fluorescent lights,
Installation Guide
You are now ready to begin installation of your KVM Switch. The following sections (pages
Before attempting to connect anything to the E Series KVM Switch or your computers, ensure that everything is powered off. Plugging and unplugging cables while computers are powered on may cause irreversible damage of the computers and/or the KVM Switch. Belkin is not responsible for damage caused in this way.
1
2
3
4
5
6
7
8
section
7

Installation
Keyboard, Monitor, and Mouse Connections
Connecting the Console
Step 1
Connect the monitor to the E Series KVM Switch. Using the cable that is attached to your monitor, connect it to the HDDB15 female port on the rear left side of the E Series KVM Switch labeled ???Console???. (Refer to diagram below.)
Step 2
Connect the PS/2 keyboard to the PURPLE keyboard port on the front of the KVM Switch. (Refer to diagram below.)
Step 3
Connect the PS/2 mouse to the GREEN mouse port on the front of the KVM Switch. (Refer to diagram below.)
You are ready to connect your computers.
8
Installation
Connecting Computers to the E Series KVM Switch
Step 1
Make sure your computer is powered off.
Step 2
Using the Belkin E Series Cable Kit for PS/2 (F1D9002x06), connect the VGA connector to the monitor port on your computer. (Refer to diagram below.)
Step 3
Connect the PS/2 mouse and keyboard connectors to the mouse and keyboard ports on the computer. (Refer to diagram below.)
Step 4
Connect the Belkin E Series Cable Kit for PS/2 to the desired PC port on the rear of the E Series KVM Switch. (Refer to diagram below.)
1
2
3
4
5
6
7
8
section
Step 5
Power up your computer.
Step 6
Repeat Steps 1 through 5 for each additional PS/2 computer you wish to connect.
9

Installation
Powering Up the Systems
Verify that all computers connected to the E Series KVM Switch are powered on. If any connected computers have not been powered on, it is okay to do so at this time (computers can be powered on simultaneously). The E Series KVM Switch emulates both a mouse and keyboard on each port and allows your computer to boot normally. Your E Series KVM Switch is ready to use.
The computer connected to Port ???1??? will be displayed on the monitor. Check that the keyboard, monitor, and mouse are working normally. Check all occupied ports to verify that all computers are connected and responding correctly. If you encounter an error, check your cable connections for that computer and reboot. If the problem persists, please refer to the ???Troubleshooting??? section in this
User Manual.
10
Using your E Series KVM Switch
Selecting a Computer Using the Selector Button
You can directly select a connected computer by pressing the selector button or by using a
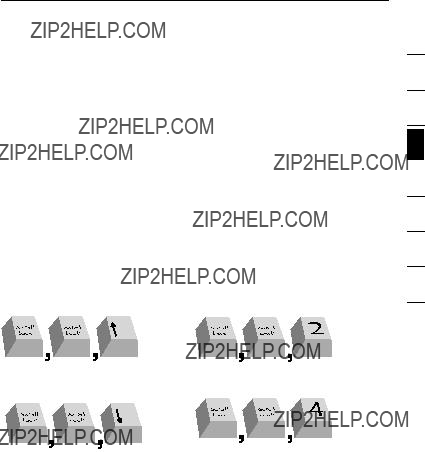
Selecting a Computer Using Keyboard
Switch to the next or previous port with simple keyboard
You can switch directly to any port by entering the number of the port you wish to access. For example, if you press ???Scroll Lock???, ???Scroll Lock???, ???2???, the KVM Switch will switch to the computer connected on Port 2.
1
2
3
4
5
6
7
8
section
????????????????????????????????????????????????????????????????????????????????????????????????????????????????????????????????? ????????????????????????????????????????????????????????????????????????????????????
??????????????????????????????????????????????????????????????????????????????????????????????????????????????????????????? ????????????????????????????????????????????????????????????????????????????????????
Note: You will have approximately three seconds to complete each
11
Using your E Series KVM Switch
Selecting a Computer Using
You can directly select which computer you wish to control by pressing the
LED
LED Display
The LED display on the front panel of the E Series KVM Switch serves as a status monitor. An LED illuminates to indicate that the console currently controls the corresponding computer. As a port selector is pushed, the LED next to it will light up. A flashing port LED indicates that there is no computer connected to that port or that the computer connected is powered off. The LED will also blink while the KVM Switch is in AutoScan mode.
Note: The port LED will remain solid for some computers that continuously supply power to the keyboard PS/2 port even while they are shut down.
AutoScan Mode
In AutoScan mode, the E Series KVM Switch remains on one active port for five seconds before switching to the next active port. This time interval cannot be changed.
To activate the AutoScan function, press ???Scroll Lock???, ???Scroll Lock???, ???0???.
To stop AutoScan, press any button on the front panel or any key on the keyboard.
Note: There is no mouse or keyboard control in AutoScan mode. This is necessary to prevent data and synchronization errors. If the user is using the mouse or keyboard when the E Series KVM Switch is switching between ports, data flow may become interrupted and could result in erratic mouse movement and/or
12

Using your E Series KVM Switch
Keyboard
Below is a complete list of
Note: Each command needs to be preceded by ???Scroll Lock???, ???Scroll Lock???.
Note: You will have approximately three seconds to complete each
1
2
3
4
5
6
7
8
section
13

Frequently Asked Questions
Q: What operating systems does the E Series KVM Switch support?
A: The E Series KVM Switch will support any operating system that runs on a PS/2 platform only. Operating systems include, but are not limited to, DOS; Windows 2000, NT, XP, Server 2003, Vista; and Linux.
Q: Can I connect USB computers on the host side?
A: No, the E Series KVM Switch will support PS/2 computers only.
Q: How far can the computer be from the KVM Switch?
A: The KVM Switch can be placed up to 25 feet away from your PS/2 computer.
Q: What is the maximum video resolution that the E Series KVM Switch supports?
A: The advanced video circuit in the KVM Switch supports a maximum resolution of up to 1920x1440@75Hz.
Q: Do I have to install any software to use the KVM Switch?
A: No, the KVM Switch does not require any drivers or software to be installed in your computers. Simply connect all your computers to the Belkin KVM Cable Kits, and then attach one keyboard, monitor, and mouse to the console port, and it is ready for use.
Q: Does the KVM Switch require an AC adapter?
A: No, the KVM Switch can be used in the majority of cases without an external power adapter.
Q: Can I use the E Series KVM Switch to switch video signals only?
A: No, the KVM Switch must be connected to both the video and keyboard/ mouse ports on your computers. The KVM Switch detects the power from the PS/2 ports on your computers in order to function.
Q: Does the KVM Switch support Linux?
A: Yes, the KVM Switch works with Red Hat and other Linux distributions configured for PS/2 support.
Q: How long is the warranty for the E Series KVM Switch?
A: The KVM Switch comes with a
14 14

Troubleshooting
My computer does not boot up when connected to the KVM Switch, but works fine when I connect the keyboard, video, and mouse directly to the computer.
???Make sure that the keyboard and mouse cables are connected tightly between the KVM Switch and the computer.
???Check that the keyboard and mouse cables are not crossed.
???Check the cable connections.
I am getting ghosting, shadowing, or fuzzy images on my monitor.
I am getting a black screen on my monitor.
???Check that all video cables are inserted properly.
???Check that the keyboard cable is connected and inserted properly between the computer and the appropriate port on the KVM Switch.
???Move the mouse and see if it is necessary to log in as a user.
???Connect your monitor directly to the computer to verify that your monitor is functioning properly.
The computer does not detect a keyboard and I get a keyboard error reported at boot up.
???Check that the keyboard cable on the KVM Switch is completely connected to your computer. Tighten any loose connections.
???If you are using the keyboard software that was included with your keyboard, uninstall it and then reinstall the standard Microsoft keyboard driver.
1
2
3
4
5
6
7
8
section
15 15

Troubleshooting
The mouse is lost when I switch to a different port.
???Check that the mouse you are using is connected properly to the console port of the KVM Switch.
???Tighten any loose cable connections.
???If you are using a mouse driver that was included with your mouse, uninstall it and install the standard Microsoft mouse driver.
???Make sure the mouse works when directly plugged into the computer.
???If the computer is coming out of standby mode, allow up to one minute to regain mouse function.
???
???If you hot swapped or changed your KVM configuration, make sure
you power off all attached computers. Then, reinstall the KVM Switch as described on pages
???Try a different mouse.
The mouse is not detected at boot up.
??? Check the cables and make sure that they are inserted correctly.
The computer boots up, but the mouse does not work.
???Make sure the mouse is plugged in properly.
???Make sure the mouse works when directly plugged into the computer. Rebooting may be necessary when trying this.
???Try a different mouse.
???Try booting the problem computer while the port is selected and wait until the operating system loads before switching to another computer.
The computer boots up, but the mouse does not work.
???If you hot swapped or changed your KVM configuration, make sure
you power off all attached computers. Then, reinstall the KVM Switch as described on pages
???Make sure you do not have more than one mouse driver installed. Make sure that the driver is either for a standard PS/2 or USB mouse, or a PS/2 mouse compatible with Microsoft.
???Make sure you do not have any mouse drivers loaded in your ???CONFIG. SYS??? or ???AUTOEXEC.BAT??? files.
???Avoid moving the mouse or pressing the mouse button when switching ports on the KVM Switch.
???Try booting the problem computer while the port is selected and wait until the operating system loads before switching to another computer.
16

Glossary
The following definitions are used throughout this User Manual.
AutoScan: A mode of operation where the KVM Switch scans from one port to another, on an ongoing basis, as configured by the user.
Console: The
Console Port: Receptors for the console to connect to the KVM Switch.
Control: When discussing switching between ports, control means that the console is capable of sending input to the computer. Control requires that the console also has focus on the port, and is viewing it.
KVM: Literally ???Keyboard Video Mouse???, this term refers to technology that allows two or more computers to be controlled by one keyboard, video monitor, and mouse; some switches that use KVM technology enable sharing of other peripherals such as audio speakers, microphones, and printers.
KVM Switch: A device that allows a user to access and control multiple computers from a single console. It has at least one console port and multiple computer ports.
Port: An interface receptor on a computer through which you can attach a device or plug in a device cable.
1
2
3
4
5
6
7
8
section
17

Information
FCC Statement
DECLARATION OF CONFORMITY WITH FCC RULES FOR
ELECTROMAGNETIC COMPATIBILITY
We, Belkin International, Inc., of 501 West Walnut Street, Compton CA 90220, declare under our sole responsibility that the products:
F1DB102P2, F1DB104P2
to which this declaration relates:
Comply with Part 15 of the FCC Rules. Operation is subject to the following two conditions:
(1)this device may not cause harmful interference, and
(2)this device must accept any interference received, including interference that may cause undesired operation.
CE Declaration of Conformity
We, Belkin International, Inc., declare under our sole responsibility that the products F1DB102P2, F1DB104P2, to which this declaration relates, are in conformity with Emissions Standard EN55022 and with Immunity Standard EN55024, LVP
ICES
This Class B digital apparatus complies with Canadian
Belkin International, Inc., Limited
Belkin International, Inc. (???Belkin???) warrants to the original purchaser of this Belkin product that the product shall be free of defects in design, assembly, material, or workmanship.
What the period of coverage is.
Belkin warrants the Belkin product for two years.
What will we do to correct problems?
Product Warranty.
Belkin will repair or replace, at its option, any defective product free of charge (except for shipping charges for the product).
What is not covered by this warranty?
All above warranties are null and void if the Belkin product is not provided to Belkin for inspection upon Belkin???s request at the sole expense of the purchaser, or if Belkin determines that the Belkin product has been improperly installed, altered in any way, or tampered with. The Belkin Product Warranty does not protect against acts of God such as flood, lightning, earthquake, war, vandalism,
18
Information
theft,
How to get service.
To get service for your Belkin product you must take the following steps:
1.Contact Belkin International, Inc., at 501 W. Walnut St., Compton, CA 90220, Attn: Customer Service, or call
a.The part number of the Belkin product.
b.Where you purchased the product.
c.When you purchased the product.
d.Copy of original receipt.
2.Your Belkin Customer Service Representative will then instruct you on how to forward your receipt and Belkin product and how to proceed with your claim.
Belkin reserves the right to review the damaged Belkin product. All costs of shipping the Belkin product to Belkin for inspection shall be borne solely by the purchaser. If Belkin determines, in its sole discretion, that it is impractical to ship the damaged equipment to Belkin, Belkin may designate, in its sole discretion, an equipment repair facility to inspect and estimate the cost to repair such equipment. The cost, if any, of shipping the equipment to and from such repair facility and of such estimate shall be borne solely by the purchaser. Damaged equipment must remain available for inspection until the claim is finalized. Whenever claims are settled, Belkin reserves the right to be subrogated under any existing insurance policies the purchaser may have.
How state law relates to the warranty.
THIS WARRANTY CONTAINS THE SOLE WARRANTY OF BELKIN. THERE ARE
NO OTHER WARRANTIES, EXPRESSED OR, EXCEPT AS REQUIRED BY LAW,
IMPLIED, INCLUDING THE IMPLIED WARRANTY OR CONDITION OF QUALITY,
MERCHANTABILITY OR FITNESS FOR A PARTICULAR PURPOSE, AND SUCH
IMPLIED WARRANTIES, IF ANY, ARE LIMITED IN DURATION TO THE TERM OF
THIS WARRANTY.
Some states do not allow limitations on how long an implied warranty lasts, so the above limitations may not apply to you.
IN NO EVENT SHALL BELKIN BE LIABLE FOR INCIDENTAL, SPECIAL, DIRECT,
INDIRECT, CONSEQUENTIAL OR MULTIPLE DAMAGES SUCH AS, BUT NOT LIMITED
TO, LOST BUSINESS OR PROFITS ARISING OUT OF THE SALE OR USE OF ANY
BELKIN PRODUCT, EVEN IF ADVISED OF THE POSSIBILITY OF SUCH DAMAGES.
This warranty gives you specific legal rights, and you may also have other rights, which may vary from state to state. Some states do not allow the exclusion or limitation of incidental, consequential, or other damages, so the above limitations may not apply to you.
1
2
3
4
5
6
7
8
section
19

OmniView?? E Series
KVM Switch
Belkin Ltd.
Express Business Park, Shipton Way Rushden, NN10 6GL, United Kingdom +44 (0) 1933 35 2000
+44 (0) 1933 31 2000 fax