belkin.com

Belkin Tech Support

US: 877.736.5771 310.898.1100 ext. 2263 Europe: 00 800 223 55 460 Australia: 1800 666 040

Belkin Corporation

501 West Walnut Street

Compton ??? CA ??? 90220 ??? USA

Tel: 310.898.1100

Fax: 310.898.1111

Belkin Components, Ltd.

Express Business Park ??? Shipton Way Rushden ??? NN10 6GL ??? United Kingdom Tel: +44 (0) 1933 35 2000

Fax: +44 (0) 1933 31 2000

Belkin Components B.V.

Starparc Building ??? Boeing Avenue 333 1119 PH Schiphol-Rijk ??? The Netherlands Tel: +31 (0) 20 654 7300

Fax: +31 (0) 20 654 7349

Belkin, Ltd.

7 Bowen Crescent ??? West Gosford

NSW 2250 ??? Australia

Tel: +61 (0) 2 4372 8600

Fax: +61 (0) 2 4372 8603

P74397

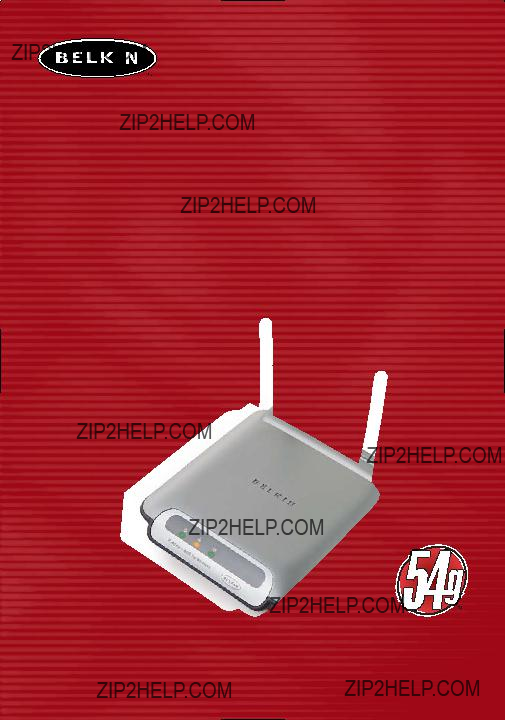
?? 2003 Belkin Corporation. All rights reserved. All trade names are registered trademarks of respective manufacturers listed. Mac and AppleTalk are trademarks of Apple Computer, Inc., registered in the U.S. and other countries. 54g and the 54g logo are trademarks of Broadcom Corporation in the United States and other countries.

802.11g Wireless

Ethernet Bridge

Connect your gaming console or Ethernet-equipped PC to a wireless network

User Manual

F5D7330

TABLE OF CONTENTS

INTRODUCTION

Thank you for purchasing the Belkin 802.11g Wireless Ethernet Bridge (the Bridge). Now you can take advantage of this great new technology and gain the freedom you need around the home or office without using cables. The 802.11g Wireless Ethernet Bridge works like a conventional network card, but without the wires. The easy installation and setup will have you networking wirelessly in minutes. Please be sure to read through this manual completely to be sure that you are getting the most out of your Wireless Ethernet Bridge.

System Requirements

???Computing device, such as a computer (PC and Mac??), or any device with an available Ethernet port

???(Installation Wizard) Windows?? 98SE, Me, 2000, XP

Package Contents

???Belkin 802.11g Wireless Ethernet Bridge

???Ethernet cable

???Installation Software CD

???User Manual

???Quick Installation Guide

???Registration Card

1

OVERVIEW

Features

The Bridge complies with the IEEE 802.11g standard in order to communicate with other 802.11b- and 802.11g-compliant wireless devices at 11Mbps and 54Mbps. 802.11g products run at speeds of up to 54Mbps and operate on the same 2.4GHz frequency band as 802.11b Wi-Fi products.

???2.4GHz ISM (Industrial, Science, and Medical) band operation

???Integrated, easy-to-use Wireless Ethernet Bridge Wizard

???Wireless interface compliance with the IEEE 802.11g standard products

???Ethernet interface, for operation in virtually all Ethernet-equipped devices

???64- or 128-bit wireless encryption (WEP)

???Wireless access to networked resources

???Support for both Infrastructure and Ad-Hoc (peer-to-peer) networking modes

???Data rate of up to 54Mbps

???Supports 11, 5.5, 2, or 1Mbps rates (802.11b)

???Supports 54, 48, 36, 24, 18, 12, 9, or 6Mbps rates (54g)

???Easy installation and use

???External antenna

???LED power, network link, and wireless indicators

Applications and Advantages

???Wireless roaming around the home or office

Offers the freedom of networking without cables.

???Connection rates of up to 54Mbps

Provides immediate, higher-speed wireless connectivity at home, work, and hotspot locations without compromising the use of existing 802.11b products.

??? Compatibility with 802.11b products

802.11g wireless LAN solutions are backward-compatible with existing Wi-Fi (IEEE 802.11b) products and with other IEEE 802.11g products.

2

OVERVIEW

??? Difficult-to-wire environments

Enables networking in buildings with solid or finished walls, or open areas where wiring is difficult to install.

??? Frequently changing environments

Adapts easily in offices or environments that frequently rearrange or change locations.

??? Temporary LANs for special projects or peak time

Sets up temporary networks such as at trade shows, exhibitions, and construction sites, which need networks on a short-term basis; also companies that need additional workstations for a peak activity period.

??? SOHO (Small Office/Home Office) networking needs

Provides the easy and quick, small network installation SOHO users need.

Product Specifications

Standards

IEEE 802.3/IEEE 802.3U 10/100Base-T Ethernet

3

OVERVIEW

Knowing your Wireless Ethernet Bridge

a b

c

a. Power Link LED

4

CONNECTING THE HARDWARE

1.Connect the included Ethernet network cable into the LAN port on the back of the 802.11g Wireless Ethernet Bridge and plug the other end of the cable to the back of your computer or any other Ethernet-enabled device.

2.Turn on your Bridge by connecting the power supply cable to your Bridge. Then plug the other end into a power outlet.

3.In most instances, the Bridge will work out-of-the-box. In cases where you need to set up the Bridge for special settings, you need to run the setup wizard from a PC or configure it using a web-based setup. Non-Windows users, please refer to the ???Setting Up your Computer to Use Web-Based Setup??? section in this manual for advanced setup.

5

CONNECTING THE BRIDGE USING THE SETUP WIZARD

Attention: Your Bridge should work out-of-the-box. You only need to run the Wizard for special settings such as encryption or head-to-head gaming play.

1.Insert the CD into your CD-ROM drive.

2.The ???Wireless Setup Wizard??? screen should automatically appear.

Note: If the Easy Setup Wizard does not start up automatically, select your CD-ROM drive from ???My Computer??? and double-click on the file named ???Setup??? on the CD-ROM.

3. The Wizard will start. Click ???Setup??? to proceed.

4. Ensure the Bridge is connected to your network correctly and click ???Next???.

6

CONNECTING THE BRIDGE USING THE SETUP WIZARD

5. Select the Bridge you wish to set up and click ???Next???.

6. Leave the password blank and click ???Next??? to continue for initial setup.

Note: If this is not your first time setting up this Bridge and you already were assigned a password, enter your password and click ???Next???.

7

CONNECTING THE BRIDGE USING THE SETUP WIZARD

7.Your Bridge ships with no password entered. You can set the password now or make no changes to the password field to keep your password blank. Click ???Next??? to continue.

8. Select ???Access point??? or ???Ad-Hoc??? and click ???Next??? to continue.

a. Access Point:

When this option is selected, the Bridge will attempt to connect to an available network (access point) in the area.

b. Ad-Hoc (Computer-to-Computer):

When this option is selected, the Bridge will attempt to connect to an available computer or device in the area that???s also using (Ad-Hoc). Access points will be excluded from the list of available networks when this option is selected.

a

b

8

CONNECTING THE BRIDGE USING THE SETUP WIZARD

9.Enter the settings for the wireless network that you will be connecting to. The default SSID of ???ANY??? will connect your Bridge to the closest network automatically. After you finish entering the settings, click ???Next??? to continue.

a. SSID:

The SSID is the wireless network name. This field lets you type in the network name (SSID) you want this Bridge to connect to. For instance, if the name (SSID) of the wireless network that you will be connecting to is ???belkin54g???, enter ???belkin54g??? in the SSID field.

b. Channel:

If you chose to connect in Ad-Hoc mode, you will need to specify the channel number.

c. Adapter (Bridge) Name:

Enter a name for this Bridge.

a

b

c

9

CONNECTING THE BRIDGE USING THE SETUP WIZARD

10.Enter the IP address settings for your Bridge. The current settings will usually work. Click ???Next??? to continue.

Warning: It is recommended that you only make changes to this page if you have a specific reason to do so.

a. IP address:

The IP address must be unique to your network. Default IP address is 192.168.2.225.

b. Subnet Mask:

The Bridge???s Subnet Mask must be the same as your network???s subnet mask.

c. Gateway:

Enter the IP address of your network???s gateway (also known as router).

a

b

c

10

CONNECTING THE BRIDGE USING THE SETUP WIZARD

11.From the Encryption drop-down menu, select ???Disabled???, ???64-bit???, or ???128-bit??? according to your wireless network???s setting. Select ???Disabled??? if you have not configured your wireless network to use encryption. All wireless devices on your network must share the same network key. Click ???Next??? to continue.

a. Encryption:

There are two types of encryption to choose from: 64-bit and 128-bit. Using encryption will make your network more secure, but will slow down the network performance. Although network performance will be reduced, it is likely the change will not be detectable to users of the network.

b. Network Key:

Enter a network key only if you have encryption enabled in your wireless network. Type your WEP key in the Network Key box using passphrase or hex key format. All wireless devices on your network must share the same network key.

c. Passphrase:

For 64-bit encryption, your key lengths will be five characters (ASCII text). For 128-bit encryption, your key length will be 13 characters (ASCII text).

d. Hex Key:

For 64-bit encryption, your key lengths will be 10 hexadecimal characters. For 128-bit encryption, your key length will be 26 hexadecimal characters.

a b

c

d

11

CONNECTING THE BRIDGE USING THE SETUP WIZARD

12. Confirm all your settings are correct then click ???Finish???.

13.Setup is complete. You can now connect the Bridge to any Ethernet-equipped device on your wireless network.

12

SETTING UP YOUR COMPUTER TO USE THE WEB-BASED INTERFACE

The default IP address of the Bridge is 192.168.2.225. You will need to set your computer???s IP address to the same subnet such as 192.168.2.224 before you can access the Web-Based Setup Interface. Perform the following steps from the PC you wish to configure your Bridge from:

Note: You must undo these steps once you have completed configuring your Bridge.

Windows 98SE, Me, 2000, and XP

1.Go to the Windows Control Panel and double-click on the Network icon or the Network Connections icon.

2.Right-click on the Local Area Connection for your Wireless Bridge and select ???Properties???.

3.In the General tab, select the Internet Protocol TCP/IP settings for your Wireless Bridge and click on ???Properties???.

4.Select the ???Use the following IP address??? radio button.

5.Enter an IP address in the same subnet as the access point (for example, 192.168.2.224).

6. Enter the following subnet mask: 255.255.255.0 then click ???OK???.

Warning: Once you have completed configuring your Bridge, you must repeat steps 1 through 3 above and select ???Obtain an IP automatically??? or set a valid IP for your computer on the same subnet as the network you are connecting to.

13

CONNECTING THE BRIDGE USING THE WEB-BASED INTERFACE

Using your Internet browser, you can access the web-based user interface. In your browser, type ???192.168.2.225??? (do not type in anything else such as ???http://??? or ???www???). Then press the ???Enter??? key.

Logging into the Web-Based Setup

You will see the Web-Based Setup home page in your browser window. The home page is visible to any user who wants to see it. To make any changes to the Bridge???s settings, you have to log in. Clicking the Login button or clicking on any one of the links on the home page will take you to the login screen. The Bridge ships with no password entered. In the login screen, leave the password blank and click ???Submit??? to log in.

Logging Out of the Web-Based Setup

One computer at a time can log in to the Bridge for the purposes of making changes to the settings of the Bridge. Once a user has logged in to make changes, there are two ways that the computer can be logged out. Clicking the Logout button will log the computer out. The second method is automatic. The login will time out after a specified period of time.

Understanding the Advanced Web-Based User Interface

The home page is the first page you will see when you access the Web-Based User Interface (UI). The home page shows you a quick view of the Bridge???s status and settings. All setup pages can be reached from this page.

14

CONNECTING THE BRIDGE USING THE WEB-BASED INTERFACE

Status

b

a

c

d

a. Quick Navigation Links

You can go directly to any of the pages by clicking directly on these links. The links are divided into logical categories and grouped by tabs to make finding a particular setting easier to find.

b. Version Information

Shows the firmware version, boot-code version, and hardware version.

c. LAN Settings

Shows you the settings of the Local Area Network (LAN) side of the Bridge. Changes can be made to the settings by clicking the Quick Navigation links on the left side of the screen.

d. WLAN Settings

Shows the status of the Bridge???s wireless setting. Changes can be made to the settings by clicking the Quick Navigation links on the left side of the screen.

15

CONNECTING THE BRIDGE USING THE WEB-BASED INTERFACE

Bridge Settings

a

a. Bridge Name

Enter the name of your Wireless Ethernet Bridge here.

b. IP Configuration:

???Manually set the Bridge???s IP address - The default IP address of your Bridge is 192.168.2.225. You can modify it to match your network subnet if needed. For example, if your network subnet is under 192.168.1.xxx, then you can configure the Bridge to use 192.168.1.225.

???Obtain an IP address from a DHCP server - If you have a DHCP server or a router in your network, you can choose to ???obtain an IP address automatically from a DHCP server???. The IP address of your Bridge might changes after selecting this option.

c. IP Address:

The IP address must be unique to your network. Default IP address is 192.168.2.225.

d. Subnet Mask:

The Bridge???s subnet mask must be the same as your network???s subnet mask.

16

CONNECTING THE BRIDGE USING THE WEB-BASED INTERFACE

e. Gateway IP Adress:

Enter the IP address of your network???s gateway (also known as router).

f. SSID:

The SSID is the wireless network name. This field lets you type in the network name (SSID) you want this Bridge to connect to. For instance, if the name (SSID) of the wireless network that you will be connecting to is ???belkin54g???, enter ???belkin54g??? in the SSID field. The default SSID of ???ANY??? will connect your Bridge to the closest network automatically. You can also click the Site Survey button to see available networks around you.

g. Mode

???Infrastructure - When this option is selected, the Bridge will attempt to connect to an available network (access point) in the area.

???Ad-Hoc (Computer-to-Computer) - When this option is selected, the Bridge will attempt to connect to an available computer or device in the area that???s also using (Ad-Hoc). Access points will be excluded from the list of available networks when this option is selected.

h. Channel:

If you chose to connect in Ad-Hoc mode, you will need to specify the channel number. All computers in the network need to use the same channel.

i. WEP Encryption:

From the Encryption drop-down menu, select ???none???, ???64-bit???, or ???128-bit??? according to your wireless network???s setting. Select ???none??? if you have not configured your wireless network to use encryption. All wireless devices on your network must share the same network key. There are two types of encryption to choose from: 64-bit and 128-bit. Using encryption will make your network more secure, but will slow down the network performance. Although network performance will be reduced, it is likely the change will not be detectable to users of the network.

j. Authentication Mode:

This setting allows the Bridge to authenticate communication with the wireless devices in your network. With ???Shared only??? mode, all wireless devices must have the same WEP keys so that all wireless devices can authenticate each other and start transmitting data.

The default ???Open + Shared??? setting will automatically detect whether a wireless device is set to ???Open??? or ???Shared Key??? and transmit data using the appropriate authentication type. You will need to select ???Shared only??? mode if your wireless network is also set to ???Shared only??? mode.

17

CONNECTING THE BRIDGE USING THE WEB-BASED INTERFACE

k. Key ID:

Select the network key (1-4) that will be used to authenticate.

l. Network Key:

Enter a network key only if you have encryption enabled in your wireless network. Type your WEP key in the Network Key box using passphrase or hex key format. All wireless devices on your network must share the same network key.

???Passphrase - For 64-bit encryption, your key lengths will be five characters (ASCII text). For 128-bit encryption, your key length will be 13

characters (ASCII text).

???Hex Key - For 64-bit encryption, your key lengths will be 10 hexadecimal characters. For 128-bit encryption, your key length will be 26 hexadecimal characters.

18

CONNECTING THE BRIDGE USING THE WEB-BASED INTERFACE

Site Survey

b

a

c

a. SSID:

The SSID is the wireless network name.

b. Refresh:

Clicking the Refresh button will give you the most up-to-date data.

c. Join:

You can connect to a specific wireless network by selecting the check box and click ???Apply Changes???.

Restart the Wireless Bridge

You can restart your Wireless Bridge without losing any of your configuration settings by clicking ???Restart Wireless Bridge???.

19

CONNECTING THE BRIDGE USING THE WEB-BASED INTERFACE

Restore Factory Default

Clicking ???Restore Defaults??? will erase all your current settings.

Save Current Settings

You can save your current configuration by using this feature. Saving your configuration will allow you to restore it later if your settings are lost or changed. It is recommended that you back up your current configuration before performing a firmware update.

Restore Previous Settings

This option will allow you to restore a previously saved configuration.

20

CONNECTING THE BRIDGE USING THE WEB-BASED INTERFACE

Firmware Update

From time to time, Belkin may release new versions of the Bridge???s firmware. Updates contain improvements and fixes to problems that may have existed.

a

b

a. Browse:

Clicking on ???Browse??? will open a window that allows you to select the location of the firmware update file. Firmware files can be obtained from our website at www.belkin.com/networking.

b. Upgrade:

Clicking on ???Upgrade??? will update your Bridge to the latest firmware.

21

CONNECTING THE BRIDGE USING THE WEB-BASED INTERFACE

Password

The Bridge ships with NO password entered. If you wish to add a password for greater security, you can set a password here. Write down your password and keep it in a safe place, as you will need it if you need to log into the Bridge in the future.

Login Timeout

The login timeout option allows you to set the period of time that you can be logged into the Bridge???s Web-Based Setup Interface. The timer starts when there has been no activity. For example, you have made some changes in the Web-Based Setup Interface, and then left your computer alone without clicking ???Logout???. Assuming the timeout is set to 10 minutes, then 10 minutes after you leave, the login session will expire. You will have to log in to the Bridge again to make any more changes. The login timeout option is for security purposes and the default is set to 10 minutes.

Note: Only one computer can be logged into the Bridge???s Web-Based Setup Interface at one time.

22

TROUBLESHOOTING

Cannot connect to the network.

If your Bridge appears to be functioning properly but you cannot connect to the network, the problem may be that there is a mismatch between the ???Network name (SSID)??? and ???Wireless network key (WEP)??? settings in your wireless network properties and the name and WEP key of the network you are trying to connect to. The network name and WEP key are case-sensitive. Verify that the spelling and case of these parameters are correct and that the settings are exactly the same on all computers on the network.

The computers do not appear in the ???My Computer??? window or in the ???My Network Places??? window.

Windows 2000

Verify that ???File and Printer Sharing??? is enabled on all the computers on your network. From the desktop, click the Start button, go to ???Settings???, and click ???Control Panel???. In Control Panel, double-click the ???Network and Dial-up Connections??? icon. In the ???Network and Dial-up Connections??? window, double-click the ???Local Area Connection??? icon. In the ???Local Area Connection Status??? box, click ???Properties???. In the ???Local Area Connection Properties??? box, verify that the ???File and Printer Sharing for Microsoft Networks??? check box is selected. If the check box is cleared, select it.

If the check box is not present, click ???Install???. In the ???Select Network Component Type??? box, select ???Service??? and click ???Add???. In the ???Select Network Service??? box, select ???File and Printer Sharing for Microsoft Networks??? and click ???OK???. Close the ???Local Area Connection Properties??? box. Close the ???Local Area Connection Status??? box. Close the ???Network and Dial-up Connections??? window.

Windows XP Environment

Verify that ???File and Printer Sharing??? is enabled on all the computers on your network. From the desktop, click the ???Start??? button and click ???Control Panel??? (if you are looking at Category View, click ???Switch to Classic View???). In Control Panel, double-click the ???Network Connections??? icon. In the ???LAN or High-Speed Internet??? area, right-click ???Wireless Network Connection??? and click ???Properties???. In the ???Wireless Network Connection Properties??? box, if the ???General??? tab is not on top, click the ???General??? tab.

23

TROUBLESHOOTING

In the ???This connection uses the following items??? list, verify that the ???File and Printer Sharing for Microsoft Networks??? check box is selected. If the check box is cleared, select it. If this item is not present, click ???Install???. In the ???Select Network Component Type??? box, select ???Service??? and click ???Add???. In the ???Select Network Service??? box, select ???File and Printer Sharing for Microsoft Networks??? and click ???OK???. Close the ???Wireless Network Connection Properties??? box. Close the ???Network Connections??? window.

Data transfer is sometimes very slow.

Microwave ovens and some cordless phones operate at the same radio frequency as the wireless network cards. When the microwave oven or cordless phone is in use, it interferes with the wireless network.

Therefore, keep computers with the Bridge at least 20 feet away from your microwave oven and any cordless telephone that operates at a frequency of 2.4GHz.

Data transfer is always very slow.

Some homes and most offices are steel-framed structures. The steel in such buildings may interfere with your network???s radio signals, thus causing a slowdown in the data transmission rate. Try moving your computers to different locations in the building to see if performance improves.

Computers are not communicating with the network.

If your network has an access point, check all cables and make sure the power LED on the front of the access point is on.

In Windows 2000, I get the following error message: ???Medium cable disconnected???. Also, there is a red X on my network icon in the system tray.

This indicates that your computer is not properly configured to connect to the network. Verify that all of the wireless network properties settings are correct. Also, make sure that your computer is receiving a good signal from the

access point.

24

TROUBLESHOOTING

Technical Support

You can find technical support information at www.belkin.com/networking or www.belkin.com through the tech support area. If you want to contact technical support by phone, please call 877-736-5771.

25

INFORMATION

FCC Statement

DECLARATION OF CONFORMITY WITH FCC RULES FOR

ELECTROMAGNETIC COMPATIBILITY

We, Belkin Corporation, of 501 West Walnut Street, Compton, CA 90220, declare under our sole responsibility that the product,

F5D7330

to which this declaration relates,

complies with Part 15 of the FCC Rules. Operation is subject to the following two conditions: (1) this device may not cause harmful interference, and (2) this device must accept any interference received, including interference that may cause undesired operation.

Caution: Exposure to Radio Frequency Radiation.

The radiated output power of this device is far below the FCC radio frequency exposure limits. Nevertheless, the device shall be used in such manner that the potential for human contact normal operation is minimized. When connecting an external antenna to the device, the antenna shall be placed in such a manner to minimize the potential for human contact during normal operation. In order to avoid the possibility of exceeding the FCC radio frequency exposure limits, human proximity to the antenna shall not be less than 20cm (8 inches) during normal operation.

Federal Communications Commission Notice

This equipment has been tested and found to comply with the limits for a Class B digital device, pursuant to Part 15 of the FCC Rules. These limits are designed to provide reasonable protection against harmful interference in a residential installation.

This equipment generates, uses, and can radiate radio frequency energy. If not installed and used in accordance with the instructions, it may cause harmful interference to radio or television reception, which can be determined by turning the equipment off and on, the user is encouraged to try and correct the interference by one or more of the following measures:

???Reorient or relocate the receiving antenna.

???Increase the distance between the equipment and the receiver.

???Connect the equipment to an outlet on a circuit different from that to which the receiver is connected.

???Consult the dealer or an experienced radio/TV technician for help.

Modifications

The FCC requires the user to be notified that any changes or modifications to this device that are not expressly approved by Belkin Corporation may void the users authority to operate

the equipment.

26

INFORMATION

Canada-Industry Canada (IC)

The wireless radio of this device complies with RSS 139 & RSS 210 Industry Canada. This Class B digital complies with Canadian ICES-003.

Cet appareil num??rique de la classe B conforme ?? la norme NMB-003 du Canada.

Europe-European Union Notice

Radio products with the CE 0682 or CE alert marking comply

with the R&TTE Directive (1995/5/EC) issued by the Commission of the European Community.

Compliance with this directive implies conformity to the following European Norms (in brackets are the equivalent international standards).

???EN 60950 (IEC60950) ??? Product Safety

???EN 300 328 Technical requirement for radio equipment

???ETS 300 826 General EMC requirements for radio equipment.

To determine the type of transmitter, check the identification label on your Belkin product.

Products with the CE marking comply with the EMC Directive (89/336/EEC) and the Low Voltage Directive (72/23/EEC) issued by the Commission of the European Community. Compliance with these directives implies conformity to the following European Norms (in brackets are the equivalent international standards).

???EN 55022 (CISPR 22) ??? Electromagnetic Interference

???EN 55024 (IEC61000-4-2,3,4,5,6,8,11)- Electromagnetic Immunity

???EN 61000-3-2 (IEC610000-3-2) - Power Line Harmonics

???EN 61000-3-3 (IEC610000) ??? Power Line Flicker

???EN 60950 (IEC60950) ??? Product Safety

Products that contain the radio transmitter are labeled with CE 0682 or CE alert marking and may also carry the CE logo.

27

INFORMATION

Belkin Corporation Limited Lifetime Product Warranty

Belkin Corporation warrants this product against defects in materials and workmanship for its lifetime. If a defect is discovered, Belkin will, at its option, repair or replace the product at

no charge provided it is returned during the warranty period, with transportation charges prepaid, to the authorized Belkin dealer from whom you purchased the product. Proof of purchase may

be required.

This warranty does not apply if the product has been damaged by accident, abuse, misuse, or misapplication; if the product has been modified without the written permission of Belkin; or if any Belkin serial number has been removed or defaced.

THE WARRANTY AND REMEDIES SET FORTH ABOVE ARE EXCLUSIVE IN LIEU OF ALL OTHERS,

WHETHER ORAL OR WRITTEN, EXPRESSED OR IMPLIED. BELKIN SPECIFICALLY DISCLAIMS ANY AND

ALL IMPLIED WARRANTIES, INCLUDING, WITHOUT LIMITATION, WARRANTIES OF MERCHANTABILITY

AND FITNESS FOR A PARTICULAR PURPOSE.

No Belkin dealer, agent, or employee is authorized to make any modification, extension, or addition to this warranty.

BELKIN IS NOT RESPONSIBLE FOR SPECIAL, INCIDENTAL, OR CONSEQUENTIAL DAMAGES RESULTING

FROM ANY BREACH OF WARRANTY, OR UNDER ANY OTHER LEGAL THEORY, INCLUDING BUT NOT

LIMITED TO, LOST PROFITS, DOWNTIME, GOODWILL, DAMAGE TO OR REPROGRAMMING OR

REPRODUCING ANY PROGRAM OR DATA STORED IN, OR USED WITH, BELKIN PRODUCTS.

Some states do not allow the exclusion or limitation of incidental or consequential damages or exclusions of implied warranties, so the above limitations of exclusions may not apply to you. This warranty gives you specific legal rights, and you may also have other rights that vary from state to state.

28