??
3
Models 3830, 3834, 3838, 3831, 3835 and 3839
FEATURES
These Attwood Stainless Steel Vertical Sidelights provide 2 Nautical Mile visibility and are designed for boats up to 20 meters/65.6 feet. The housing is
Lights meet USCG CFR 183.810, ABYC
REQUIRED FOR INSTALLATION
???Phillips screwdriver
???Cordless drill; 7/64" (#32 drill) and 3/8" (3 and 10mm) bits
???Three #6 pan head stainless steel tapping screws (not included)
???
???
INSTALLATION LOCATION
Before drilling mounting holes, position sidelights on a surface of the gunwale or deck where you are certain that sidelights:
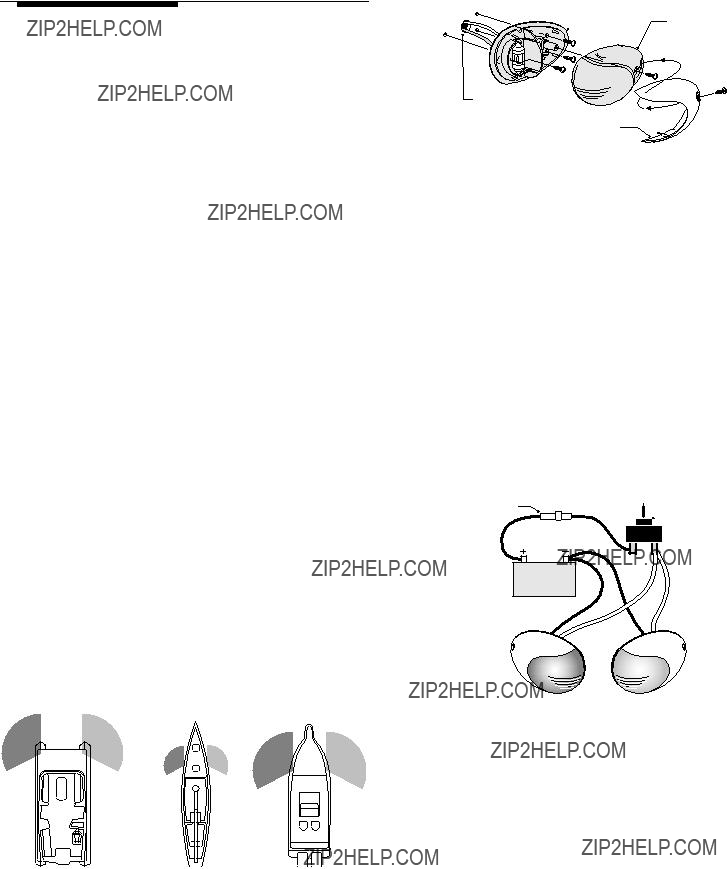
???Are equal distance from the bow (Figure 1)
???Shine straight ahead
???Shine within 5?? of horizontal when the boat is floating
???The light beam is not obstructed
Place lights with the red lens on the port (left) and green lens on the starboard (right). Be sure there are no obstructions at the front or side within the light???s arc of visibility (112.5 degrees each side).
Figure 1
INSTALLATION
1.To access light base mounting holes, remove exterior screw and stainless steel or plastic lens helmet. (Figure 2)
2.Remove lens screw and colored lens. Save screws, helmet, and lens for reinstallation.
3.Place light in position as shown in Figure 1.
4.Hold base with ???FRONT??? arrow pointing forward.
Important: Before drilling, be sure that light will shine straight ahead and within 5?? of horizontal when boat is floating.
Figure 2
 Base Lens
3/8" (10mm) dia. Hole
Helmet
5.Use base as a template to mark location of three mounting holes and a center hole for wire access.
CAUTION
Position wire access hole carefully, especially on aluminum boats, so that wires do not contact the hull.
6.Drill 3/8" (10mm) diameter hole for wire access and three 7/64" (3mm) diameter holes for mounting screws. (Figure 2).
7.Bring one
8.Connect wires using waterproof crimp connectors.
9.Fasten light to deck with three #6 stainless steel screws. DO NOT OVERTIGHTEN screws.
10.Replace lens over base. Replace lens screw.
11.Replace helmet over lens. Replace helmet screw.
FINAL WIRING INSTRUCTIONS
Use ONLY the rated voltage (see chart above). All positive wires must be protected by a
Figure 3
Fuse

(pos) (neg)

 (pos)
(pos)
1.Neatly thread wires to the switch, avoiding areas where abrasion or snagging may occur.
2.Use switch (Attwood #14386 or equivalent) that allows
MAINTENANCE
To replace lamp: Remove the helmet and lens (Figure 2). Use small slotted screwdriver to pry old lamp out of terminals. Replace with the proper
ATTWOOD LIMITED WARRANTY
This product carries the standard Attwood
??2003 Attwood Corporation
1016 N. Monroe Street, Lowell, MI