About ???User???s Manual ??? Operating Guide???
The ???User???s Manual - Operating Guide??? of this projector is written into the CD-ROM. Before using, please read the following and use the CD-ROM correctly.
 CAUTION ??? Only use the CD-ROM in a computer CD drive. The CD-ROM is designed for PC use only. NEVER INSERT THE CD-ROM INTO A NON-COMPUTER CD PLAYER! Inserting the CD-ROM into an incompatible CD drive may produce a loud noise, which in turn MAY RESULT IN EAR AND SPEAKER DAMAGE!
??? After using CD-ROM, please put it into CD case and keep it. Please keep the CD neither in direct sunlight nor in a high temperature and high humidity environment.
NOTE
???The information in the CD-ROM is subject to change without notice.
???No responsibility is taken for any obstacle and defect to hardware and software of your PC as a result of the use of the CD.-ROM.
???All or Any part of the information in the CD-ROM must not be copied, reproduced or republished without notice to our company.
TRADEMARK ACKNOWLEDGEMENT
???Windows?? is a registered trademark of Microsoft Corporation.
???Macintosh, Power Macintosh and Mac OS are registered trademarks of Apple Computer, Inc.
???Pentium is a registered trademark of Intel Corporation.
???Adobe and Acrobat are registered trademarks of Adobe Systems Incorporated.
All other trademarks are the property of their respective owners.
 System requirements
The system for using the CD-ROM requires the following.
 Use the attached CD-ROM
1. Insert CD into PC???s CD-ROM drive.
Windows??:In a while, Web browser automatically starts. Start up window comes up.
Macintosh??:(1) Double-click on the ???Hitachi Projectors??? icon appeared on the desktop screen.
(2) When ???main.html??? file is clicked, Web browser will start and Initial window will appear.
2. Acrobat??Reader?? is required to open the manual on the CD-ROM. If it is not on your PC, please download the Acrobat?? Reader?? 5.1 from Adobe Web site. Click the "Get
Acrobat Reader" button on the screen to access there.
Windows??: CD-ROM includes installer of Acrobat Reader 5.1 English version. Clicking "for Windows" on the screen starts installer program.
3. Click the model name of your projector first, and then click language you want from the displayed list. The operating guide will open.
 WARNING ???Before using this product, please read the "User's Manual - Safety Guide" and related manuals to ensure the proper use of this product. After reading them, store them in a safe place for future reference.


 the remote control


 WARNING
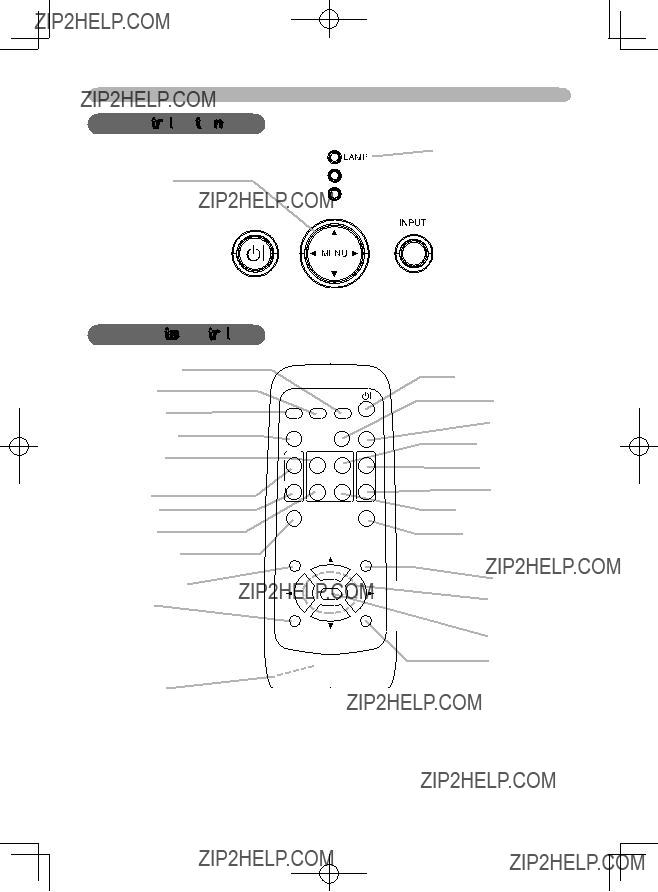
 buttons


 TEMP indicator

 POWER indicator
 INPUT button


 Filter cover
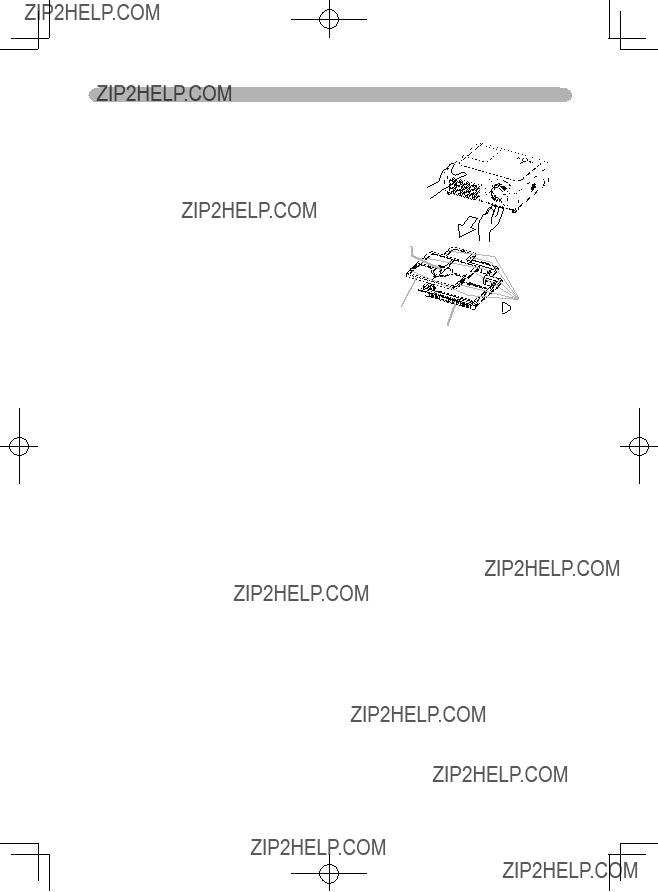
 locations. Make sure there is no dust or dirt remaining after the cover is in place. If any dust or dirt remains use a vacuum cleaner to remove it as when placing the ???lter cover on the air ???lter.